Installing SQL Server
Check out this tutorial guiding you through the installation of Microsoft SQL Server on your machine.
This article will guide you through the installation of Microsoft SQL Server.
Note
i4connected 5.6 is compatible with Microsoft SQL Server 2017 and higher versions.
Important
New windows account with Administrator rights for the i4connected server needs to be created on the machine, that exists on both systems. This account must have Administrator rights to the Analysis Database which will be created in the i4connected part of this document.
It is mandatory to perform these operations because the i4connected service must connect to the Analysis Server and the Cube, which only accepts Windows authentication. Within the current documentation tutorials, the user will be named "ServiceUser" but you can choose another name.
The Microsoft SQL Server will be installed with several customizations, including specific features, database engine, and analysis services configuration.
Important
The Microsoft SQL Server installation media needs to be the ENGLISH language disc image, otherwise i4connected will have issues storing data in the measurements table.
The following solution will focus on the non-standard steps of the SQL Server installation:
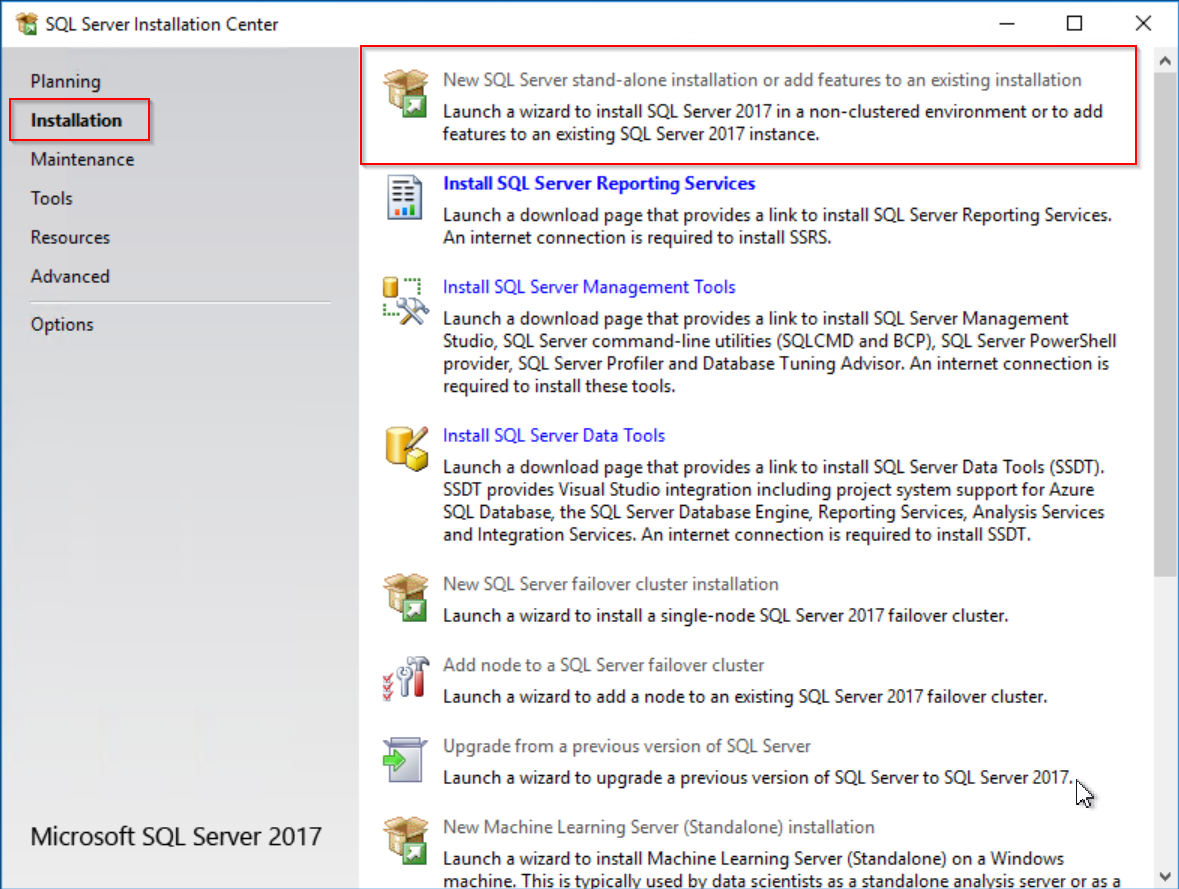
Run the Setup application from the SQL Server installation disc.
In the SQL Server Installation Center, click on the Installation option from the left-side panel. Select New SQL Server stand-alone installation or add features to an existing installation from the Installation page.
Read and accept the License Terms and select Next to proceed.
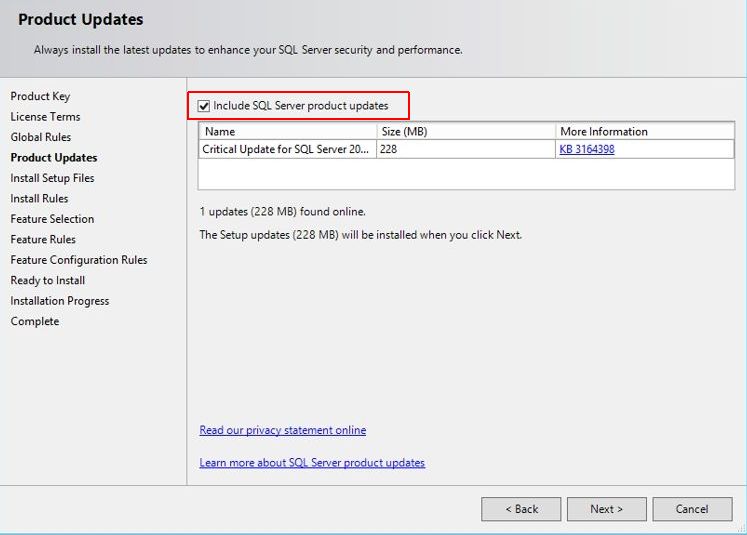
At the Product Updates page make sure that the Include SQL Server product updates option is checked and proceed by clicking Next.
At the Instance Configuration page select the Default instance and click the button Next to continue.
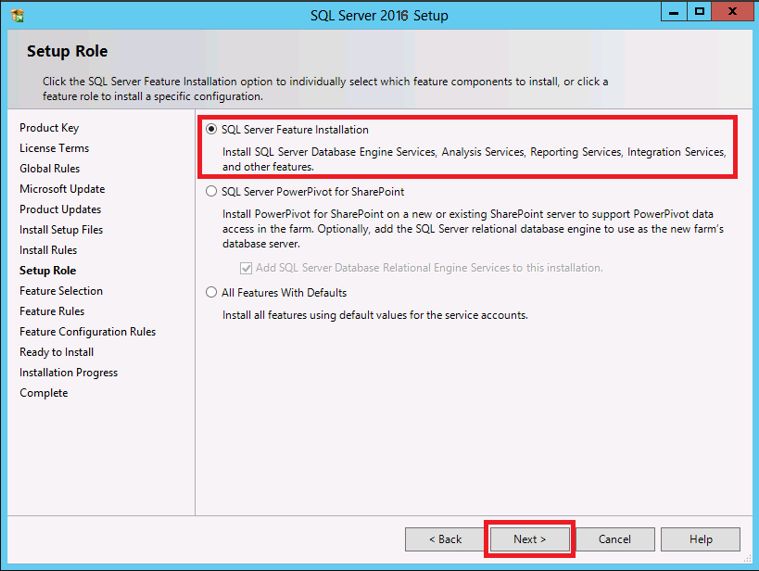
At the Setup Role page, make sure that SQL Server Feature Installation is selected and click Next to proceed.
On the Feature Selection page the following features are to be installed:
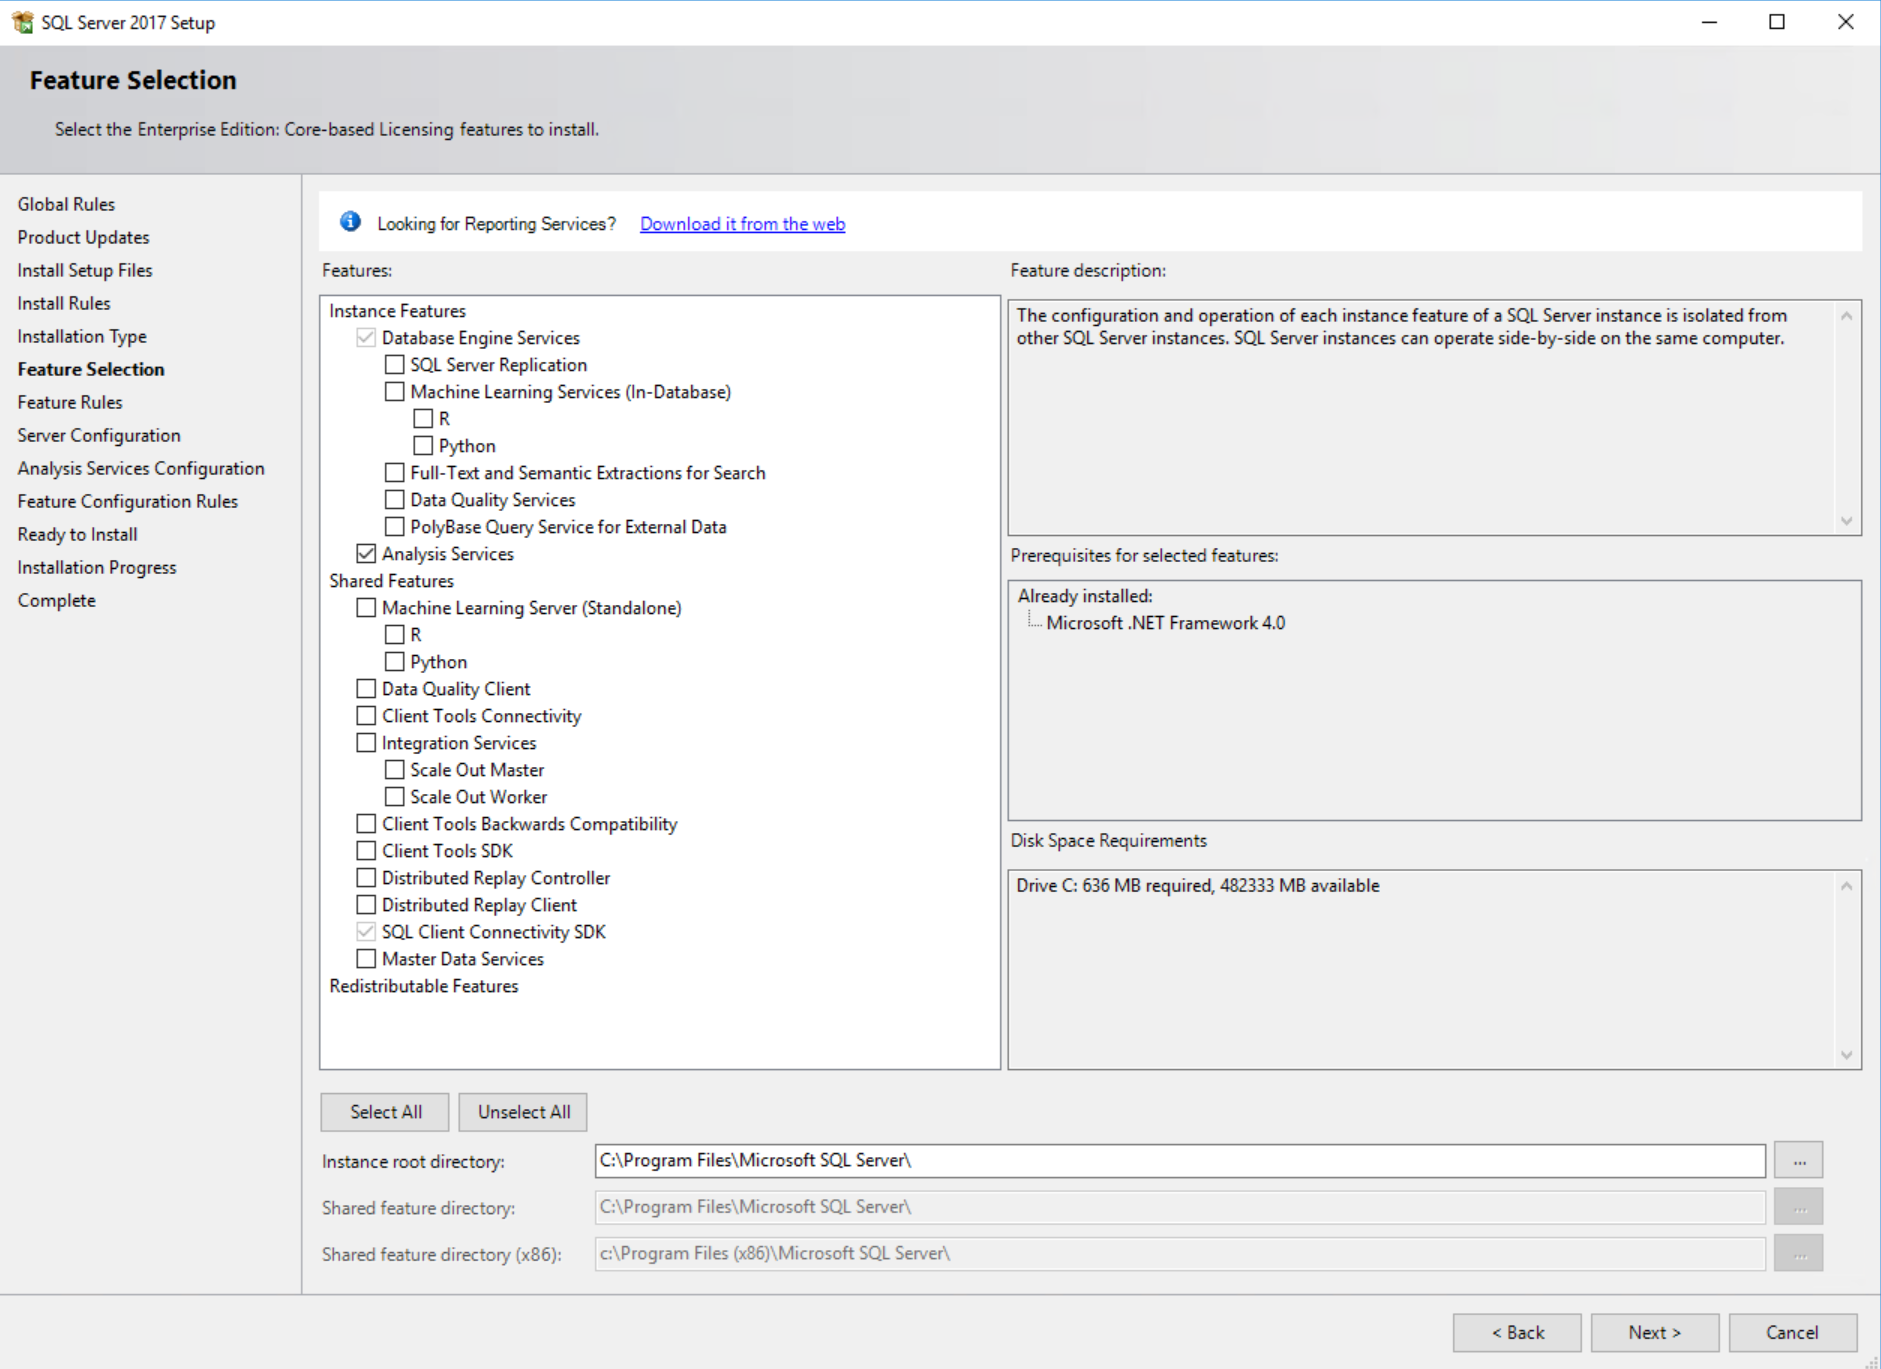
Standard Features
Database Engine Services
Analysis Services
Note
In order to use the i4connected reporting feature, the Microsoft SQL Server Reporting Services (SSRS) needs to be downloaded and installed separately from Microsoft since it’s no longer a feature listed in the SQL installation.
Note
The Microsoft SQL Management Studio needs to be downloaded and installed on a server that is connected to the Database Server. This software will be needed for the upcoming i4connected installation and configuration steps.
Review the Disk Space Requirements and click the Next button to continue.
At the Server Configuration page, click Next to continue.
The Database Engine Configuration page allows you to set up the authentication mode and SQL Server administrators. The settings are complete by default, but you can make a custom configuration if required. For the present tutorial, we defined the following settings:
Select the Mixed Mode Authentication Mode.
Enter the System Administrator Password.
Note
By default, the Password of the system administrator is "sa". You can customize the password, considering that it will be used further in configuring the i4connected portal.
SQL Server expects a strong password: must be at least 8 characters long and it should contain characters from the four primary categories, including uppercase letters, lowercase letters, numbers, and characters.
Click the Add button and add the Administrators group to the SQL Server Administrators and the needed Users.
Tip
If possible, you can also add the previously mentioned ServiceUser Windows account to this group.
Click Next to proceed.
At the Setup Role page, make sure that SQL Server Feature Installation is selected and click Next to proceed.
In Analysis Service Configuration the following settings should be defined:
Make sure that the Server Mode is set to option Multidimensional and Data Mining Mode.
Click the Add button and the Administrators group as Administrators for Analysis Services and the user NT Service/SQLSERVERAGENT using the same method as done a step 10c.
Tip
If possible, you can also add the previously mentioned ServiceUser Windows account to this group.
Click Next to proceed.
At the Error Reporting page click Next to proceed.
At the Installation Configuration Rules make sure that no errors are reported. If errors have occurred, fix them in order to proceed. Click Next to continue.
Review the installation summary and click Install to start the SQL Server installation.