Activating Windows Roles and Features
Prepare your operating system for the Ewon by HMS Networks i4scada setup installation. Check out these easy steps accompanied by screenshots required to activate the needed Roles and Features.
These tutorials describe the Roles and Features needed for the i4scada application.
Activating Windows 10 Roles and Features
To activate Windows roles and features, required for optimal results when working with i4scada, please organize the steps below:
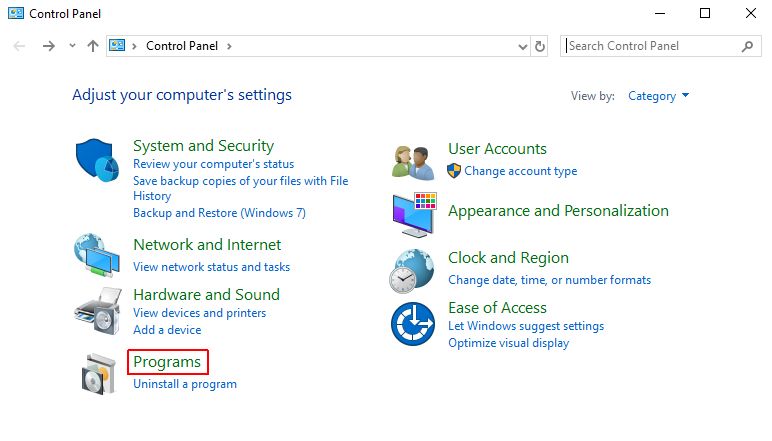
Open the Control Panel and click on the Programs option.
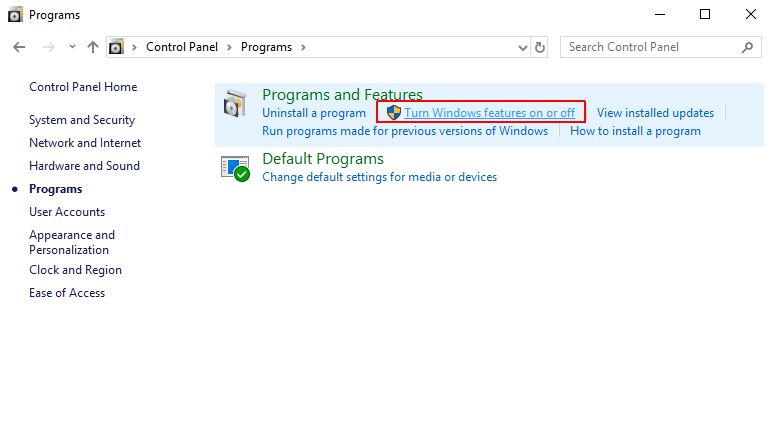
Select the Turn Windows features on or off option.
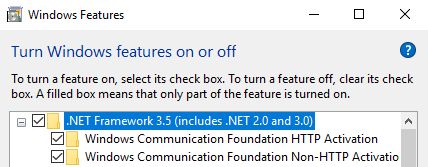
The Windows Features window is opened. It might take a while until all features are loaded and listed.
Make sure that all .NET Framework 3.5 nodes and sub-nodes are checked.
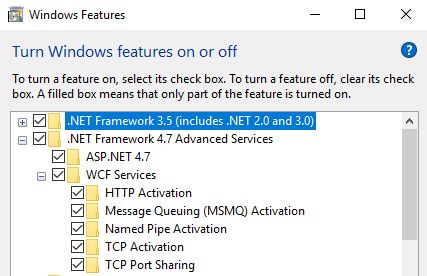
Make sure that all .NET Framework 4.7 nodes and sub-nodes are checked.
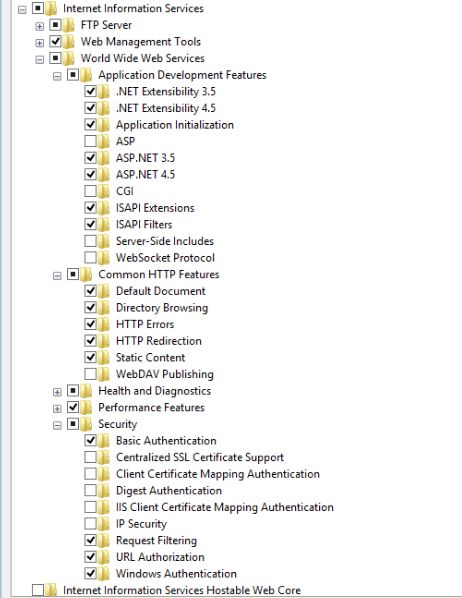
Make sure that the Internet Information Services nodes and sub-nodes are checked, as visible in the below screenshot.
To preserve the changes made click the button OK. It might be necessary that you restart your computer.
Activating Windows Server 2016 Roles and Features
In order to ensure that your operating system is compatible and ready to use the i4scada application, the following Features need to be added to Windows Server 2016:
Open the Server Manager 2016, as Administrator.
By default, the Server Manager Dashboard is displayed.
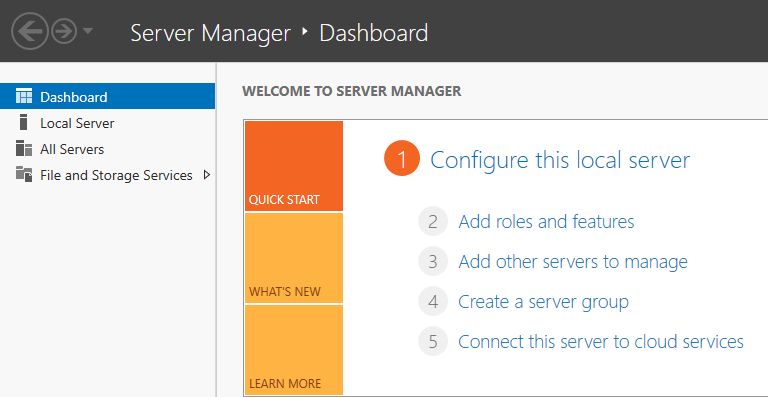
Select Add roles and features.
The Add Roles and Features Wizard are displayed. Follow the wizard until reaching the Features section.
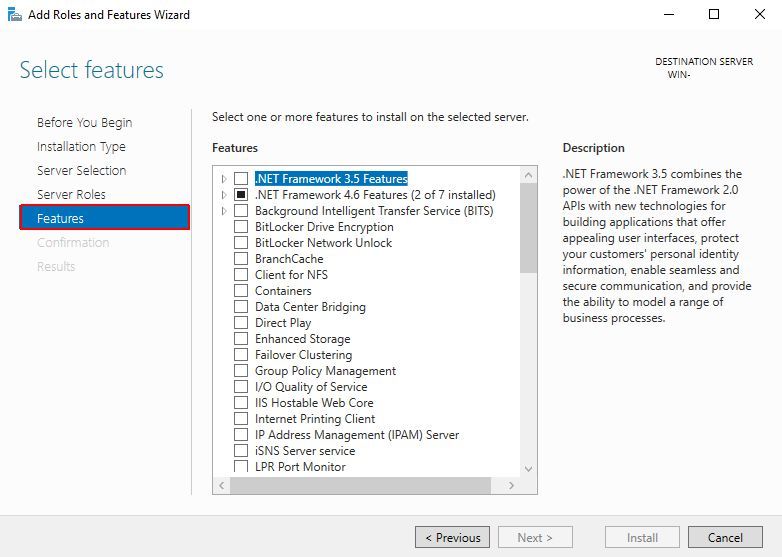
Expand the first Features node: .NET Framework 3.5 Features. Mark the .NET Framework 3.5 check-box and all sub-nodes.
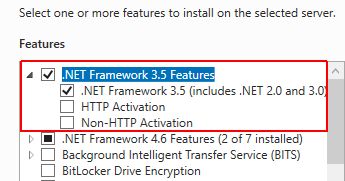
It may be the case that sub-nodes, such as HTTP Activation require further feature activation. In this case, an Add Roles and Features Wizard dialog pops up displaying those features:
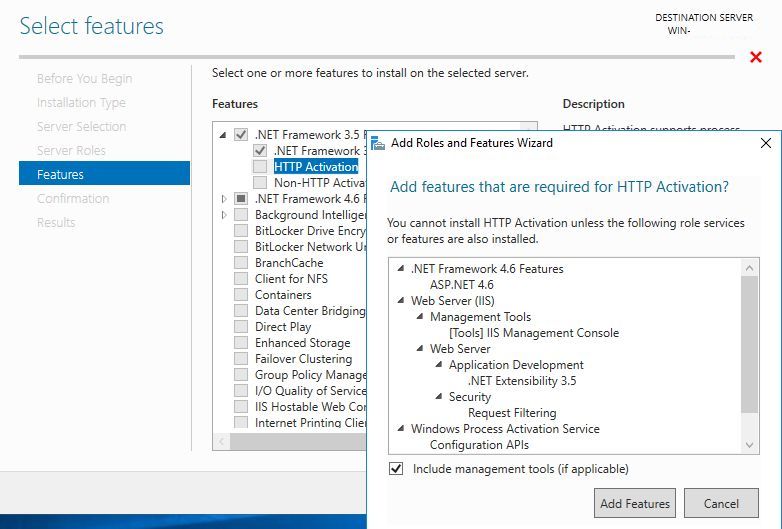
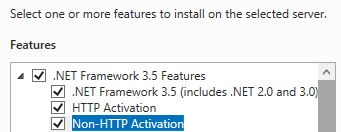
Click the Add Features button. You will recognize that the HTTP Activation feature is now set.
Continue with setting the Non-HTTP Activation feature.
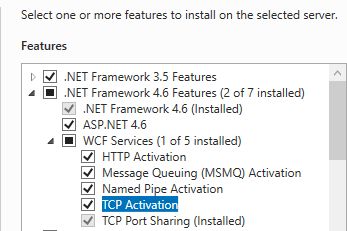
Proceed with the .NET Framework 4.6 Features, the same as with the 3.5 ones. Make sure all the features are set. In case some of the nodes require activation of further features, proceed as described in steps 6 and 7.
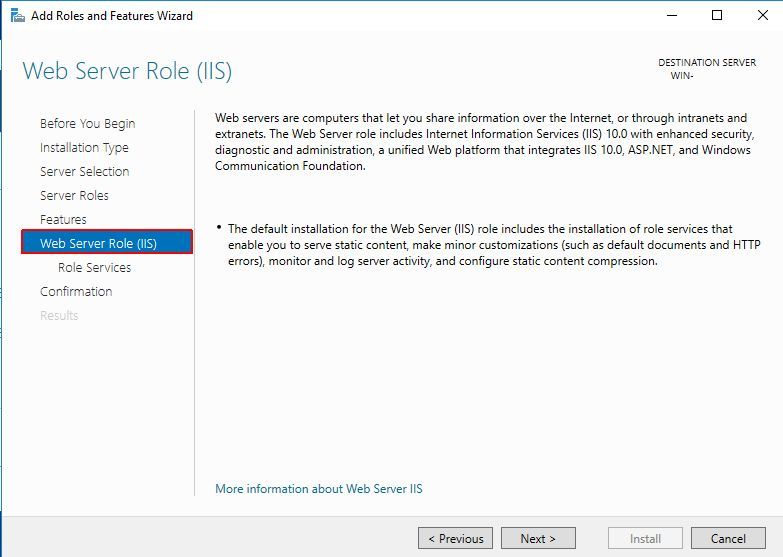
Click Next in the Add Features and Roles Wizard until reaching the Web Server Role (IIS) section.
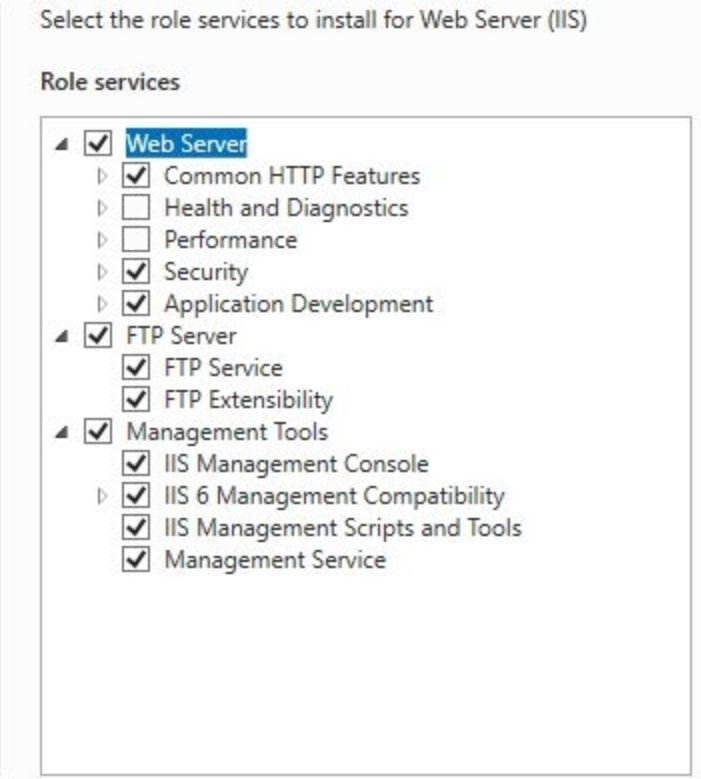
Clicking Next will lead you to the Role Services sub-section.
Make sure that Role Services nodes and sub-nodes are checked and click Next.
Note
Following Web Server Role Services should be selected at a minimum:
Common HTTP Features
Default Document
Default Browsing
HTTP Errors
Static Content
Security
Request Filtering
Windows Authentication
Application Development
.NET Extensibility 3.5 (if .NET Framework 3.5 is installed)
.NET Extensibility 4.5
ASP.NET 3.5 (if .NET Framework 3.5 is installed)
ASP.NET 4.5
ISAPI Extensions
ISAPI Filters
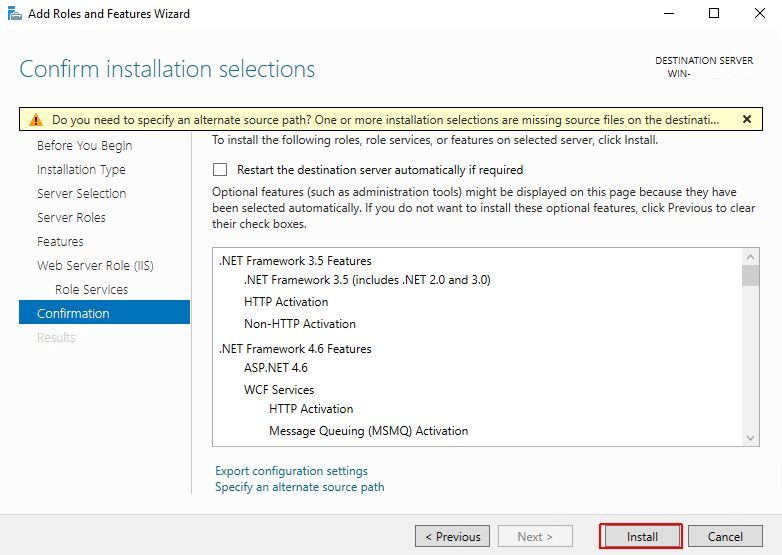
In the Confirmation section, a warning is displayed: "Do you need to specify an alternate source path?". If the target computer does not have access to Windows Update, click the Specify an alternate source path link to specify the path to the \sources\sxs folder on the installation media and then click OK."
After you have specified the alternate source, or if the target computer has access to Windows Update, click the X next to the warning, and then click Install.
The Results section is opened. The progress of the processing tasks is displayed in a bar.
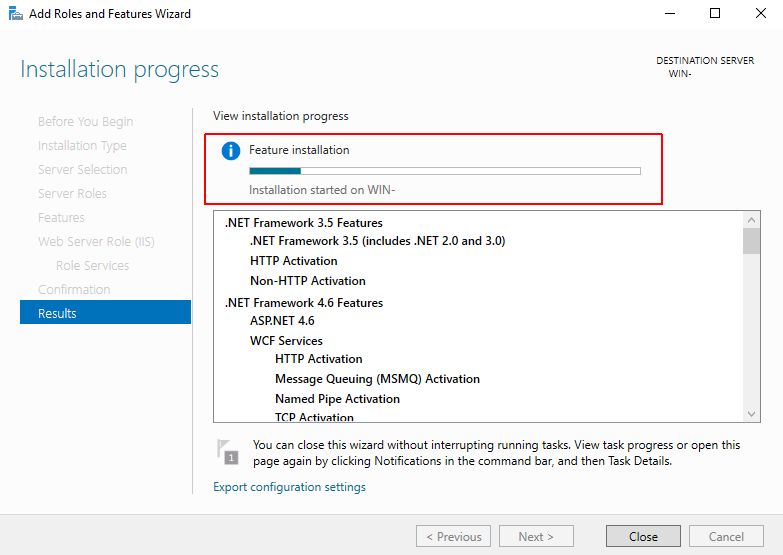
Once progress is finished, click Close. It might be necessary that you restart your computer.