i4scada Beckhoff ADS Connector Tutorials
Check out these tutorials and start setting up your i4scada Studio Beckhoff ADS Connector. All the details you need to know in order to do these steps by yourself.
These articles will guide the user through the steps needed to define a Beckhoff ADS Connector and explain how to setup it up in order to receive data.
Filtering i4scada items using the Beckhoff PLC software
Check out this article and learn how to filter items using the i4scada Beckhoff PLC software.
In order to be able to filter Beckhoff PLC items when importing them in i4scada Studio, a special comment must be added in the Beckhoff PLC software, next to each desired item.
In the following example, the process of commenting code in Beckhoff PLC software and importing filtered items in i4scada Studio, will be described in a step-by-step manner. The Beckhoff PLC software used in this guide is TwinCAT PLC Control.
Note
For demonstration purposes, we will assume that we have a list of 10 variables in the PLC program, and we need to automatically filter 5 variables to be imported in i4scada Studio, (using the Import configuration (i4scada symbols only)).
In the TwinCAT PLC Control software (or any other Beckhoff PLC software), open the desired PLC program.
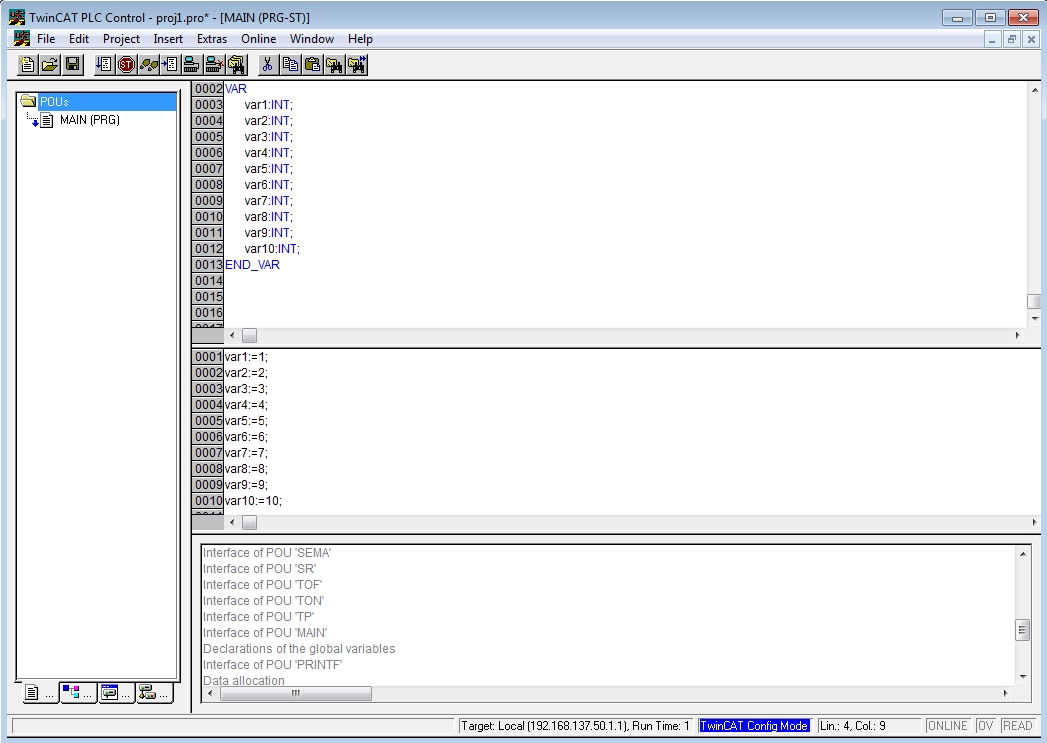
The example PLC program in TwinCAT PLC Control
The demo program contains 10 variables. The first 5, represent signals that we don't need in i4scada Studio. The last 5 variables, need to be imported in the i4scada Studio Beckhoff connector configuration, and from there, in i4scada Studio,Beckhoff connector as i4scada signals. In order to achieve automatic filtering, at import, a special comment needs to be placed inline with the variable to be imported. The next step describes the procedure.
Place the (*~ (WEBfactory : 1 : enabled for WF ) *) comment next to the variables that need to be imported in WEBfactoryStudio (as .tpy configuration).
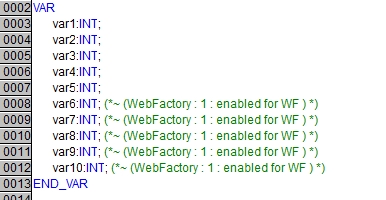
The items with comments will be filtered in, by i4scada Studio
The variables can also be imported with custom name and custom description. This will require additional parameters in the comment syntax:
(*~ (  : 1 : enabled for WF
Name = Example_signal_name
Description = Description of the Signal_name)*)
The same PLC program code with custom names and comments will look like this:
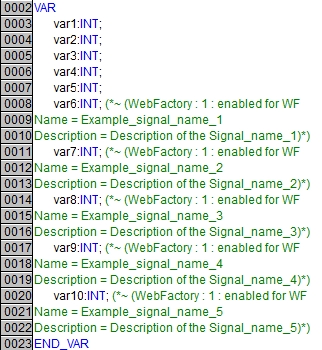
The comments containing custom signal name and description
The custom name will be available in i4scada Studio as Signal name and the custom description as Signal description.
From the menu bar, select Project and click on Build (or press Ctrl+F8). The program will be built and the necessary files can be located in the program's folder. Locate the .tpy file in the build folder.
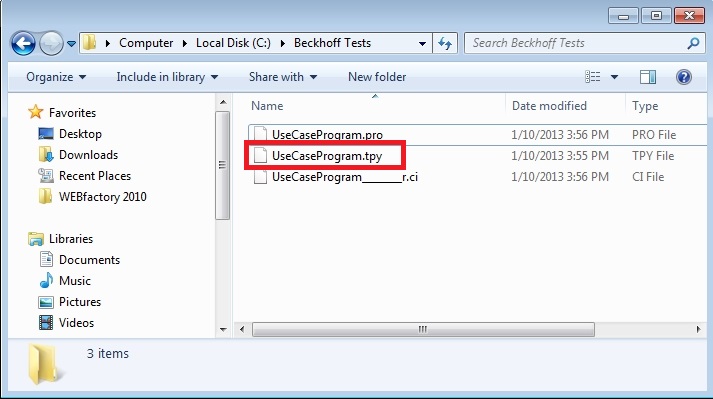
The .tpy file is needed for importing Beckhoff items in i4scada Studio
In i4scada Studio select the WEBfactory.Beckhoff.Ads.Connector and open the Connector Configuration panel. Select the Beckhoff device to import the configuration, or to create a new device, by clicking the New button.
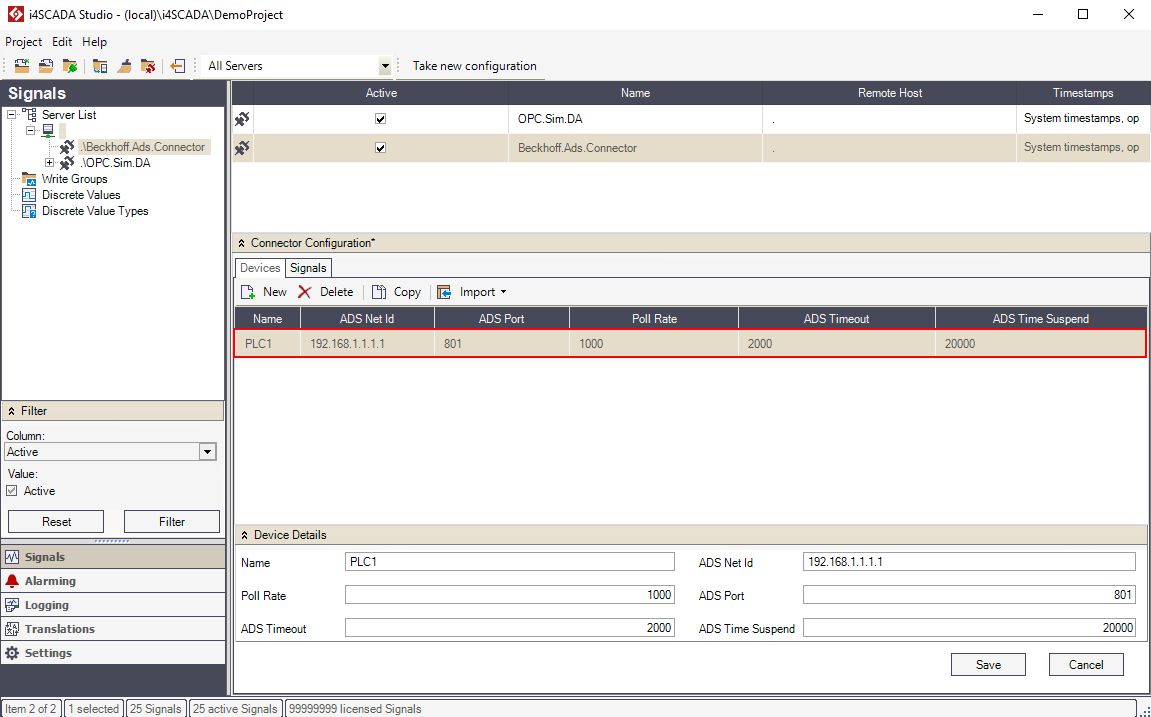
The Beckhoff device to which the items will be imported to
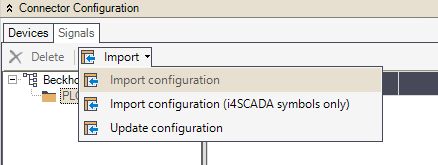
With the desired Beckhoff device selected, click on the Import drop-down menu and select the Import configuration (i4scada symbols only) option.
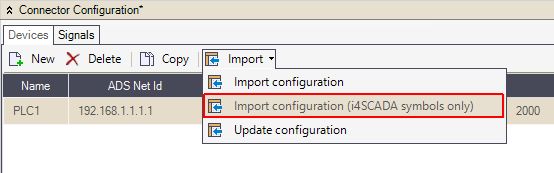
The Import configuration option
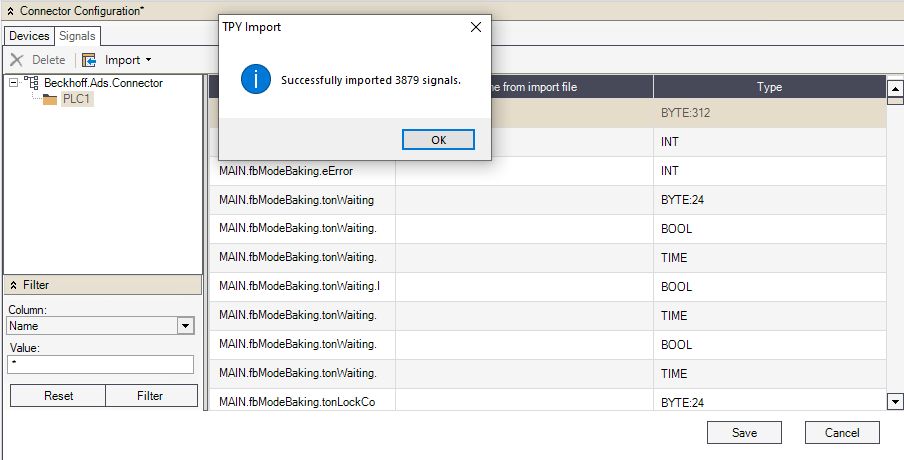
Select the .tpy file from the Beckhoff PLC program build folder and click the Open button. The i4scada Studio will display a dialog confirming the import of the 5 signals from the configuration.
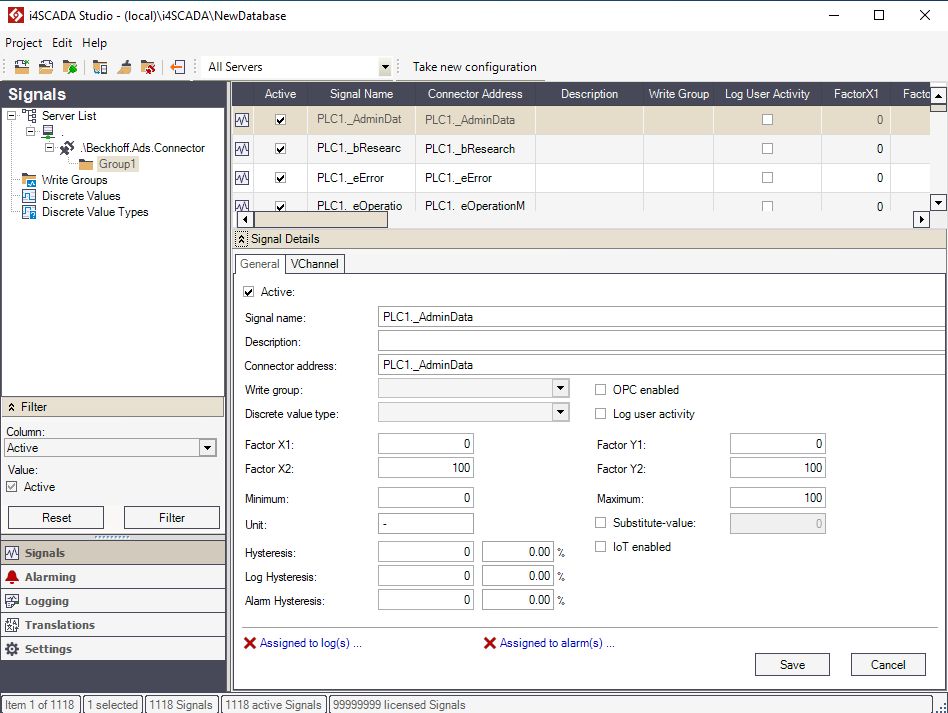
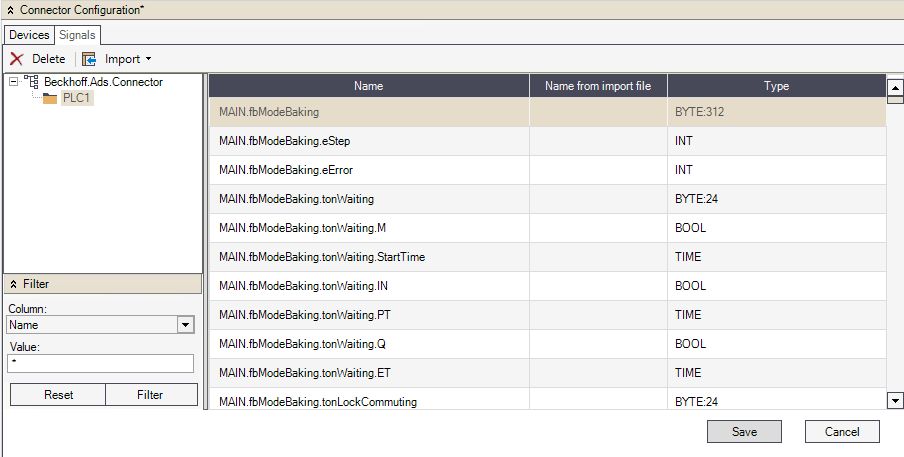
The signals are now available in the Signals tab of the Connector Configuration panel. The connector can now be browsed and the signals used in i4scada Studio.
If custom names and descriptions are available for the imported items, the signals resulting from the imported items will have the custom name displayed as Alias and the custom description as Description.
Installing the Beckhoff ADS Connector
Check out this tutorial and learn how to setup and use the Beckhoff ADS Connector on a local 64 bit system, by following these easy steps.
To setup and use the Beckhoff ADS Connector on a local 64 bit system, the following steps must be executed:
Install TwinCAT Engineering Station, x64 version on the machine where the Beckhoff ADS Connector will run (where i4scada is installed).
Note
The TwinCAT Engeneering Station, versions 2.11.x or 3.1.x for x64 needs to be installed on the same machine running the i4scada 2010 and Beckhoff ADS Connector. If the software is uninstalled from that machine or installed on a different one, the functionality of the Beckhoff ADS Connector will be limited.
After installation, navigate to C:\TwinCAT\ADS API\TcAdsDll\ and copy the following dll files:
AdsDll.dll
TcAdsDll.dll
Paste the dll files in C:\Program Files (x86)\i4scada\Server\Connectors\Beckhoff ADS.
Configuring the Beckhoff ADS Connector in i4scada Studio
Check out this easy guide and start setting up your i4scada Beckhoff ADS Connector on your Studio Database.
To configure a Beckhoff ADS Connector to your i4scada Studio Database, please follow the below described steps:
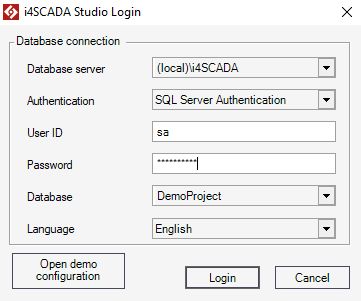
Open the i4scada Studio application.
The login dialog is opened. Fill in your credentials (if you are a new user and made no changes during i4scada installation, the default user name is "sa" and the password is "webfactory".
Select the [New Database] option from the Database drop-down list.
The New Database dialog is opened allowing the user to fill in the Database name.
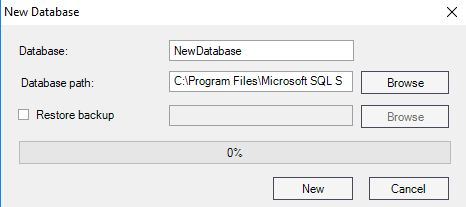
Press the button New to start generating the new Database.
Once the Database is prepared, press the Login button.
The i4scada Studio is opened. An information window pops up asking the user to confirm if the new database should be set as Default or not.
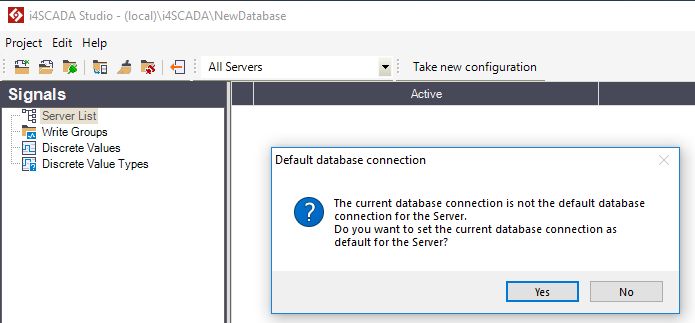
For the current use case, we shall set the New database as default, hence the button Yes should be selected.
Under the Signals section click right on the Server List node.
The Server contextual dialog is displayed. Select the option New Server.
A new Server node is added, under Server List. We shall name the new Server ".", as for the current use case the Server runs on the same machine as the i4scada Studio.
Select the Server node and click-right. Select the option New Connector / Beckhoff ADS Connector from the contextual menu.
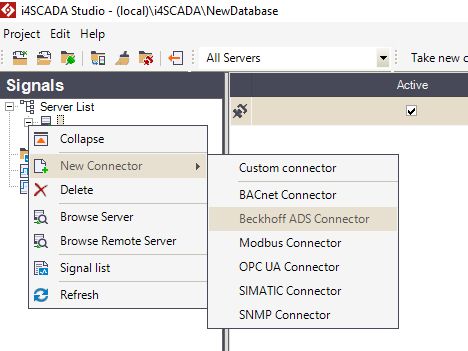
The Beckhoff ADS Connector node is added to the hierarchical view.
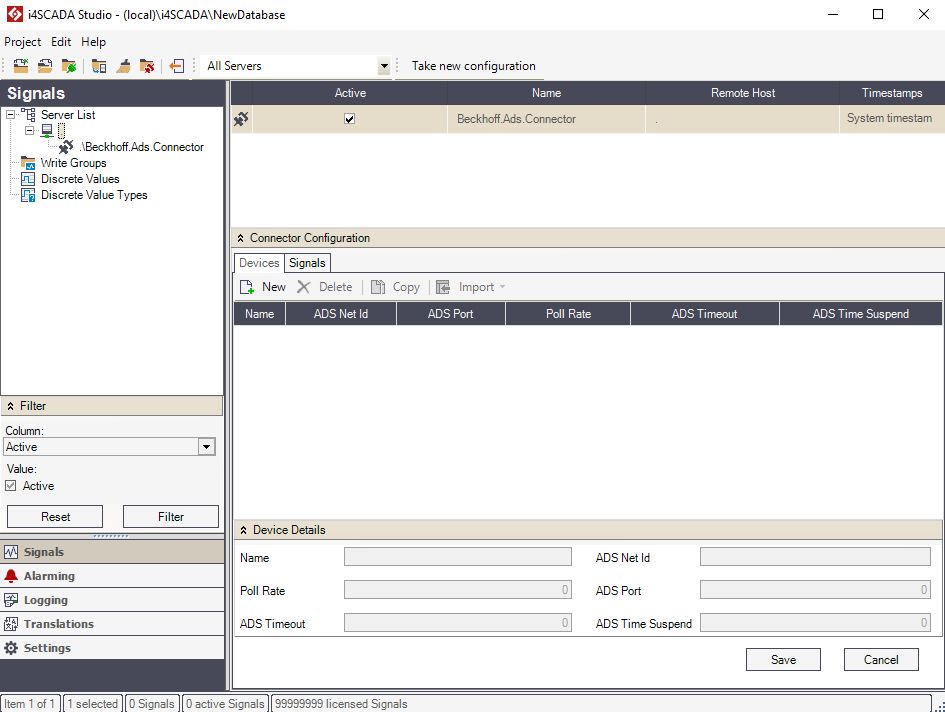
Further configuration steps, will be organized in the Connector Configuration panel.
Under the Devices tab, click the toolbar button New.
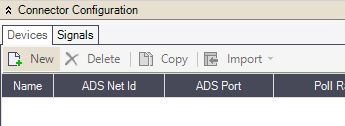
The new Device will be added to the Devices grid view. Here you can organize the settings of your Beckhoff ADS Device.
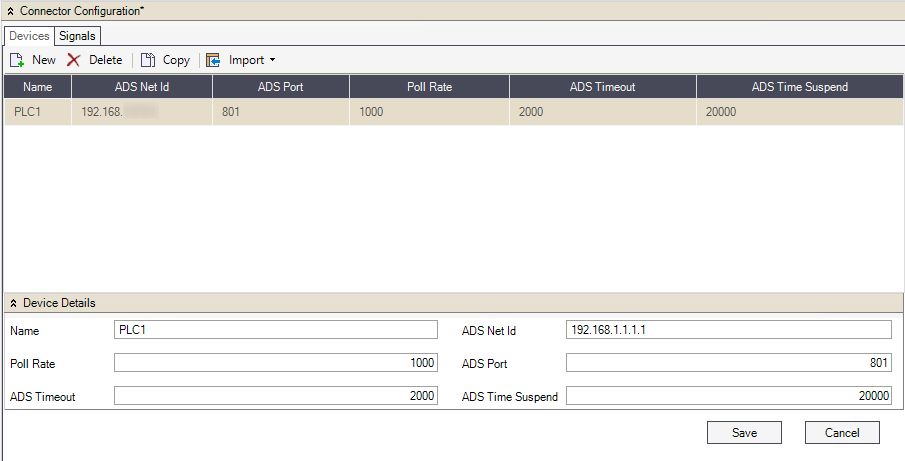
Click Save to save the current changes.
Switch to the Signals tab and select the previously added Device. The Import toolbar button will become active.
Select the desired import method and upload the Signals *.tpy file. All the Signals in the uploaded file will be added to your Device and the list will be populated with the uploaded Signals.
Click the Save button in order to preserve changes.
Setting up a Signal for the Beckhoff ADS Connector
In order to create a new signal in the Beckhoff ADS Connector, we need to create first a new signal group in our connector. Check out this tutorial to learn more.
Now the Beckhoff ADS Connector is configured and connected to the Beckhoff ADS Device, we need to create a signal group in our connector. Proceed as follows:
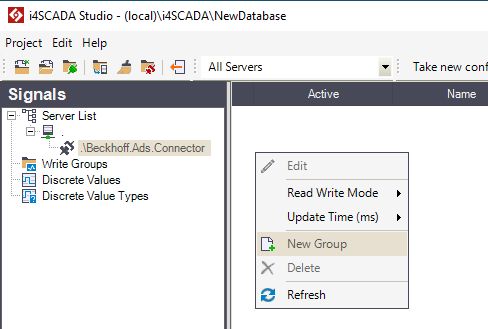
Select the connector from the Signals tab / Server List / Server and right click in the empty pane from the right side. Select New Group.
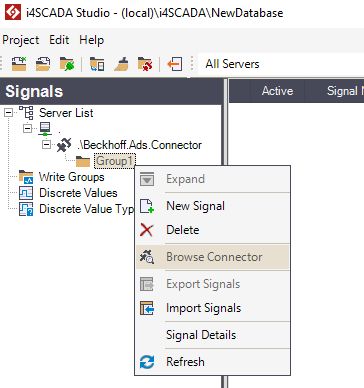
Now select the new group Group1 from the Signal tab / Server List / Server i4scada Beckhoff ADS Connector and right click on it. Select the Browse Signal option.
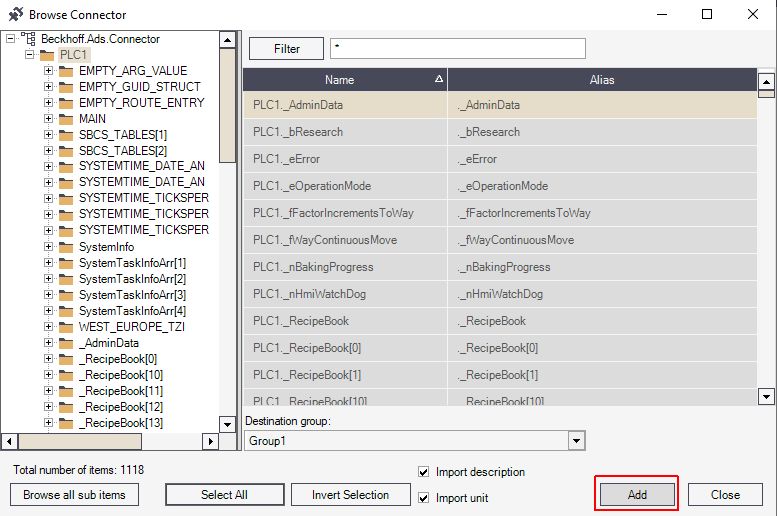
In the Browse connector window, the Beckhoff Device Signals are listed.
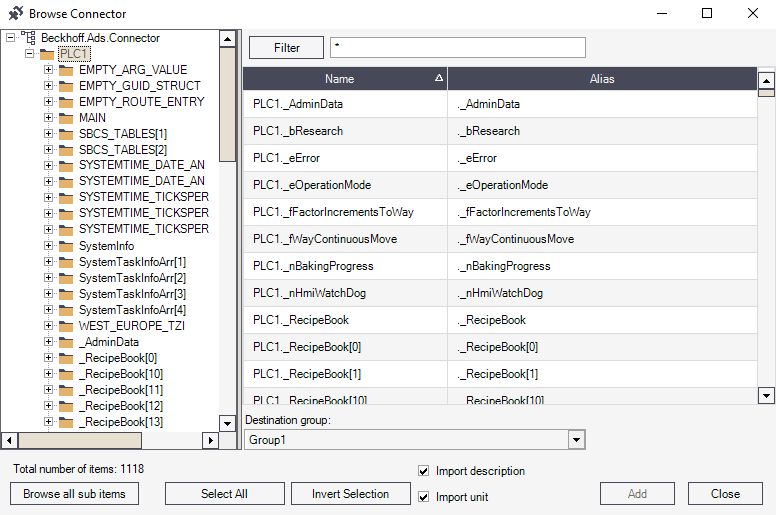
Select the desired Signals and click the button Add to confirm and upload selected items. Afterward, you click the Close button to close the Browse connector window,
Now the list of i4scada Beckhoff ADS Connector Signals is populated with all the selected items. To preserve your changes, click the Save button.