SmartEditor Recipe Manager tutorials
These tutorials cover the basics of creating Recipe Definitions and Recipes, aligning them with Signals and applying filter and tables.
Create an i4scada Recipe Manager Project
For an easy guide to set up and publish an i4scada SmartEditor Recipe Manager project, open this tutorial and follow the steps.
To design and publish a simple i4scada Recipe Manager project, follow the steps below:
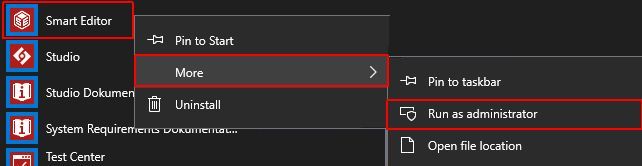
Open the i4scada SmartEditor with Administrative privileges.
Important
This in an important step as without the Administrative privileges, the i4scada SmartEditor will not be able to publish the project to Internet Information Service (IIS).
By default, a new project is opened and ready to use.
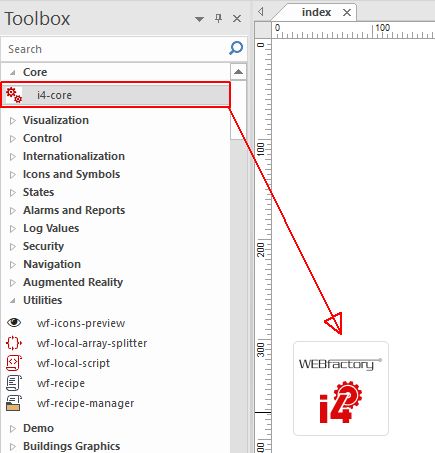
Add the i4-core extension to the project page. To add the extension on the project page you can simply drag and drop it, into the desired position.
Important
The i4-core extension will not be visible at run-time. The scope of it is to handle the connection between your visualization and the i4scada Server. Without it, communication with the Server is not possible!
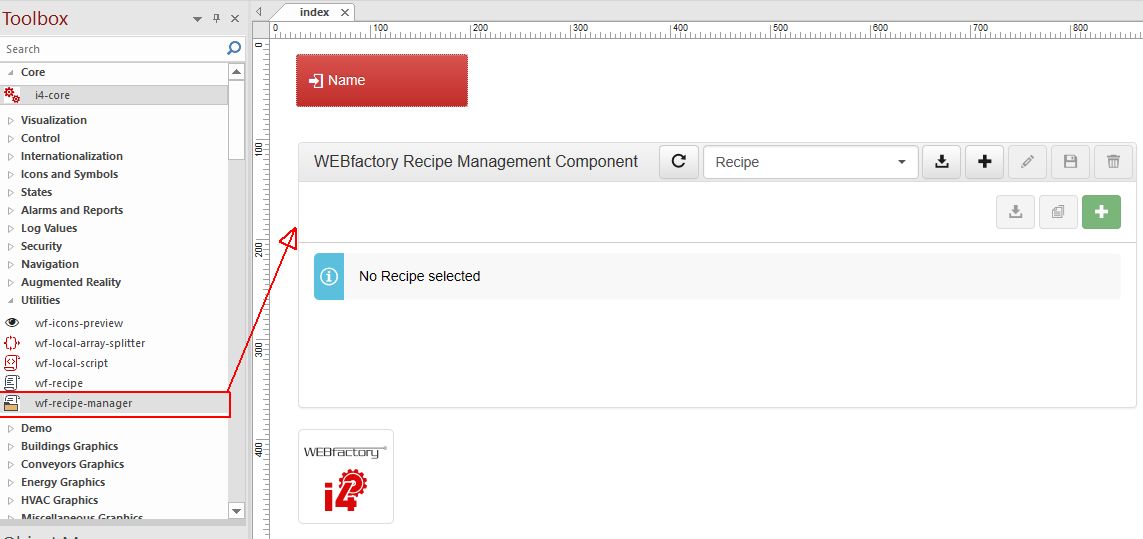
Next, we need the wf-recipe-manager extension. This extension will enable the Recipe Manager, at run-time. Drag and drop the extension on the page.
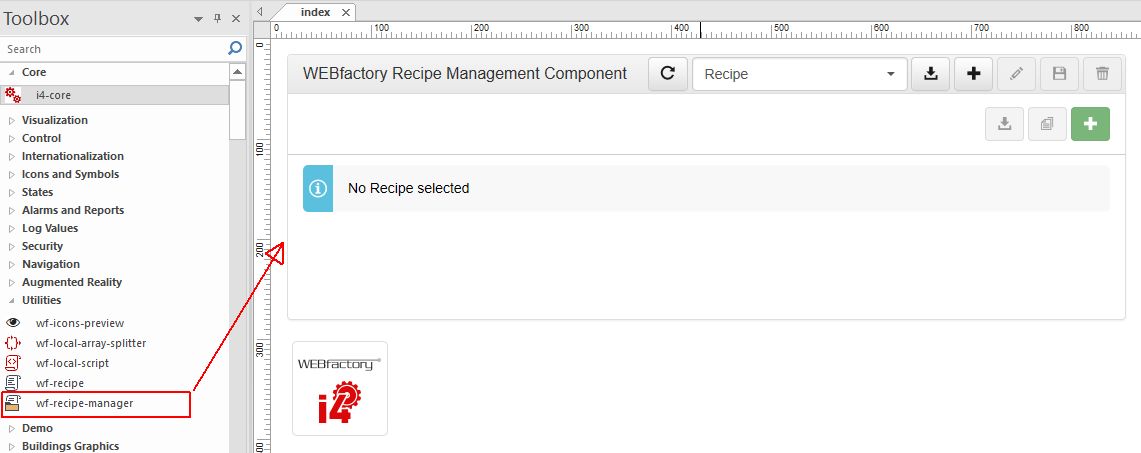
Tip
Make sure that the wf-recipe-manager extension width and height will fit the page content, at run-time.
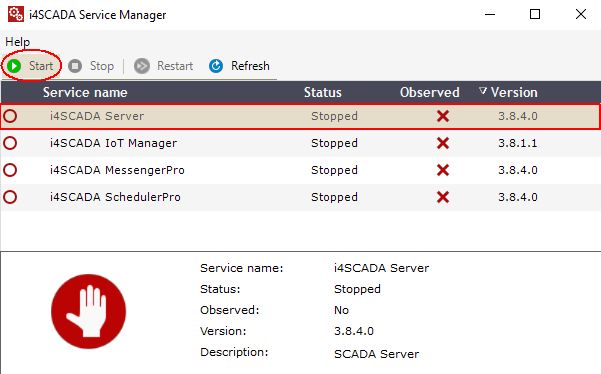
Open the i4scada Service Manager and start the i4scada Server.
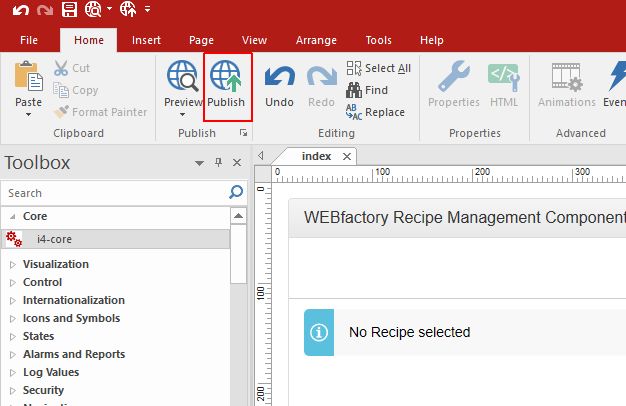
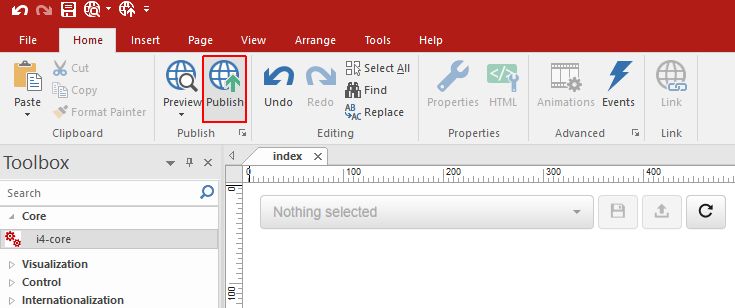
Return the i4scada SmartEditor project and click on the toolbar button Publish.
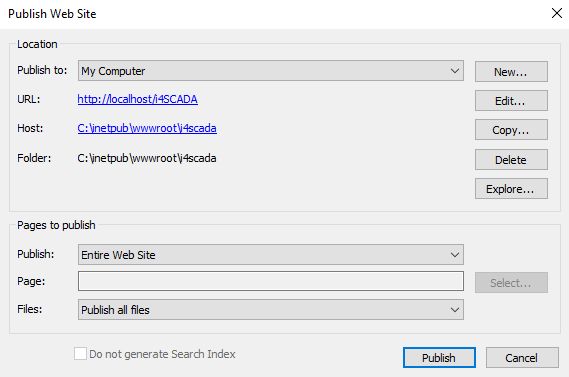
The Publish to Web Site window is opened. Select the Publish button.
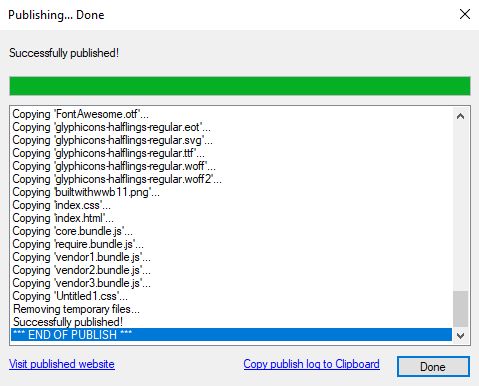
The HTML output is generated and the publishing is done. The message"Successfully published!" is displayed.
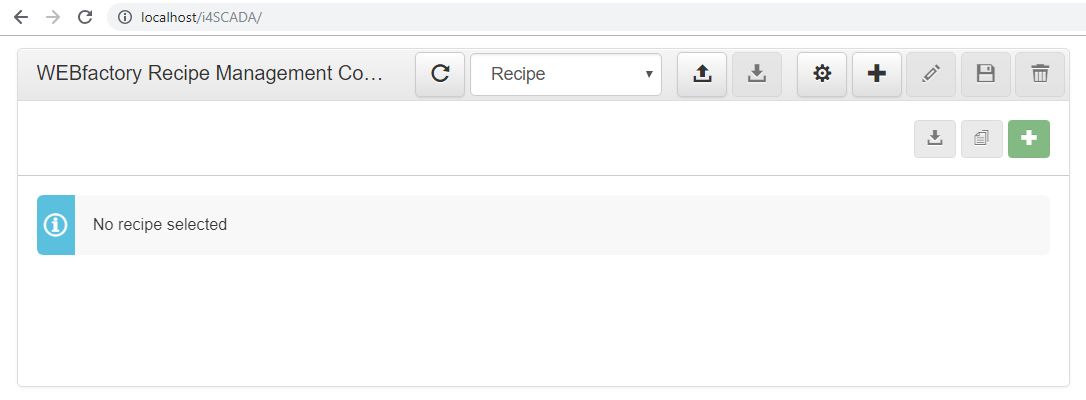
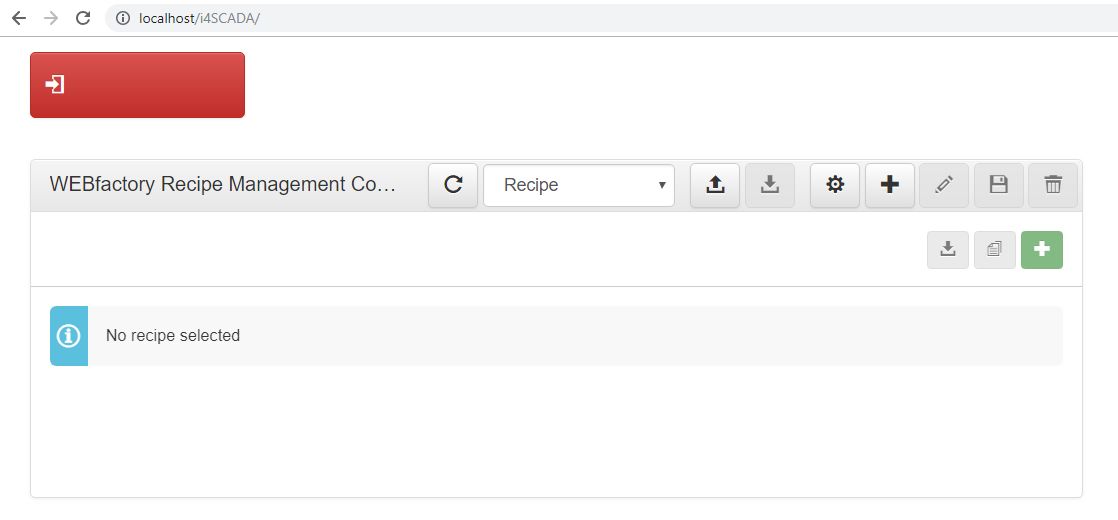
Open the published website in the browser. The Recipe Manager is visible.
Create a securitized i4scada Recipe Manager Project
Secure your i4scada Recipe Manager project by following the steps provided by this step-based tutorial.
The present tutorial will guide you through the necessary steps to design, publish and view a Recipe Manager project containing security settings, as well.
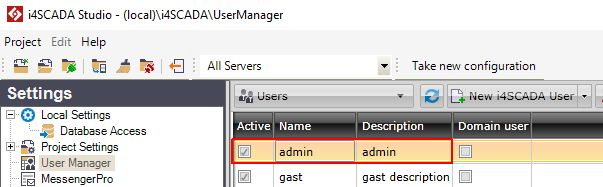
Check your custom Database, in i4scada Studio and make sure that at least one active user is available.
Open the i4scada SmartEditor with Administrative privileges.
Important
This is an important step as without the Administrative privileges, the i4scada SmartEditor will not be able to publish the project to Internet Information Service (IIS).
By default, a new project is opened and ready to use.
Add the i4-core extension to the project page. To add the extension on the project page you can simply drag and drop it, into the desired position.
Important
The i4-core extension will not be visible at run-time. The scope of it is to handle the connection between your visualization and the i4scada Server. Without it, communication with the Server is not possible!
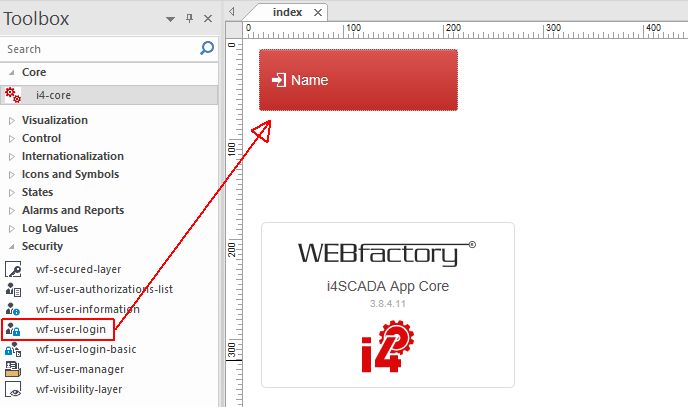
Next, we need the wf-user-login / wf-user-basic-login extension. This extension will enable the user access to the project, at run-time. Drag and drop the extension on the project page.
Add the wf-recipe-manager extension. This extension will enable the Recipe Manager, at run-time. Drag and drop the extension on the page.
Tip
Make sure that the wf-recipe-manager extension width and height will fit the page content, at run-time.
Open the i4scada Service Manager and start the i4scada Server.
Return the i4scada SmartEditor project and click on the toolbar button Publish.
The Publish to Web Site window is opened. Select the Publish button.
The HTML output is generated and the publishing is done. The message"Successfully published!" is displayed.
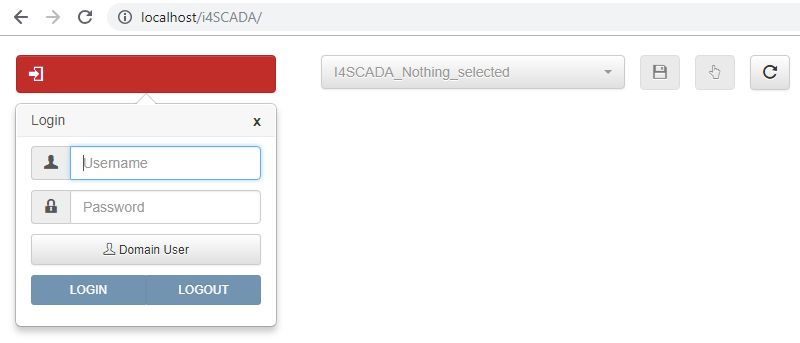
Open the published website in the browser. The Login button and the Recipe Manager are visible.
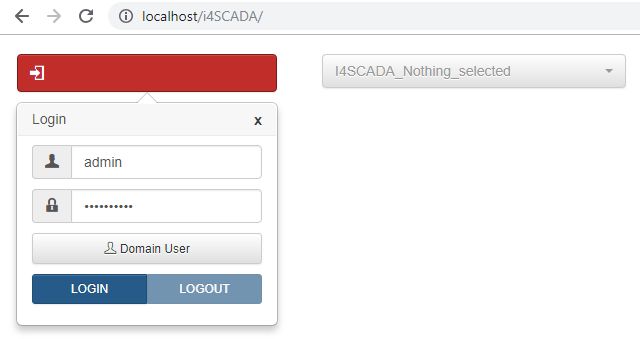
Click on the Login button. A dialog pop-us where the Username and Password can be added. Fill in your Username and Password.
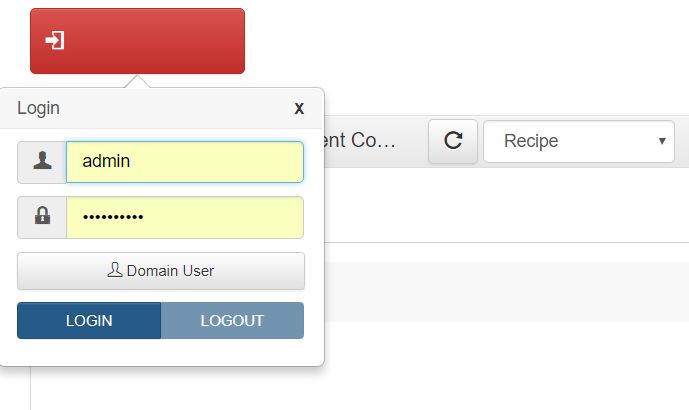
Click the LOGIN button.
The project is opened and the selected user is logged in.
Create an i4scada Recipe Project
Set up an i4scada SmartEditor Recipe visualization, by following the easy steps available only in this article.
In order to create an i4scada SmartEditor Recipe project, please follow the below-described steps:
Open the i4scada SmartEditor with Administrative privileges.
Important
This in an important step as without the Administrative privileges, the i4scada SmartEditor will not be able to publish the project to Internet Information Service (IIS).
By default, a new empty project is opened and ready to use.
Add the i4-core extension to the project page. To add the extension on the project page you can simply drag and drop it, into the desired position.
Important
The i4-core extension will not be visible at run-time. The scope of it is to handle the connection between your visualization and the i4scada Server. Without it, communication with the server is not possible!
Next, we need the wf-recipe extension. This extension will enable the Recipe at run-time. Drag and drop the extension on the page.
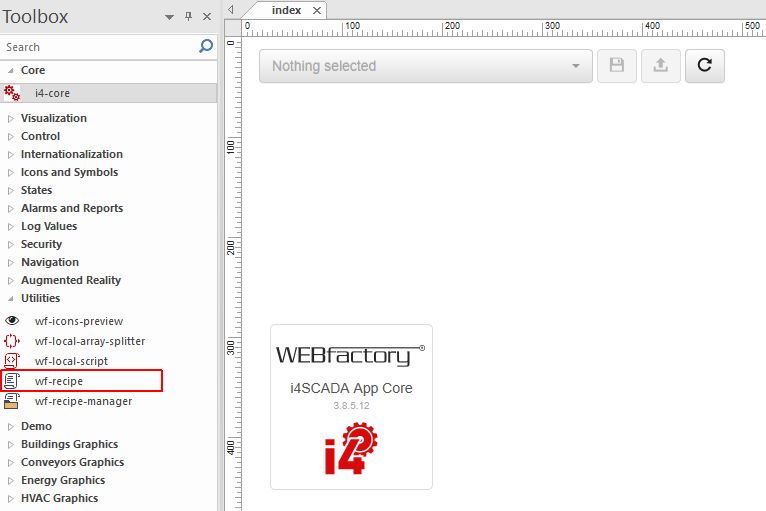
Tip
Make sure that the wf-recipe extension width and height will fit the page content, at run-time.
Open the i4scada Service Manager and start the i4scada Server.
Return the i4scada SmartEditor project and click on the toolbar button Publish.
The Publish to Web Site window is opened. Select the Publish button.
The HTML output is generated and the publishing is done. The message"Successfully published!" is displayed.
Open the published website in the browser. The Recipe is visible.
Create a securitized i4scada Recipe Project
Check out this tutorial and learn how to set up a securitized i4scada SmartEditor Recipe project, in just a few steps.
The present tutorial will guide you through the necessary steps to design, publish and view a Recipe project containing security settings, as well.
Check your custom Database, in i4scada Studio and make sure that at least one active user is available.
Open the i4scada SmartEditor with Administrative privileges.
Important
This is an important step as without the Administrative privileges, the i4scada SmartEditor will not be able to publish the project to Internet Information Service (IIS).
By default, a new project is opened and ready to use.
Add the i4-core extension to the project page. To add the extension on the project page you can simply drag and drop it, into the desired position.
Important
The i4-core extension will not be visible at run-time. The scope of it is to handle the connection between your visualization and the i4scada Server. Without it, communication with the Server is not possible!
Next, we need the wf-user-login / wf-user-basic-login extension. This extension will enable the user access in the project, at run-time. Drag and drop the extension on the project page.
Add the wf-recipe extension. This extension will enable the Recipe, at run-time. Drag and drop the extension on the page.
Tip
Make sure that the wf-recipe extension width and height will fit the page content, at run-time.
Open the i4scada Service Manager and start the i4scada Server.
Return the i4scada SmartEditor project and click on the toolbar button Publish.
The Publish to Web Site window is opened. Select the Publish button.
The HTML output is generated and the publishing is done. The message"Successfully published!" is displayed.
Open the published website in the browser. The Login button and the Recipe are visible.
Click on the Login button. A dialog pop-up up where the Username and Password can be added. Fill in Username and Password.
Click the LOGIN button.
The project is opened and the selected user is logged in.
Create a new Recipe Definition
It is time to start working with the i4scada SmartEditor Recipe Manager and set up a new Recipe Definition. Check out this tutorial!
To create a new Recipe Definition follow up the below steps:
Open a published Recipe Manager project, in your favorite browser.
Switch from Recipe to Recipe Definition, in the toolbar drop-down list.

Click the toolbar button Add.

The Add recipe definition window pops up. Fill in the Name of your new Recipe Definition.
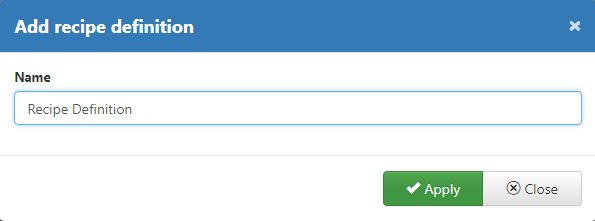
Click the Apply button. The Add recipe definition window is closed and the newly created Recipe Definition is loaded automatically.
Click the Add recipe definition item button.

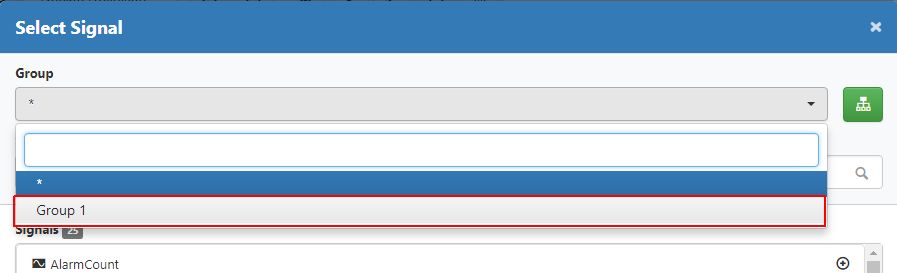
The Select Signal window pops up.
Select the Group from the drop-down list.
Select the Signal(s) from the list or start typing a part of the desired signal name in the respective field.
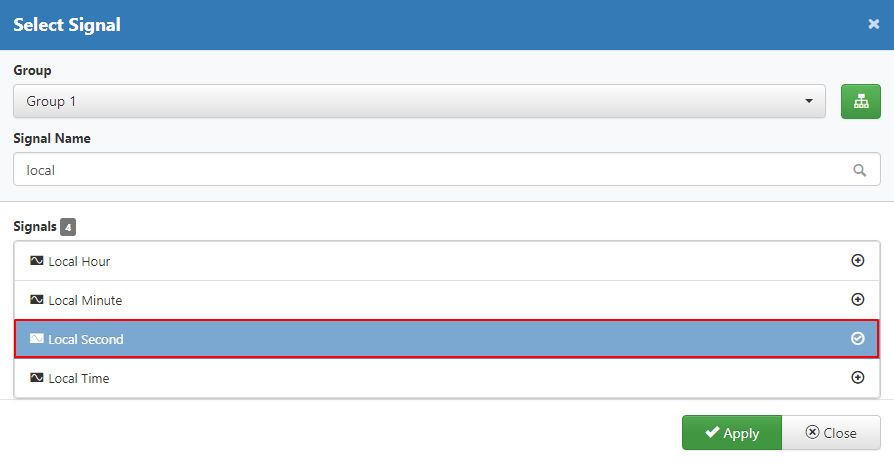
Once Group and Signal(s) have been selected click the Apply button.
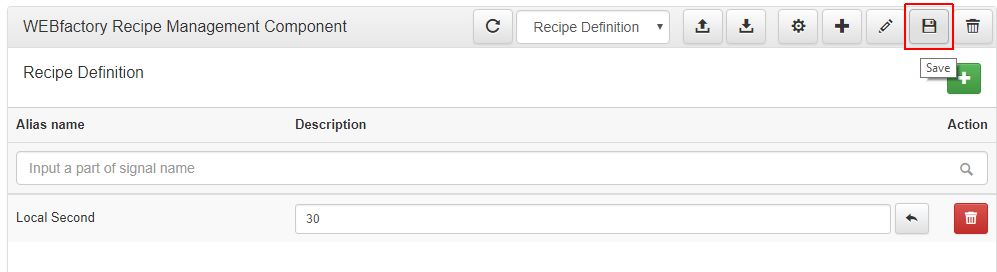
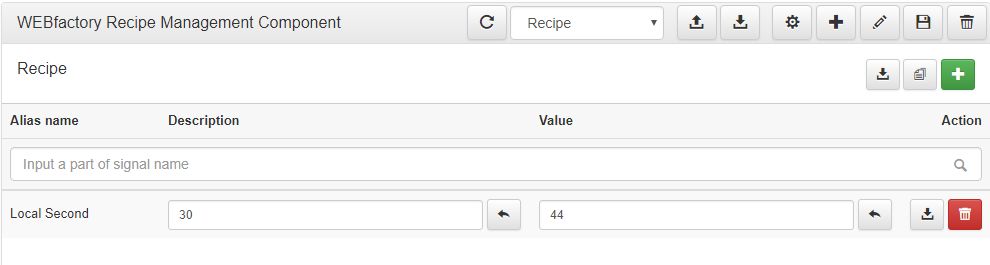
The Select Signal window is closed. The selected Recipe Definition item(s) can be seen in the Signals list.
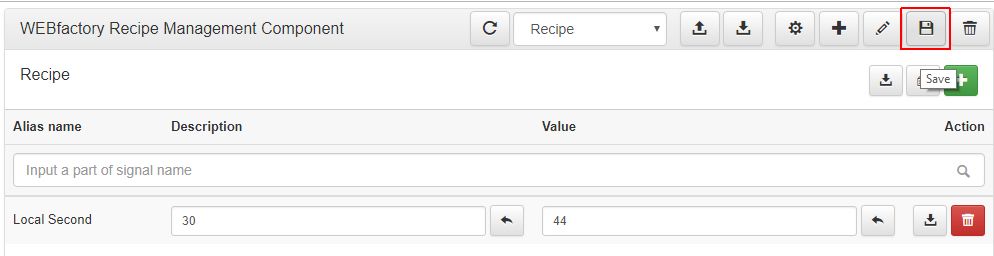
Press the toolbar button Save to preserve the Recipe Definition.
Create a new Recipe
Open this tutorial and follow the provided steps, to create a new Recipe in your i4scada SmartEditor project.
Creating a Recipe, in the Recipe Manager, can be done by following the below-described steps:
Open your published Recipe Manager project, in your favorite browser.
Switch (if needed) from Recipe Definition, to Recipe, in the toolbar drop-down list.

Click the Add toolbar button.

The Add Recipe window pops up.
Fill in the Name for the new Recipe.
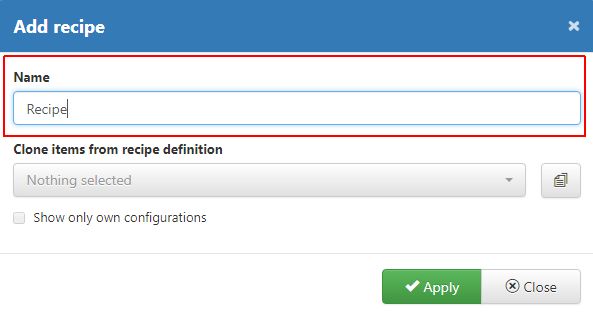
Select the desired Recipe Definition to clone its items, for the new Recipe.
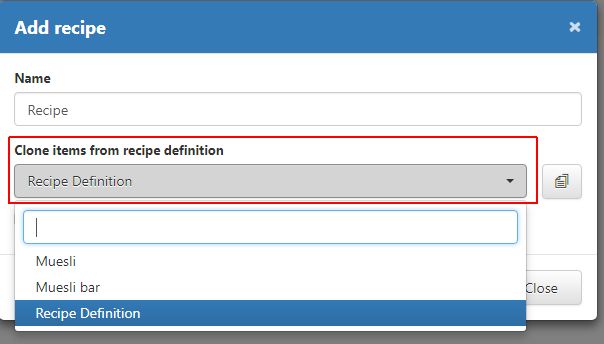
Press the Apply button to save the new Recipe.
The Add recipe window is closed and the newly created Recipe is loaded in the manager, along with all its defined details.
Press the toolbar button Save to preserve the new Recipe.
Load Recipe Definition / Recipe
Check out these easy steps guiding you to load a Recipe Definition or a Recipe, in your i4scada SmartEditor project.
The existing Recipe Definitions and Recipes can be loaded for further changes, as follows:
Open a published Recipe Manager project, in your favorite browser.
By default, no Recipe or Recipe Definition is loaded.
While the Recipe Manager toolbar drop-down is set to Recipe, click the Load button.

The Load Recipe window pops up. A list of all available Recipes is displayed.
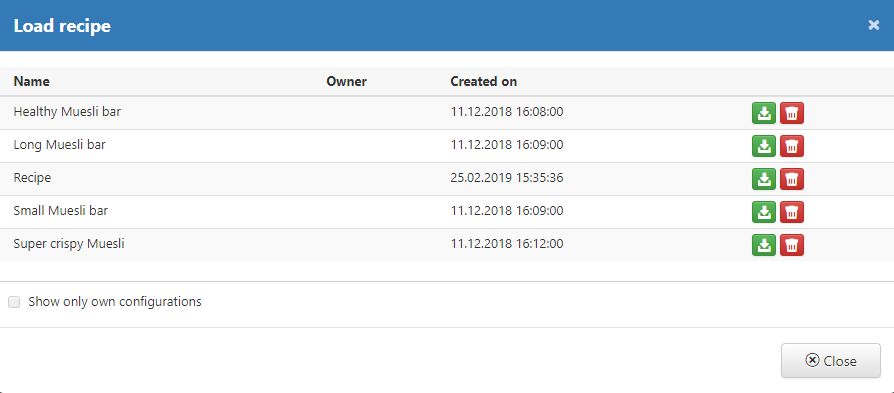
Select the desired Recipe and click the green Load button.
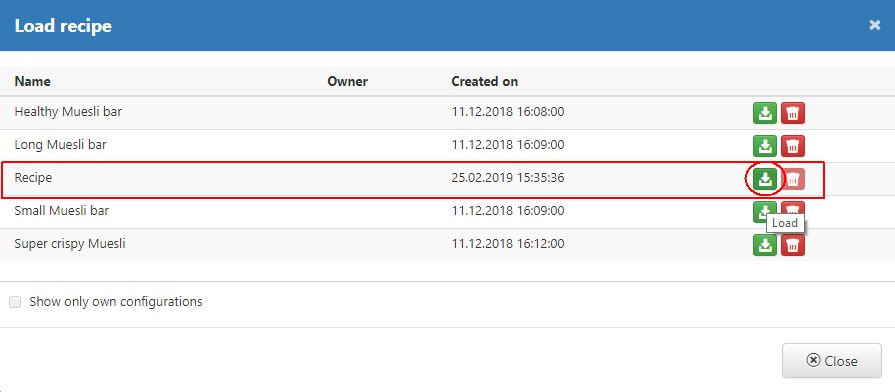
Press the Close button. The Load recipe window is closed and the selected Recipe is successfully loaded.
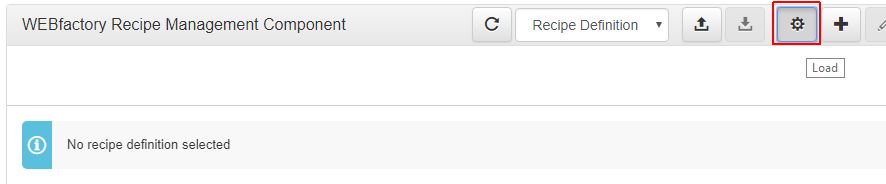
Switch from Recipe to Recipe Definition, in the toolbar drop-down list.
Click the Load toolbar button.
The Load recipe definition window pops up. A list of all available Recipe Definitions is displayed.
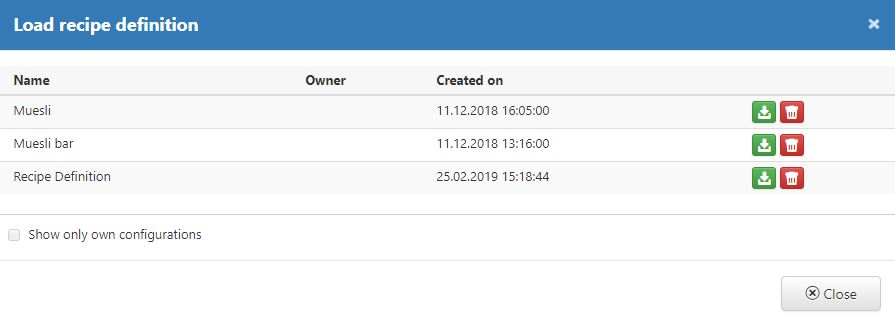
Select the desired Recipe Definition and click the green Load button.
Click on the Close button.
The Load recipe definition window is closed and the loaded Recipe Definition is visible in the manager.

Edit a Recipe Definition
Update your i4scada SmartEditor Recipe Definitions in a few easy steps, by following the information provided by this article.
It is possible to edit a Recipe Definition, by organizing the below steps:
Open a published Recipe Manager project, in your favorite browser.
Switch from Recipe to Recipe Definition, in the toolbar drop-down list.
Click the Load toolbar button.
The Load recipe definition window pops up. A list of all available Recipe Definitions is displayed.
Select the desired Recipe Definition and click the green Load button.
Click on the Close button.
The Load recipe definition window is closed and the loaded Recipe Definition is visible in the manager.
Once the Recipe Definition is loaded, the toolbar button Edit is activated.
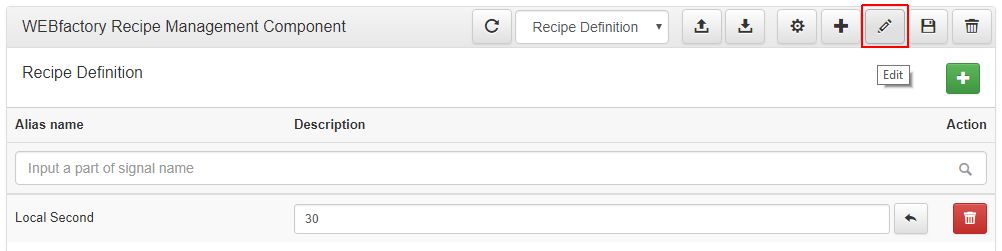
Click on the Edit button.
The Edit recipe definition name window pops up.
Update the new selected Recipe Definition, as desired, and click the Apply button.

Click the Save toolbar button to preserve the updates.

Edit a Recipe
Check out this article and follow this step-based tutorial to change the settings of your i4scada SmartEditor Recipe.
Changes at the level of Recipes can also be organized, as follows:
Open a published Recipe Manager project, in your favorite browser.
By default, no Recipe is loaded.
Click the Load toolbar button.
The Load Recipe window pops up. A list of all available Recipes is displayed.
Select the desired Recipe and click the green Load button.
Press the Close button. The Load recipe window is closed and the selected Recipe is successfully loaded.
Once the Recipe is loaded, the toolbar button Edit is activated.
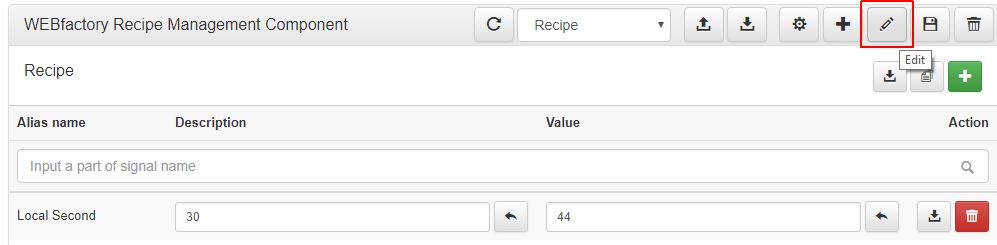
The Edit recipe name window is opened.
Update the Recipe name as desired and press the Apply button.
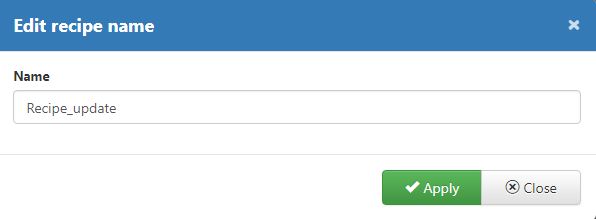
The Edit recipe name window is closed and changes are applied.
To preserve the changes click on the toolbar button Save.

Import a Recipe Definition / Recipe
Check out this tutorial! You are just a few steps away from uploading Recipe Definitions or Recipes to your i4scada SmartEditor project.
Recipe Definitions and Recipes also allow the user with the possibility to import files, as follows:
Open a published Recipe Manager project, in your favorite browser.
Select from the toolbar drop-down list either the Recipe or the Recipe Definition.
Click on the Import toolbar button.
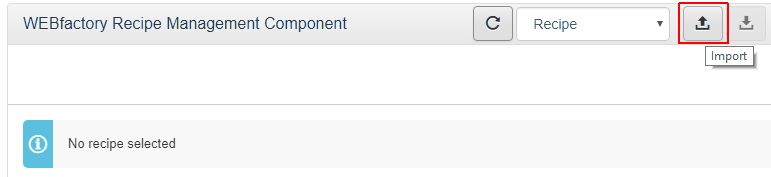
The Import recipe / Import recipe definition window is opened.
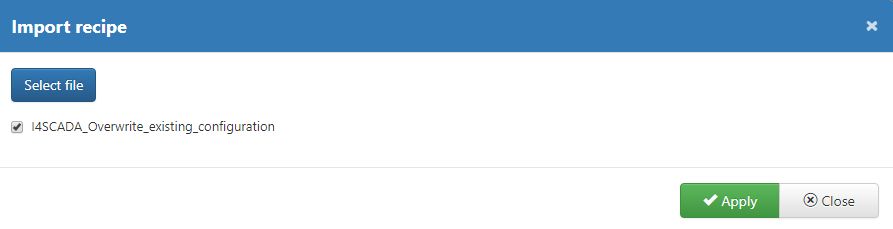
Click on the Select file button to browse for the import file.
Tip
The expected import format is .json.
Once the file is selected, its name and format will be visible in the Import recipe window.
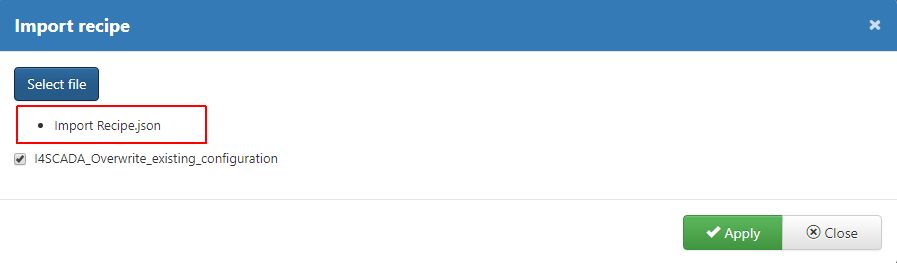
Click the Apply button to proceed with the Import.
The import is processed in the background. The imported Recipe / Recipe Definition will be automatically made available in the load lists.
Export a Recipe Definition / Recipe
Check out how to export via .json format a Recipe Definition or a Recipe, from your i4scada SmartEditor project.
To export a Recipe or a Recipe Definition, organize the below described steps:
Open a published Recipe Manager project, in your favorite browser.
Select from the toolbar drop-down list either the Recipe or the Recipe Definition.
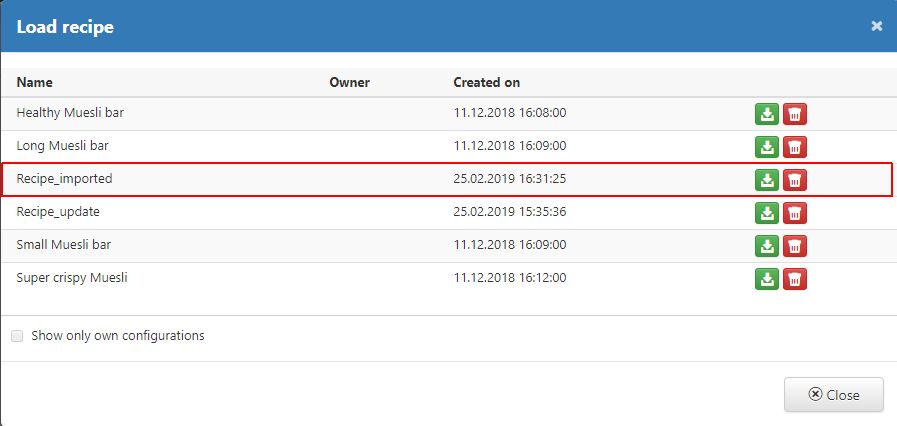
Click on the toolbar Load button.
Select the desired element to be loaded, from the list view.
Once an element is available in the Recipe Manager view, the Export button becomes active.
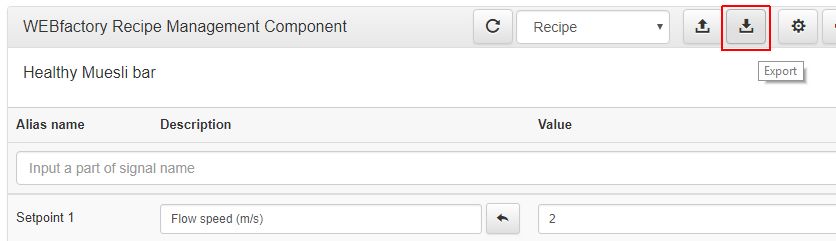
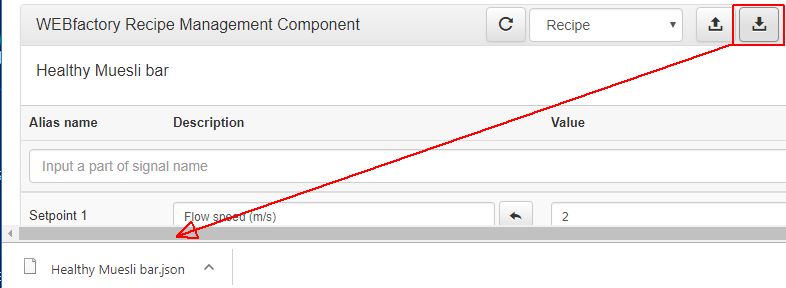
Click on the Export button
A .json format file is automatically opened, in the browser.
Delete a Recipe Definition / Recipe
Check out how to remove redundant or unneeded Recipe Definitions or Recipes, using the Delete function of the i4scada SmartEditor Recipe Manager project.
Open a published Recipe Manager project, in your favorite browser.
By default, no Recipe or Recipe Definition is loaded.
Click on the Load toolbar button to add to the manager either a Recipe or a Recipe Definition.
As soon as a Recipe / Recipe Definition is loaded, the Delete toolbar button is activated.
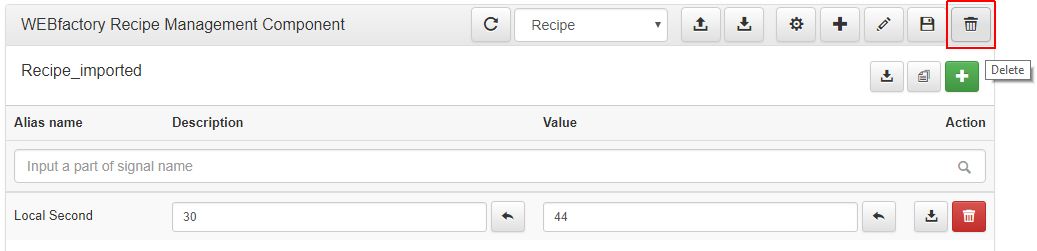
The Delete recipe / Delete recipe definition window is opened.
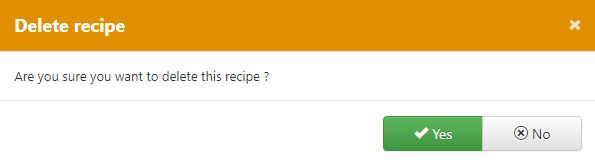
Click the Yes button, to proceed with the deletion.
The recipe / Recipe definition is deleted.
Write a recipe
Check out these steps guiding you on how to write Recipes to the i4scada Server, using the respective functionality in the i4scada SmartEditor Recipe Manager project.
To write recipe values in the server, follow the below steps:
Open a published Recipe project, using your favorite browser.
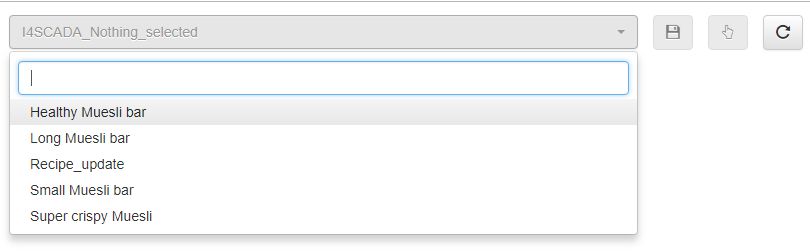
By default, the Recipe viewer is opened. No Recipe is applied.

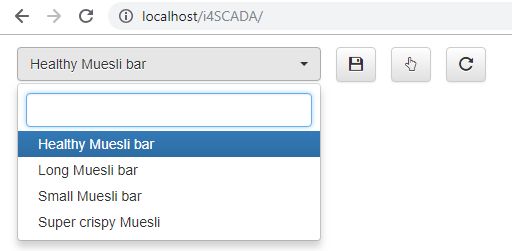
Select the desired Recipe from the drop-down list.
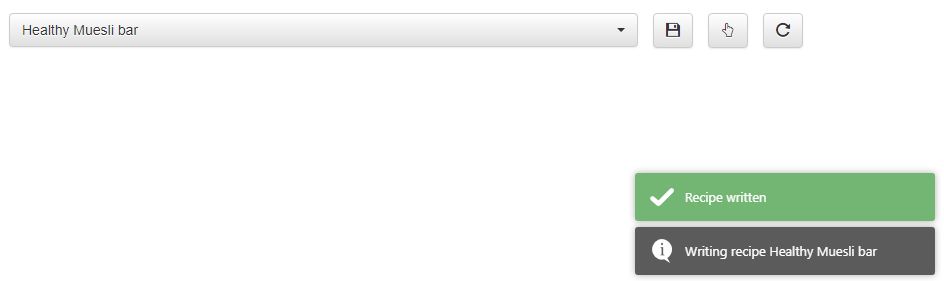
Click on the Write Recipe toolbar button.

A confirmation message is displayed indicating that the Recipe was written to the Server.