Export Import Tool Tutorials
Check out these tutorials and learn how to use the WEBfactory2010 Export Import Tool by following the described steps.
Using the WEBfactory 2010Export Import Tool
Check out this article and learn how to use the WEBfactory 2010 Export Import Tool in several scenarios.
The WEBfactory 2010Export Import Tool allows the user to execute the operations of exporting information from a database to an XML file, importing it back to another database and displaying differences between the different information sets.
The following tutorial contains all the information regarding the use of the WEBfactory 2010Export Import Tool.
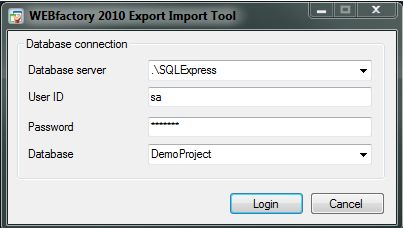
Login on an existing WEBfactory 2010 database.
Export data from the WEBfactory 2010 database to an XML file, as follows:
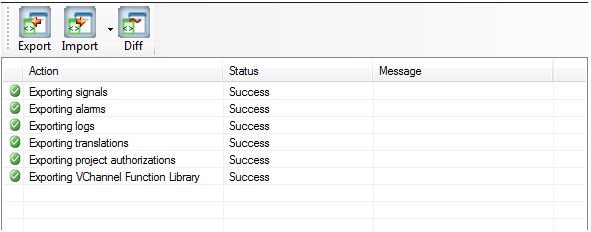
Click the Export button.
Browse for a folder where to store the XML file and enter a name for it.
Click the Save button.
Import data from another WEBfactory 2010 data, exported in XML format,as follows:
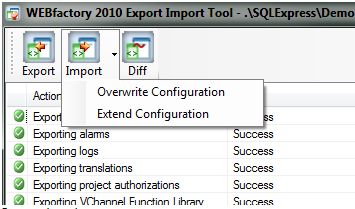
Select the import method : Overwrite Configuration/Extend Configuration from the Import drop down menu.
Browse for the XML file previously exported from another WEBfactory 2010 database.
Click Open.
Note
The WEBfactory 2010Export Import does not export/import settings.
When importing data into a new project using the Overwrite Configuration option, the existing Web Access settings will be deleted along with the existing Servers. The WEBfactory 2010Export Import creates, in this case, the settings using default values. In more detail, the Web Access settings will be created with the Client Name option set to * (all) for each imported server.
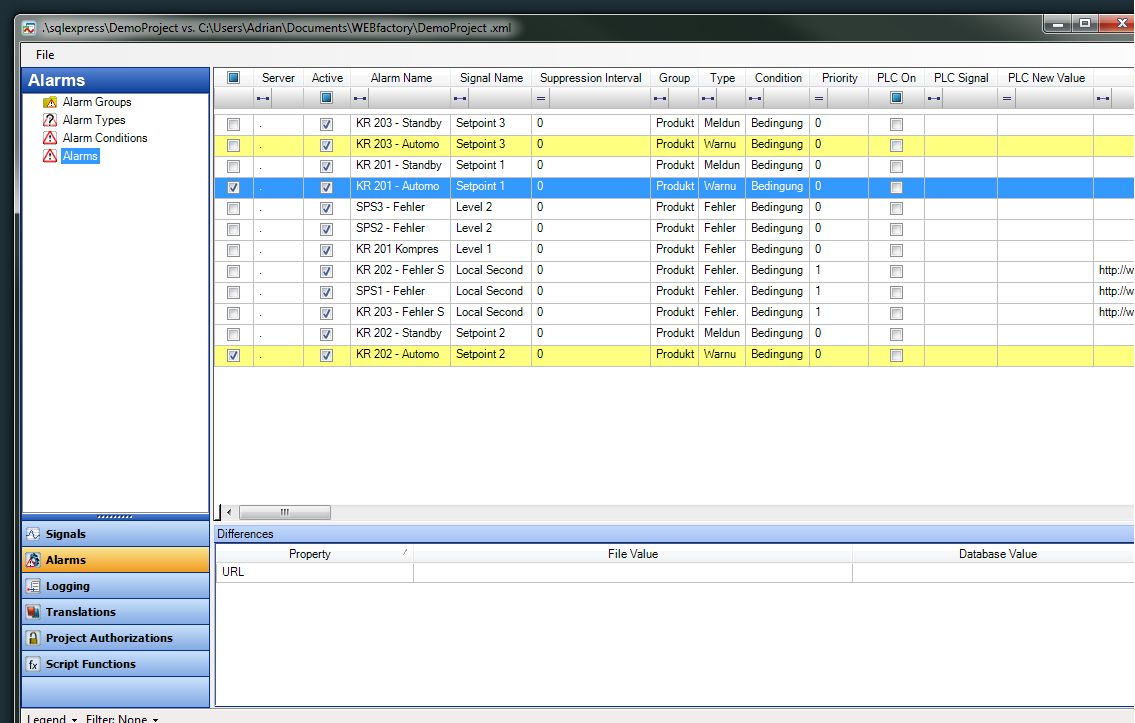
Compare the information from the database and from the exported xml file and select just some information to be imported, as follows:
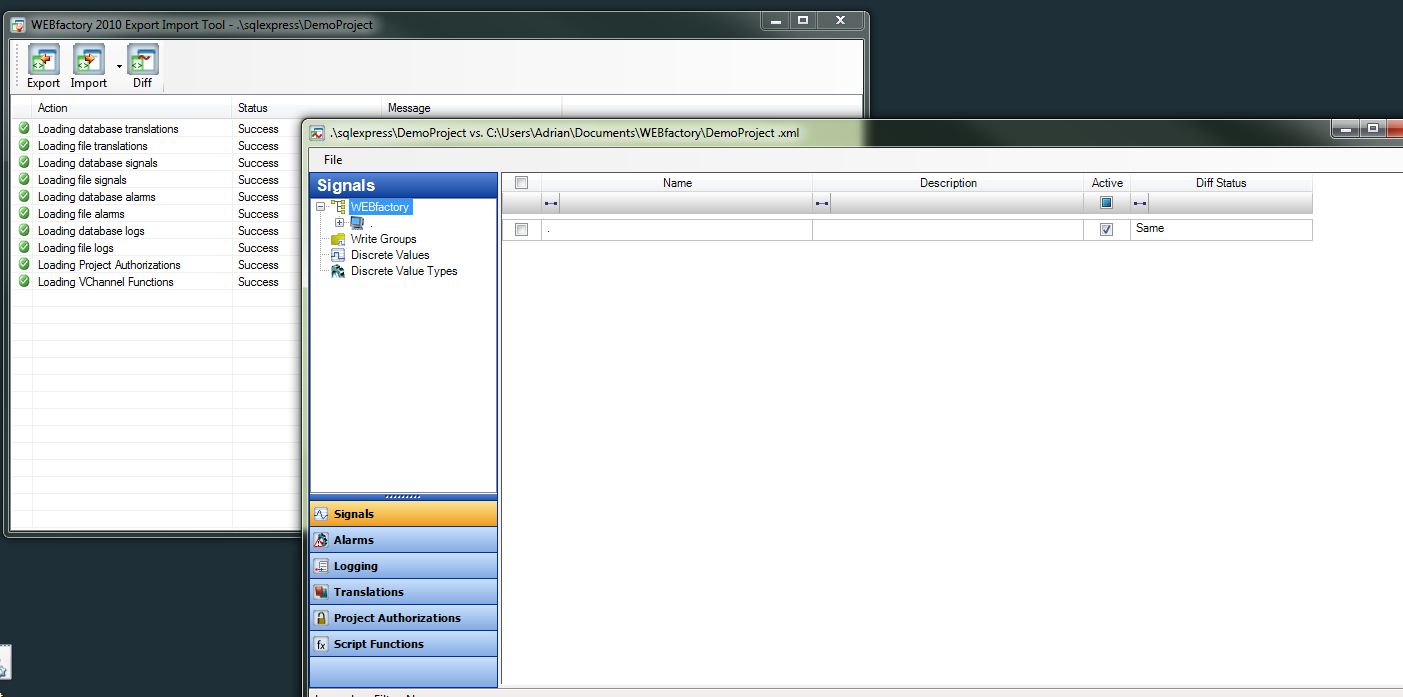
Click Diff
Browse to the XML file to be used for comparison and import.
Click Open
Note
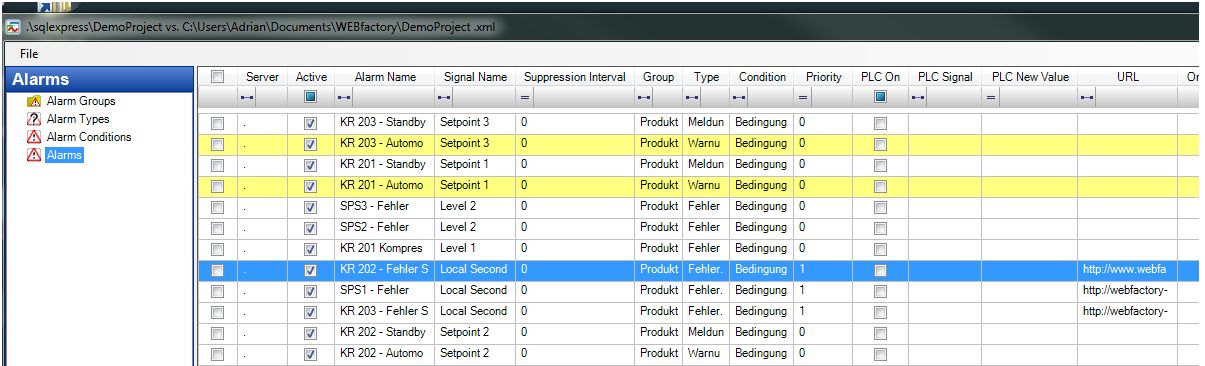
The diff tool allows you to navigate and visualize the differences between database and the exported file.
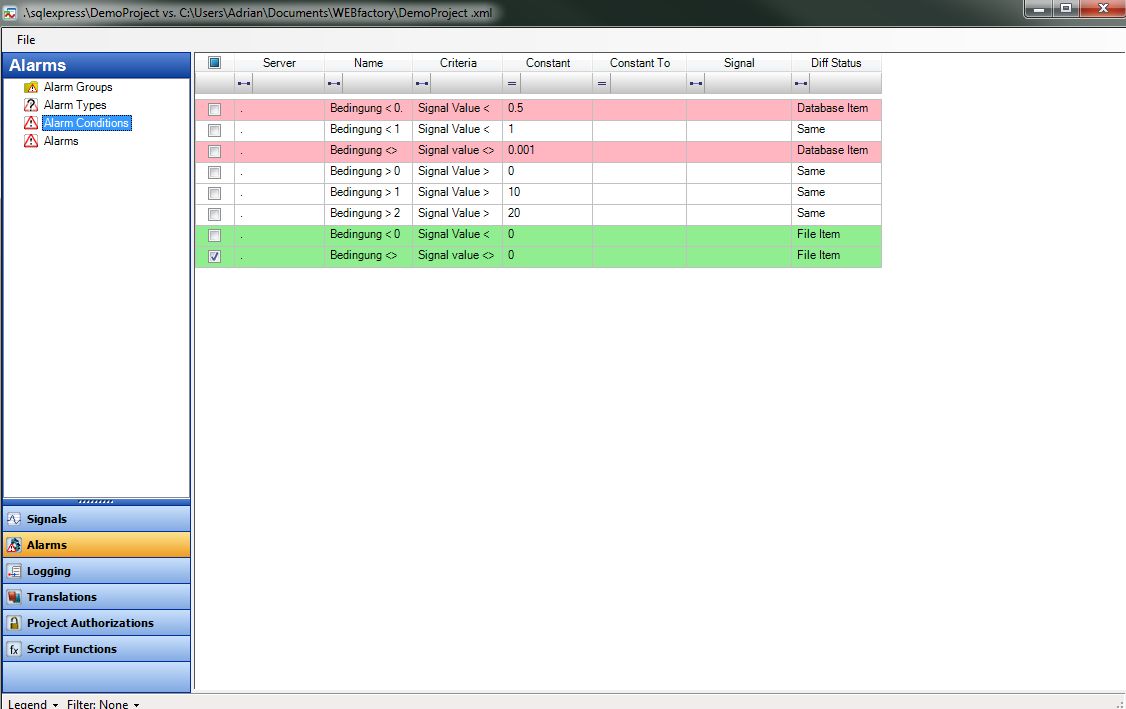
White rows are the identical.
Yellow rows are present in database and in the file but some details differ. Changes can be seen in the Differences panel
Red rows are present in the database but missing from the file. (If red rows are marked for import they will be deleted from the database)
Green rows are present in file but missing from the database.

The DiffTool
Rows can be filtered and sorted.
Rows can be marked for import by checking the first column.
Marking rows for import
When a row is checked its related information is automatically checked for importing since it relay on depending information.
For example, if an alarm is checked its referring alarm condition is marked for import.
Marking rows for import
When a row is unchecked, if other information depends on it, the user will be informed and the action is canceled since doing this will break the database integrity.
For example, if we try to unmark the alarm condition that is referred by a marked alarm we get a message that is explaining why this is not possible.
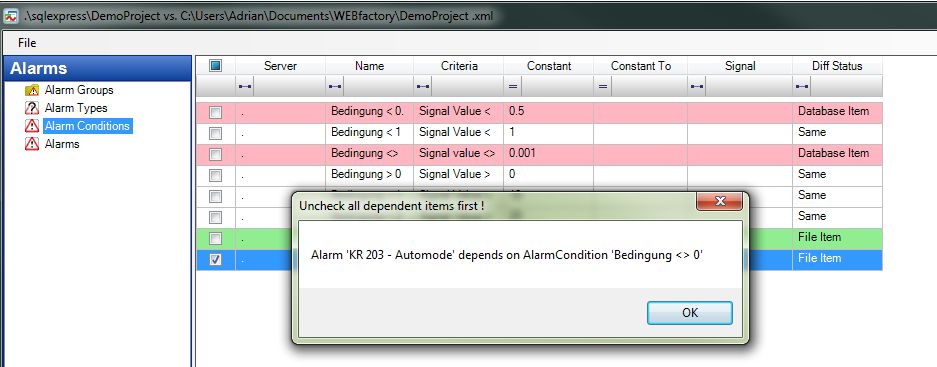
Uncheck all dependent items
Checked Items can be synchronized by choosing a command from the menu.
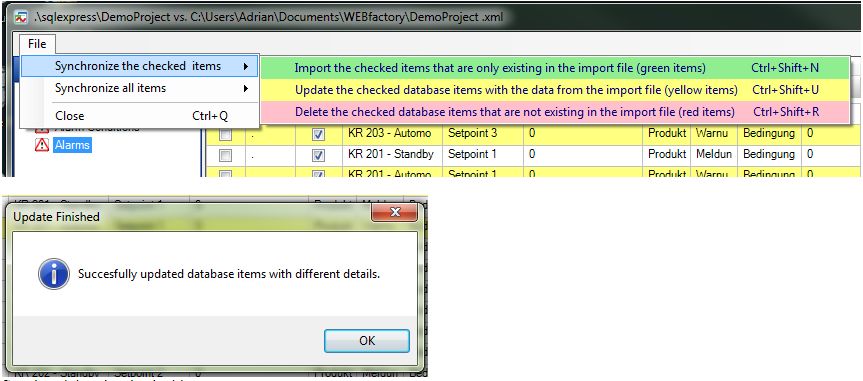
Synchronizing the checked items
The status color is updated.
For example, the KR 202 Automo alarm was synchronized and the status color was changed from white to yellow.
Updated status colors
The synchronization can also be done for all information in a category, without the need to mark specific items.
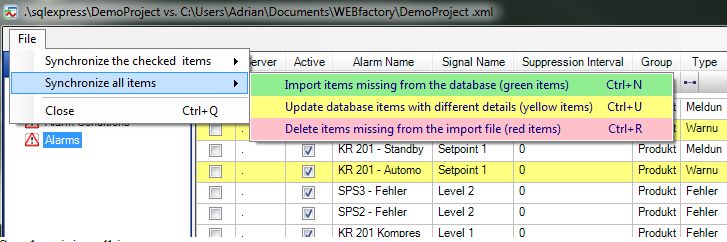
Synchronizing all items