Using arrays and multidimensional arrays
Check out this article and leran how to use arrays and multidimensional arrays when writing and testing signals.
The purpose of this tutorial is to exemplify how to use, test and write signals with array data types. A signal with array data types is necessary to follow this tutorial.
To fully understand the WEBfactory 2010 approach of arrays data types, four steps are necessary to be followed:
Configure signals using arrays data type in WEBfactory 2010Studio
In WEBfactory 2010 Sudio, select the connector and click Browse Connector from the contextual menu.
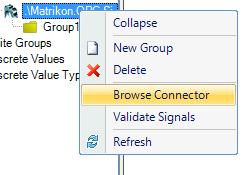
Browsing the connector
Select the desired signal that has the array as data type and Add it to the WEBfactory 2010Studio project.
Make sure that the signal belongs to a signal group. If no groups are defined in the connector, the Destination group text field can be used to create a new signal group.
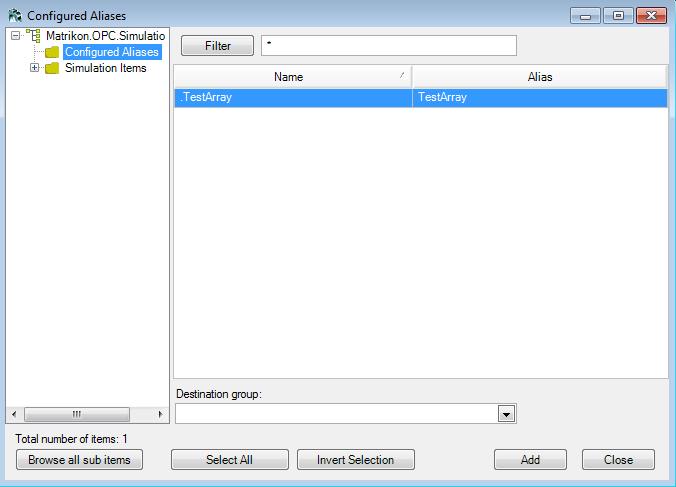
Adding a new signal to WEBfactory 2010 WEBfactory 2010
If a new signal group was defined when adding the signal to the project, the signal group will be listed under the connector in the Signals tree menu.
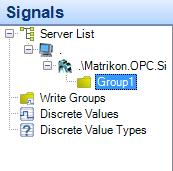
The new signal group
In this tutorial, we use MatrikonOPC Simulator for generating the signal that uses arrays of double floats as the data type. The example signal name is TestArray, and the data type is array of double floats.
In the Signal Details, assign the signal to a write group and make sure it is active.

The signal details in WEBfactory 2010 Studio
Make the additional desired changes and Save the signal details.
Restart the WEBfactory 2010 Server service using the WEBfactory 2010Service Manager.
Setting up the signal with array type of data in WEBfactory 2010 Studio is the same for unidimensional arrays or multidimensional arrays.
Display the signal's array values in WEBfactory 2010Test Center
The WEBfactory 2010Test Center can display the array values of a signal that has the data type set to array. In our case, the values will be an array of double floats, because our signal has the data type set as array of double floats.
More information about the WEBfactory 2010Test Center can be found here.
To view the signal values, open the Test Center and select Manage servers from the Communication menu. Alternatively, you can press Ctrl+M to open the Manage server dialog.

Opening the Manage Servers dialog
Select New (from the Manage servers top menu) to define a new server. Enter the ID and the Server ID. In our example, . (dot) is used for the ID and Server ID, representing the local machine.
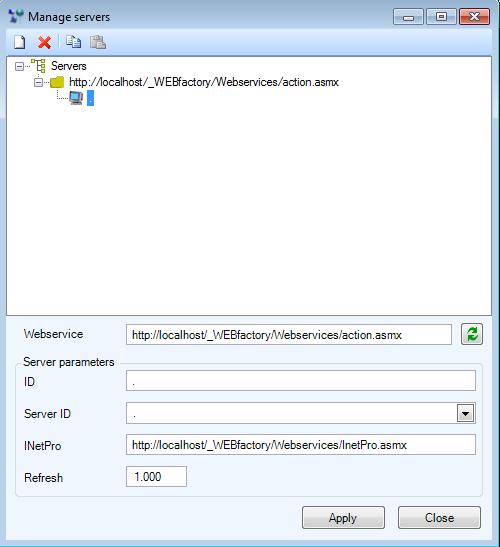
Defining a new server
Select Apply to apply the settings. Select Close to close the dialog.
Now that the server is defined in Test Center, select Browse server from the top menu of the Test Center.

Browse server option
The Browse Server dialog allows the user to browse the server for the desired signal and import it. The user has the possibility to use filtering for quicker access.
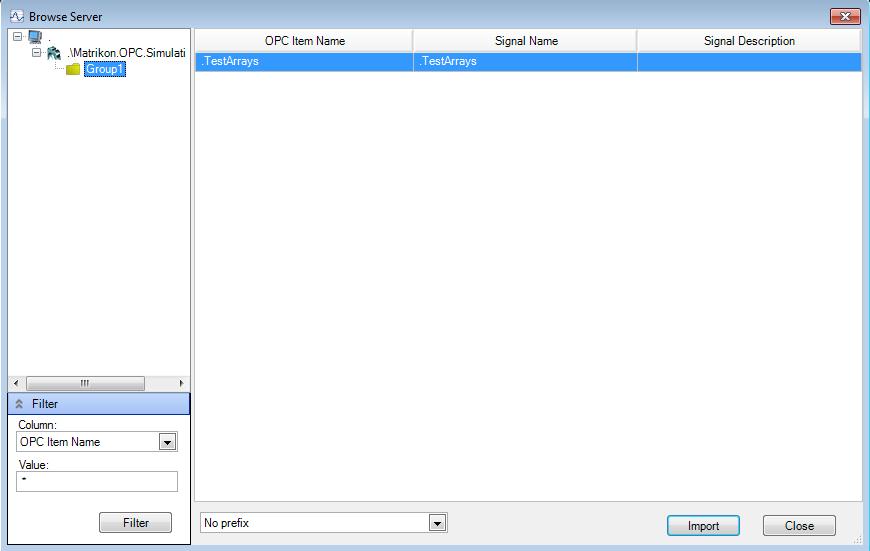
Browsing the server for the signal
Select the signal and click Import to import it in Test Center. Select Close to return to the Test Center. Now the Test Center should display the signal array of values in the Current value section of the grid.
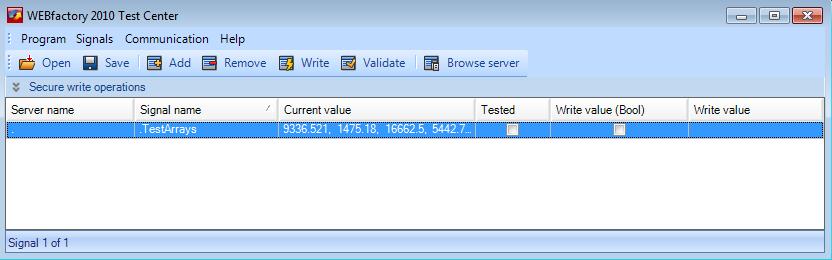
Displaying the array of strings in Test Center.
Testing it in WEBfactory 2010 Test Center is the same for unidimensional arrays or multidimensional arrays.
Writing the array values to the signal using the WEBfactory 2010 Silverlight SDK
For this part of the tutorial, we will create a Silverlight application using Microsoft Visual Studio that will write values to the signal's array of strings. WEBfactory 2010Test Center is necessary for testing the results.
The same procedure and code is available for Expression Blend too.
In the new Silverlight application project, add as reference the WFCore.dll from the WEBfactory 2010 installation folder > Silverlight > Standard.
Make sure that the project has the following usings:
using System.Windows;
using System.Windows.Controls;
using WFSilverlight.Core;
Create an instance of WFConnector:
private WFConnector wfConnector = new WFConnector(false);
Now create a button in xaml...:
<Button x:Name="writeArray" Content="Write array" Click="writeArray_Click" Width="300"/>
...and an event handler for the click action of that button:
private void writeArray_Click(object sender, RoutedEventArgs e)
        {
            wfConnector.WriteSignal(
                string.Empty,
                ".TestArrays",
               BuildUnidimensionalArrayValue());
        }
Notice that inside the event handler we have the method WriteSignal that actually writes the values defined by BuildUnidimensionalArrayValue().
We now need to define the values:
private object BuildUnidimensionalArrayValue()
        {
            object[] arrayValue = new object[4];
            arrayValue[0] = 11.0f;
            arrayValue[1] = 22.0f;
            arrayValue[2] = 33.0f;
            arrayValue[3] = 44.0f;
            return arrayValue;
        }
In our example, the array will be populated with floats. To make sure that signal can be written with this values, we have to specify the type of data for each one of the array's items:
11.0f means "the value 11.0 is a float".
NOTE
The values from this example are optional. Depending on the data type set for the signal, the array can be populated with other types of data too.
Run the application. When pressing the button, the specified values will be written to the signal.
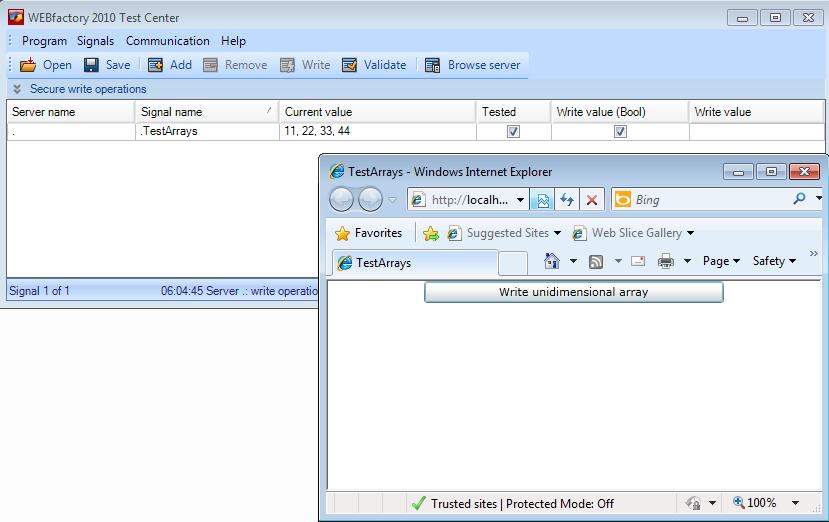
Testing the writing of arrays using the WEBfactory 2010 Silverlight SDK.
Example of using arrays in VChannels
Example usage of arrays in VChannels (Visual Basic):
Sub GetResult()

 'starttime for duration calculation
 starttime = Timer()

 'read Array
  myArray =  ReadSignal("BYTEARRAY")
 'convert Array in long string
  myValue = convert(myArray)

 'take single values
 myString1 = chr( CLng("&H" & mid(myValue,1,2)))
 myString2 = chr( CLng("&H" & mid(myValue,3,2)))
 myString3 = chr( CLng("&H" & mid(myValue,5,2)))
 myString4 = chr( CLng("&H" & mid(myValue,7,2)))

 'write values to single signals
 WriteSignal "BYTE1", myString1, "", ""
 WriteSignal "BYTE2", myString2, "", ""
 WriteSignal "BYTE3", myString3, "", ""
 WriteSignal "BYTE4", myString4, "", ""

 'endtime for duration calculation
 endtime = Timer()

 'calculate the duration of array conversion
 duration = (endtime-starttime)*1000

 Result = now() & " - Duration: " & duration

End Sub

   ConvertByteArrayToHex = ""
   For Each ByteValue in Value
     HexByte = Right("00" &  Hex(ByteValue), 2)
     ConvertByteArrayToHex = ConvertByteArrayToHex & HexByte
   Next
The above script reads a byte array. converts it to string and write single values of the array to WEBfactory 2010 signals.