i4messenger Tutorials
Are you about to get started with the i4messenger application? Check out these easy tutorials guiding you through the most common use cases.
Defining Email Notification Profiles using the Scriban syntax
Open this article and learn how to define your Notification Profiles using the Scriban syntax in a few easy steps.
Please check the steps described below in order to define a new Email Notification Profile, using the Scriban syntax:
Note
For this tutorial, please make sure that your user has the Manage notification profiles permission enabled.
Access the Notification Profile List panel by clicking the Notification Profiles tile.
Click the Add toolbar button of the Notification Profile List panel.
In the Add notification profile panel organize the following mandatory settings:
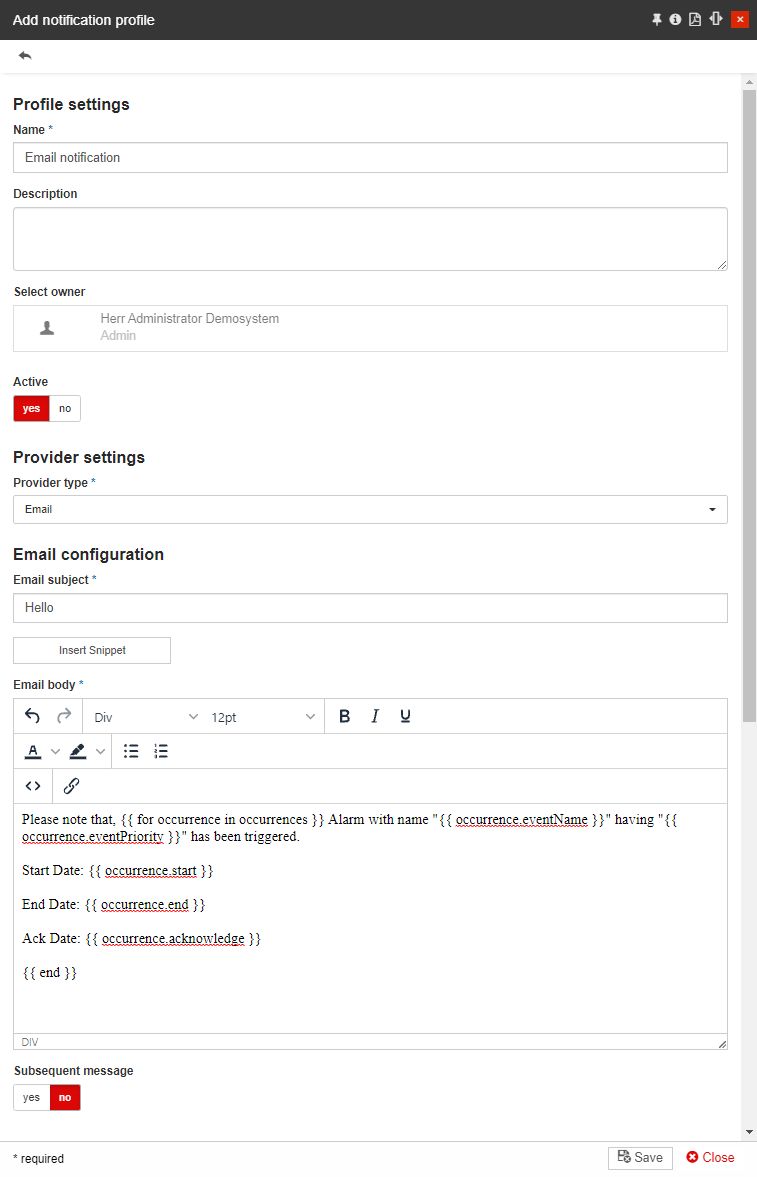
Type in the Name of the new Notification Profile.
Make sure that the Notification Profile is set to Active.
Set the Provider type by choosing the Email option.
Type in an Email subject.
Fill in the Notification Profile body field the below syntax:
Please note that, {{ for occurrence in occurrences }} Alarm with name "{{ occurrence.eventName }}" having "{{ occurrence.eventPriority }}" has been triggered.
Start Date: {{ occurrence.start }}
End Date: {{ occurrence.end }}
Ack Date: {{ occurrence.acknowledge }}
{{ end }}
Click the bottom Save button to preserve your changes.
Tip
Before saving the new Email notification profile you can proceed with further optional settings, such as usage of subsequent messages, introduction of the last message before initiating the escalation procedure, priority filtering, various states notifications, and notification throttling mechanism settings. For more details, please visit the dedicated article, here.
Defining SMS Notification Profiles using the Scriban syntax
Open this article and learn how to define your SMS Notification Profiles using the Scriban syntax in a few easy steps.
Please follow the steps listed below for more details about the usage of the Scriban syntax while creating an SMS Notification Profile:
Note
For this tutorial, please make sure that your user has the Manage notification profiles permission enabled.
Open the Notification Profile List panel by clicking the Notification Profiles tile.
Click the Add toolbar button of the Notification Profile List panel.
In the Add notification profile panel organize the following mandatory settings:
Type in the Name of the new Notification Profile.
Make sure that the Notification Profile is set to Active.
Set the Provider type to SMS.
Fill in the SMS body field the below syntax:
 {{ for occurrence in occurrences }}
A new alarm has been triggered.
With {{ occurrence.priority }} and {{ occurrence.eventName }}
Start: {{ occurrence.start }}
End: {{ occurrence.end }}
{{general.closeAllLink}}
 {{ end }}
Warning
You can not have more than 400 characters in the SMS body field.
Click the bottom Save button to preserver your changes.
Tip
Before saving the new SMS notification profile you can proceed with further optional settings, such as usage of subsequent messages, introduction of the last message before initiating the escalation procedure, priority filtering, various states notifications, and notification throttling mechanism settings. For more details, please visit the dedicated article, here.
Defining Telegram Notification Profiles using the Scriban syntax
Check out this article and learn how to configure a new Telegram Notification Profile using the Scriban syntax to introduce various placeholder properties.
Check the below-listed steps to create a new Telegram Notification Profile using the Scriban syntax:
Note
For this tutorial, please make sure that your user has the Manage notification profiles permission enabled.
Open the Notification Profile List panel by clicking the Notification Profiles tile.
Click the Add toolbar button of the Notification Profile List panel.
In the Add notification profile panel organize the following mandatory settings:
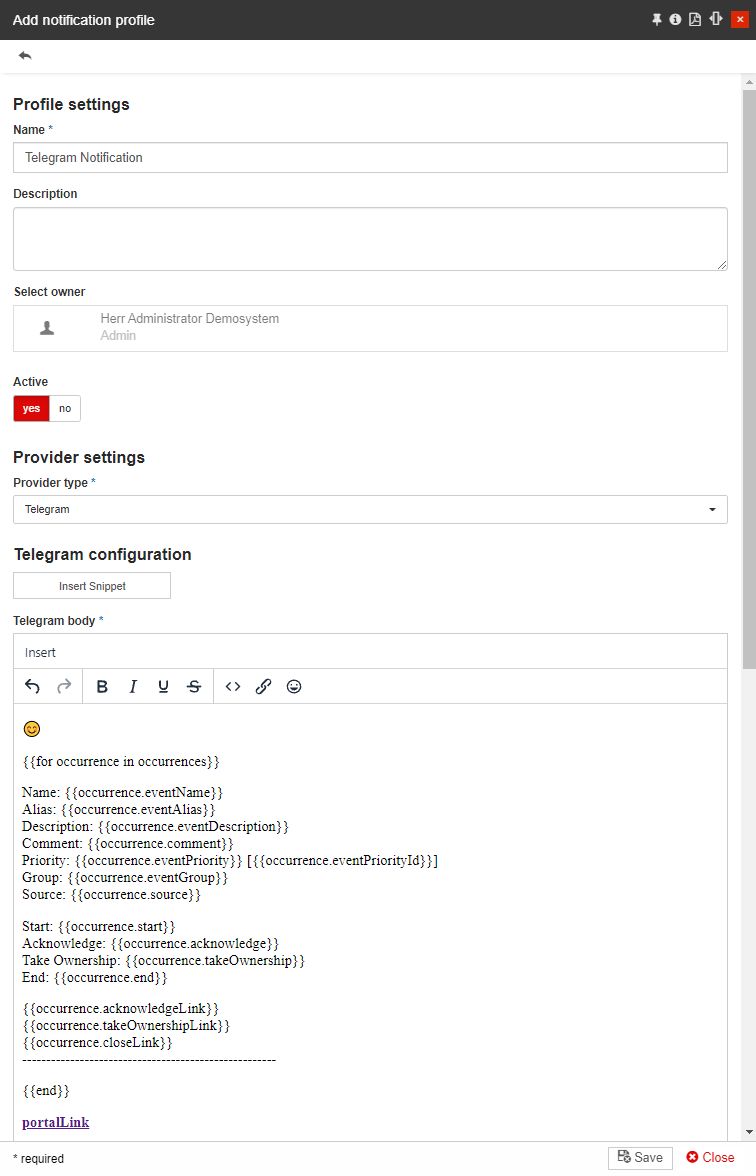
Type in the Name of the new Notification Profile.
Make sure that the Notification Profile is set to Active.
Set the Provider type to Telegram.
Fill in the Telegram body field the below syntax:
 ?
{{for occurrence in occurrences}}
Name: {{occurrence.eventName}}Alias: {{occurrence.eventAlias}}Description: {{occurrence.eventDescription}}Comment: {{occurrence.comment}}Priority: {{occurrence.eventPriority}} [{{occurrence.eventPriorityId}}]Group: {{occurrence.eventGroup}}Source: {{occurrence.source}}
Start: {{occurrence.start}}Acknowledge: {{occurrence.acknowledge}}Take Ownership: {{occurrence.takeOwnership}}End: {{occurrence.end}}
{{occurrence.acknowledgeLink}}{{occurrence.takeOwnershipLink}}{{occurrence.closeLink}}-----------------------------------------------------
{{end}}
portalLink{{ for occurrence in occurrences }}
A new alarm has been triggered.
With {{ occurrence.priority }} and {{ occurrence.eventName }}
Start: {{ occurrence.start }}
End: {{ occurrence.end }}
{{general.closeAllLink}}
 {{ end }}
Note
The Telegram application also allows the usage of emojis.
Click the bottom Save button to preserver your changes.
Tip
Before saving the new Telegram notification profile you can proceed with further optional settings, such as usage of subsequent messages, introduction of the last message before initiating the escalation procedure, priority filtering, various states notifications, and notification throttling mechanism settings. For more details, please visit the dedicated article, here.
Configuring the Email notification mechanism
Follow these steps and start configuring the Email notification mechanism. This tutorial is complimented with a bunch of screenshots and tips!
Given the multitude of options provided by the i4connected component, the system administrator user can customize the notification mechanism in various ways. The scope of this tutorial is to guide you through the steps required to configure a common scenario, involving Event Service Level Agreements, Escalation, and Email throttling.
In order to configure the i4messenger Email notification mechanism for i4connected Events the system administrator is required to perform the following steps:
As a first step in the Email notification mechanism configuration guide, please open the Edit settings panel and fill in or check the current settings.
Note
The Edit settings panel is guarded by the Manage configurations permission.
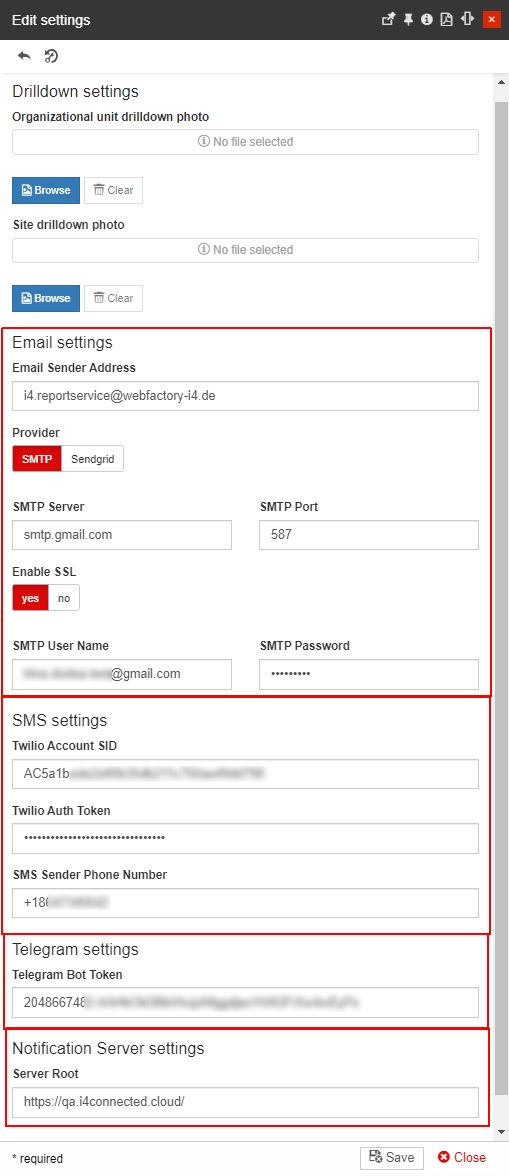
In this view, you are provided with various settings, allowing you to define the Email settings, SMS settings, Telegram settings, and the Notification Server settings.
Tip
For more details about the i4messenger notification settings, please visit the dedicated article, here.
Next, open the Response Team panel and click on the Add toolbar button.
Note
Management of Response Teams can be done by all users having at least the Manage Response Teams permission.
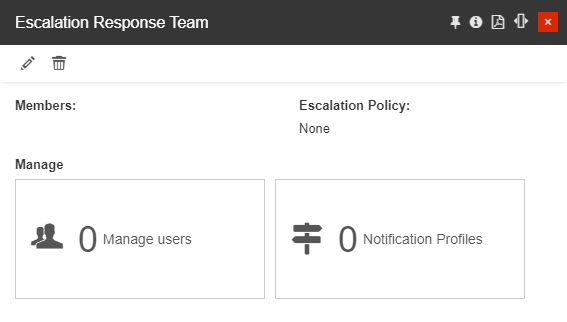
In the Add Response Team panel, we shall first add an Escalation Response Team. Proceed by filling in the following settings:
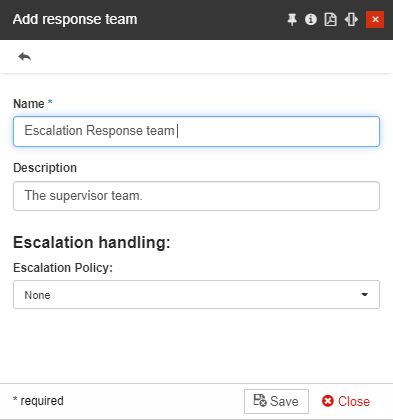
Type in the name of the new Response team.
Provide an optional description.
Leave the Escalation Policy to None.
Click the bottom Save button, in order to preserve your changes.
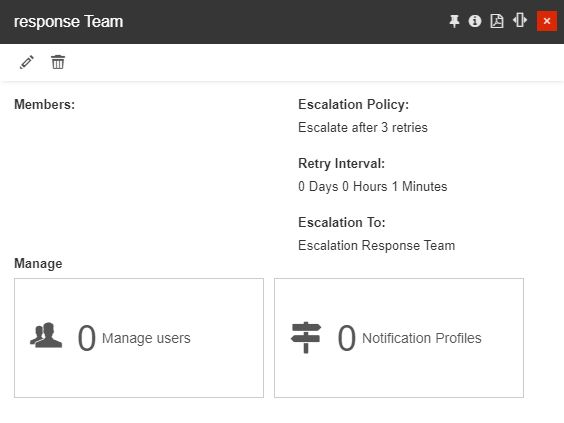
In the Response Team panel, click again on the Add toolbar button, in order to create a new Response Team, as follows:
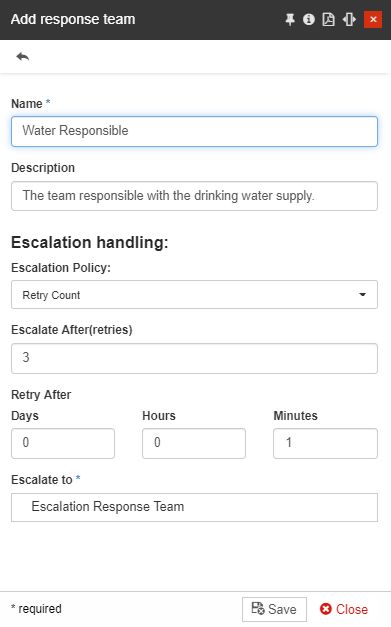
Type in the name of the new Response Team.
Note
The Response Team names should be unique.
Provide an optional description.
Enable the Escalation Policy and select the option Retry Count.
In the Escalate After (retries) field, set the amount of desired retries, before escalation occurs.
Tip
In this field, at least 3 retries should be defined, for the messaging system to be able to deliver the Subsequent and Last notification.
Define the amount of Days / Hours and Minutes, before a retry occurs.
Next, click on the Escalate to selector and choose the previously created Escalation Response Team.
Click on the Notification Profile List tile.
Proceed by clicking the Add toolbar button.
Note
Management of Notification Profiles is guarded by the Manage notification profiles permission.
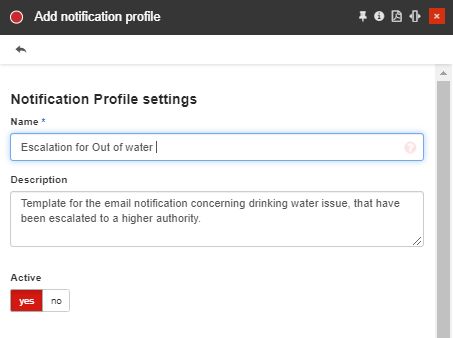
In the Add notification profile panel fill in in the following settings:
Fill in the Notification Profile settings
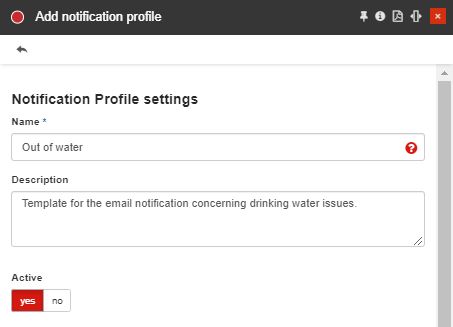
Type in the name of the new Notification Profile.
Add an optional description of the new Notification Profile.
Make sure the Active toggle button is enabled.
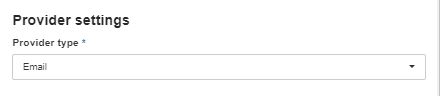
Select the Provider settings, by setting the desired Provider type. For this tutorial we shall define an Email Notification Profile, but you can choose the SMS or Telegram type, as well.
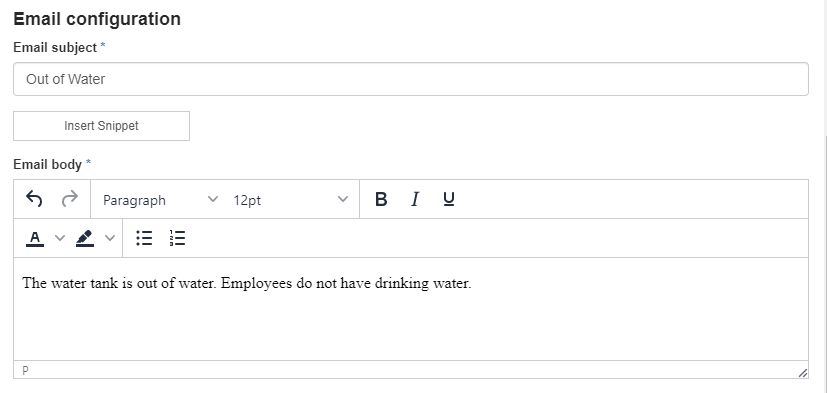
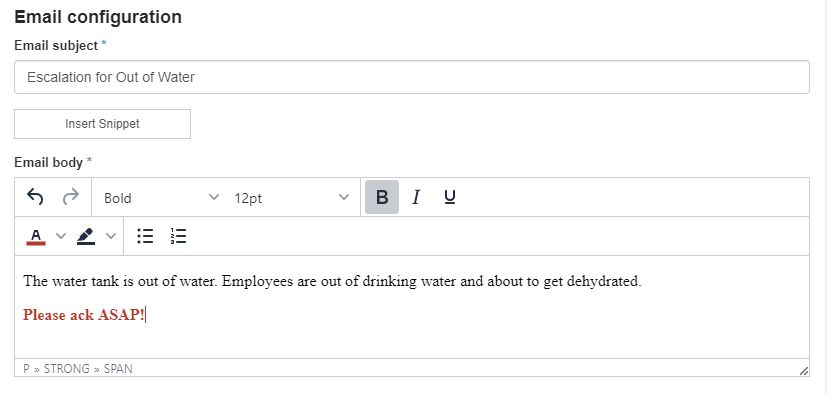
Define the Email configuration settings, by filling in an email subject and body.
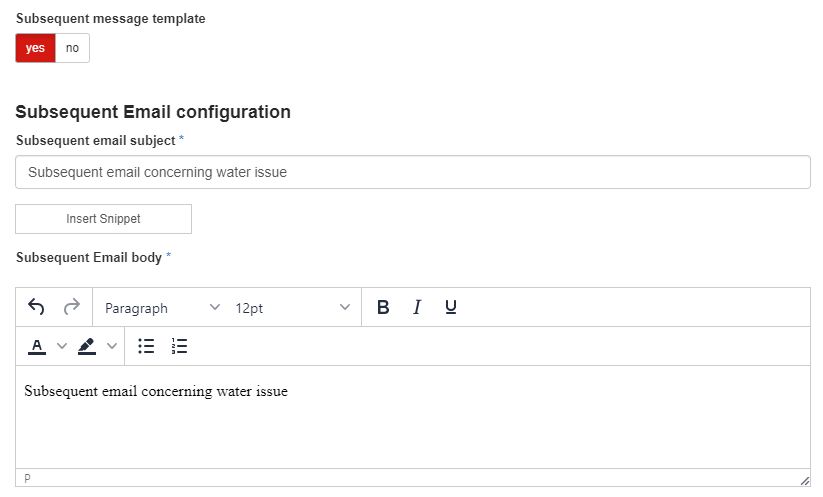
Enable the Subsequent message template toggle button and fill in the email subject and body.
Tip
The Subsequent message is the message delivered after the initial notification is sent if the ongoing alarm has not yet been processed.
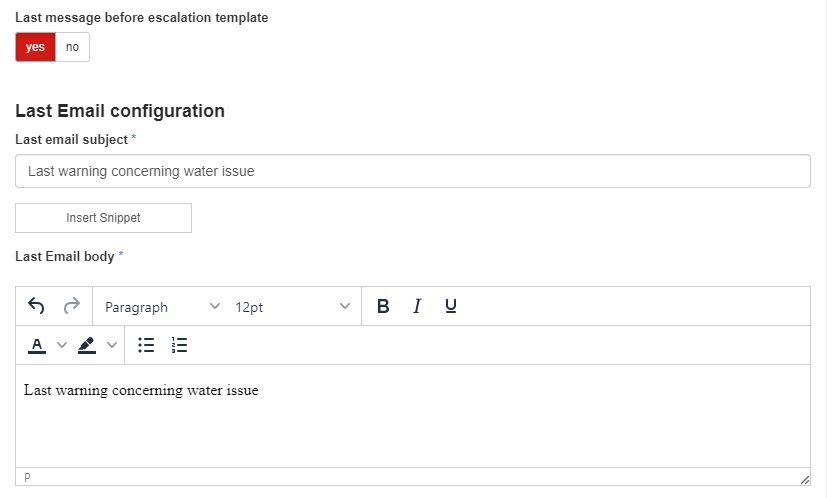
Enable the Last message before the escalation template toggle button and fill in the email subject and body.
Tip
The Last message before escalation is the message delivered before the escalation process starts if the ongoing alarm has not yet been processed.
Configure the states in the Enable notification for states area, as follows:
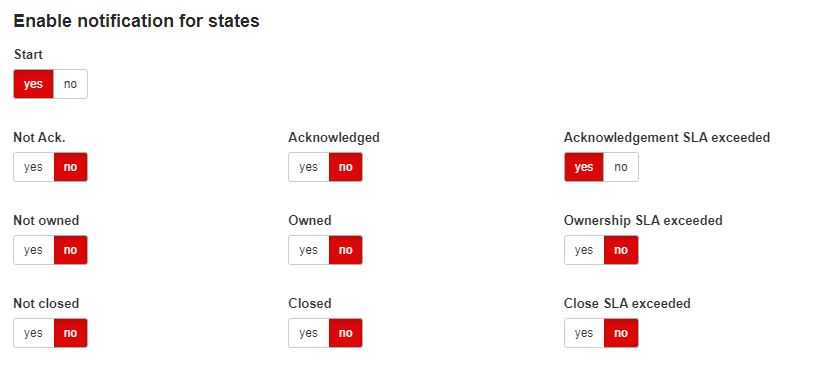
The Start state is by default enabled. Leave the toggle button set to Yes.
Enable the Acknowledgment SLA exceeded state, as well.
Tip
For more details concerning Notification states and their behavior, please visit the article describing them, here.
Select the desired Notification throttling mode.
Tip
For more details concerning Notification throttling modes and their behavior, please visit the article describing them, here.
Click the bottom Save button in order to preserve the changes made.
Back in the Notification Profile List, click on the Add toolbar button, to add the template for notifying your Escalation Team.
In the Add notification profile panel fill in in the following settings:
Fill in the Notification Profile settings.
Type in the name of the new Notification profile.
Note
The name of the Notification Profiles should be unique.
Optionally add a description for the new Notification profile.
Set the Active toggle button to value Yes.
Organize the Provider settings and select the Email provider type.

Select the Email configuration settings and fill in the Email subject and body.
Configure the states in the Enable notification for states area, as follows:
The Start state is by default enabled. Leave the toggle button set to Yes.
Enable the Acknowledgment SLA exceeded state.
Tip
For more details concerning Notification states and their behavior, please visit the article describing them, here.
Select the desired Notification throttling mode.
Tip
For more details concerning Notification throttling modes and their behavior, please visit the article describing them, here.
Click the bottom Save button in order to preserve the changes made.
Further on, return to the Response Teams panel. The list of all the Response Teams is displayed.
Select the Escalation Response Team in detailed view mode.
Click on the Users tile and assign the escalation users.
Next, click on the Notification Profiles tile and assign the Escalation Notification Profile.
Return to the Response Teams panel and select the Response Team in detailed view mode, as well.
Click on the User tile of the Response Team and assign the response users.
Click on the Notification Profiles tile and assign the Response Notification Profile.
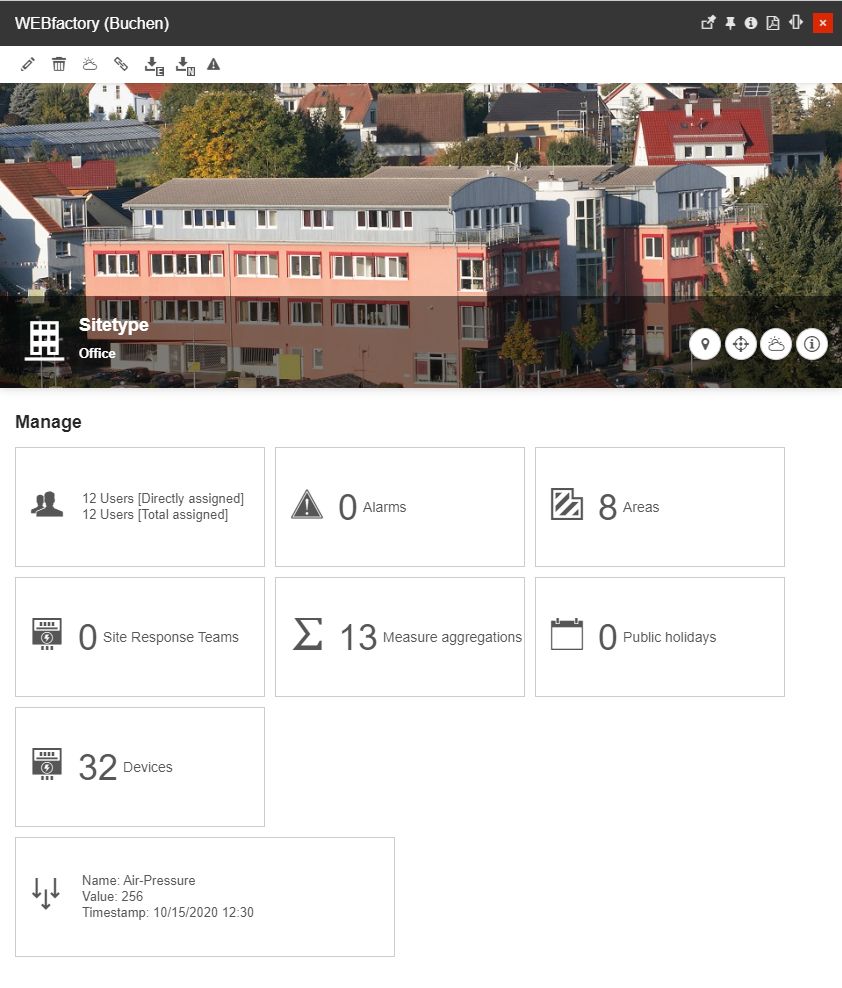
Next, go to your Site and open it in detailed view mode.
Click on the Site Response Teams tile.
Note
Visibility of the Site Response Team tile is guarded by the Manage site response teams permission.
In the Site Response Teams List click the Add toolbar button.
In the Add Entity Response Team panel fill in the following settings:
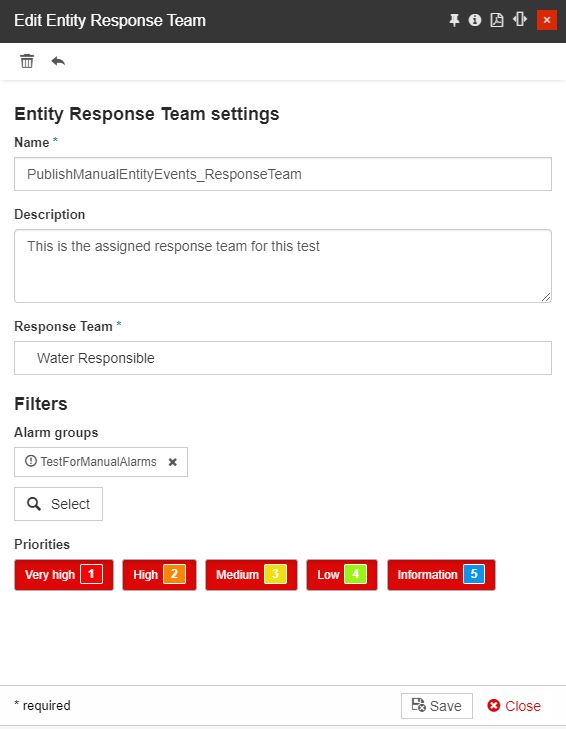
Type in the Name of the new Site Response Team Mapping.
Note
The name should be unique.
Optionally, add a Description of the new Site Response Team Mapping.
Click on the Response Team field and select the Response Team created at step 4.
In the Filters area, select the Event groups filters option and apply your Event (for this tutorial we have selected a Manual event).
Tip
By setting an Event group filter, ensures that the notification mechanism is only processed for the selected Events / Event types / Event groups.
Go to the Priorities labels and select the desired priorities.
Tip
By setting a Priority filter, ensures that the notification mechanism is only processed for the selected Priorities.
Click on the bottom Save button in order to preserve the changes made.
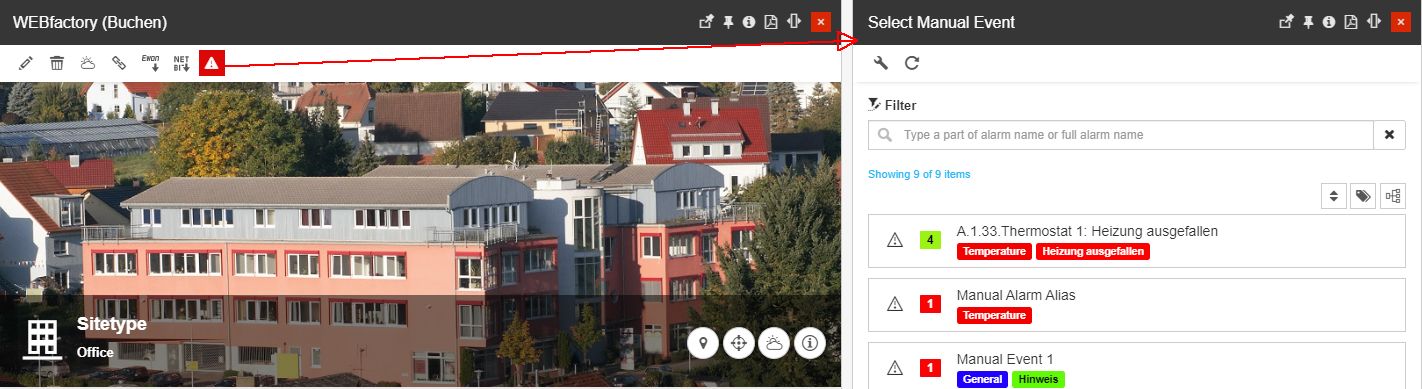
Next, return to the Site detailed view mode and click on the Publish Manual Event toolbar button, to open the list of manual events.
Note
The Publish Manual Event button is guarded by the Publish manual events for sites permission.
Find your event in the list and click on it.
The Publish Manual Event panel is opened allowing you to trigger the alarm with a chosen comment and priority.
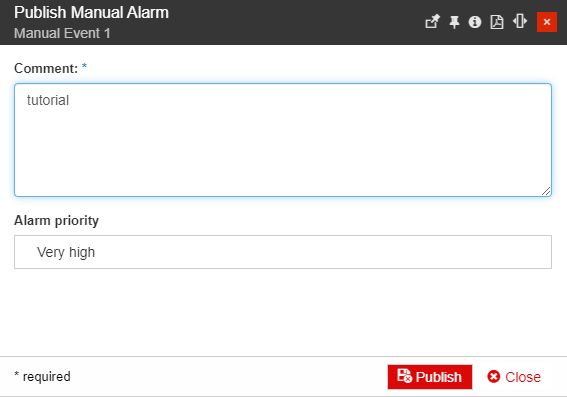
Click the Publish button to proceed.
An Event occurrence will be triggered.
Tip
For more details concerning Event occurrences, please also check the articles described in the Events Management section.
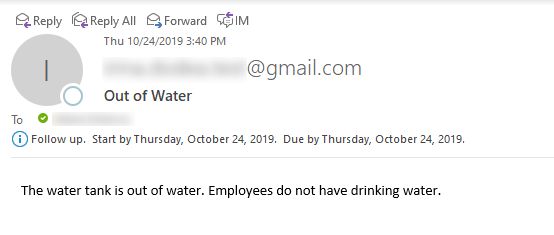
As soon as the Event occurrence was triggered, the Active Alarms panel is updated. The new alarm is visible there.
Consequently, the Response Team is notified via Email.
Note
The notifications delivery is guarded by the View events occurrences permission.
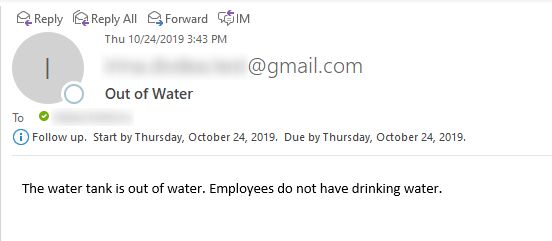
As soon as the Event Acknowledgement interval has been exceeded, based on the Event established Service Level Agreement, another email notification is delivered to the Response Team.
Note
The notifications delivery is guarded by the View events occurrences permission.
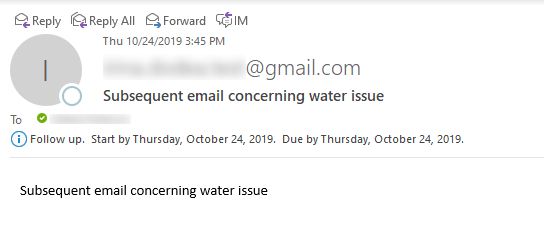
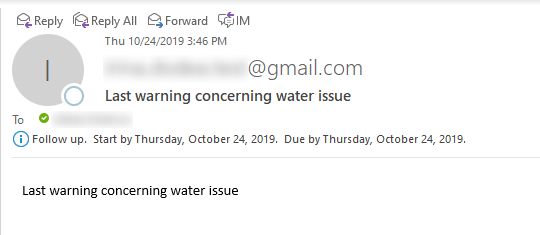
As the Notification profile created for the Response Team contains a "Subsequent email" and a "Last email before escalation" definition, the Response Team will receive two more emails, each one after another considering the applied time interval:
Note
The notifications delivery is guarded by the View events occurrences permission.
the Subsequent email
the Last notification before escalation
Considering that no actions have been taken for the active Alarm, the escalation process will be started after the interval has passed.
Consequently, the Escalation Team members will receive an email notification.
Note
The notifications delivery is guarded by the View events occurrences permission.
Managing Alarms in i4messenger MobileApp
By following the below-described steps, you will be able to own, acknowledge and close Alarms, using the i4messenger MobileApp.
Accessing Alarms from an Email notification
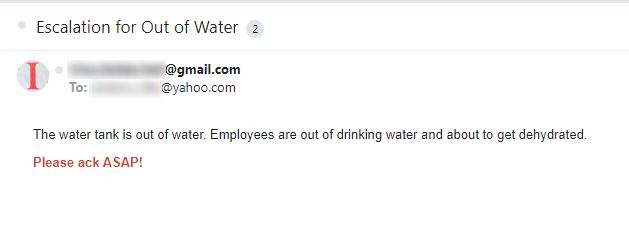
Based on the i4messenger Notification Profile settings, occurring Alarms can trigger an Email or SMS notification. This tutorial guides you on how to access an Alarm on your portable device, from an Email notification:
Open your Email application on your device and check the Inbox folder.
An Email notification concerning the new i4connected Alarm should be available.
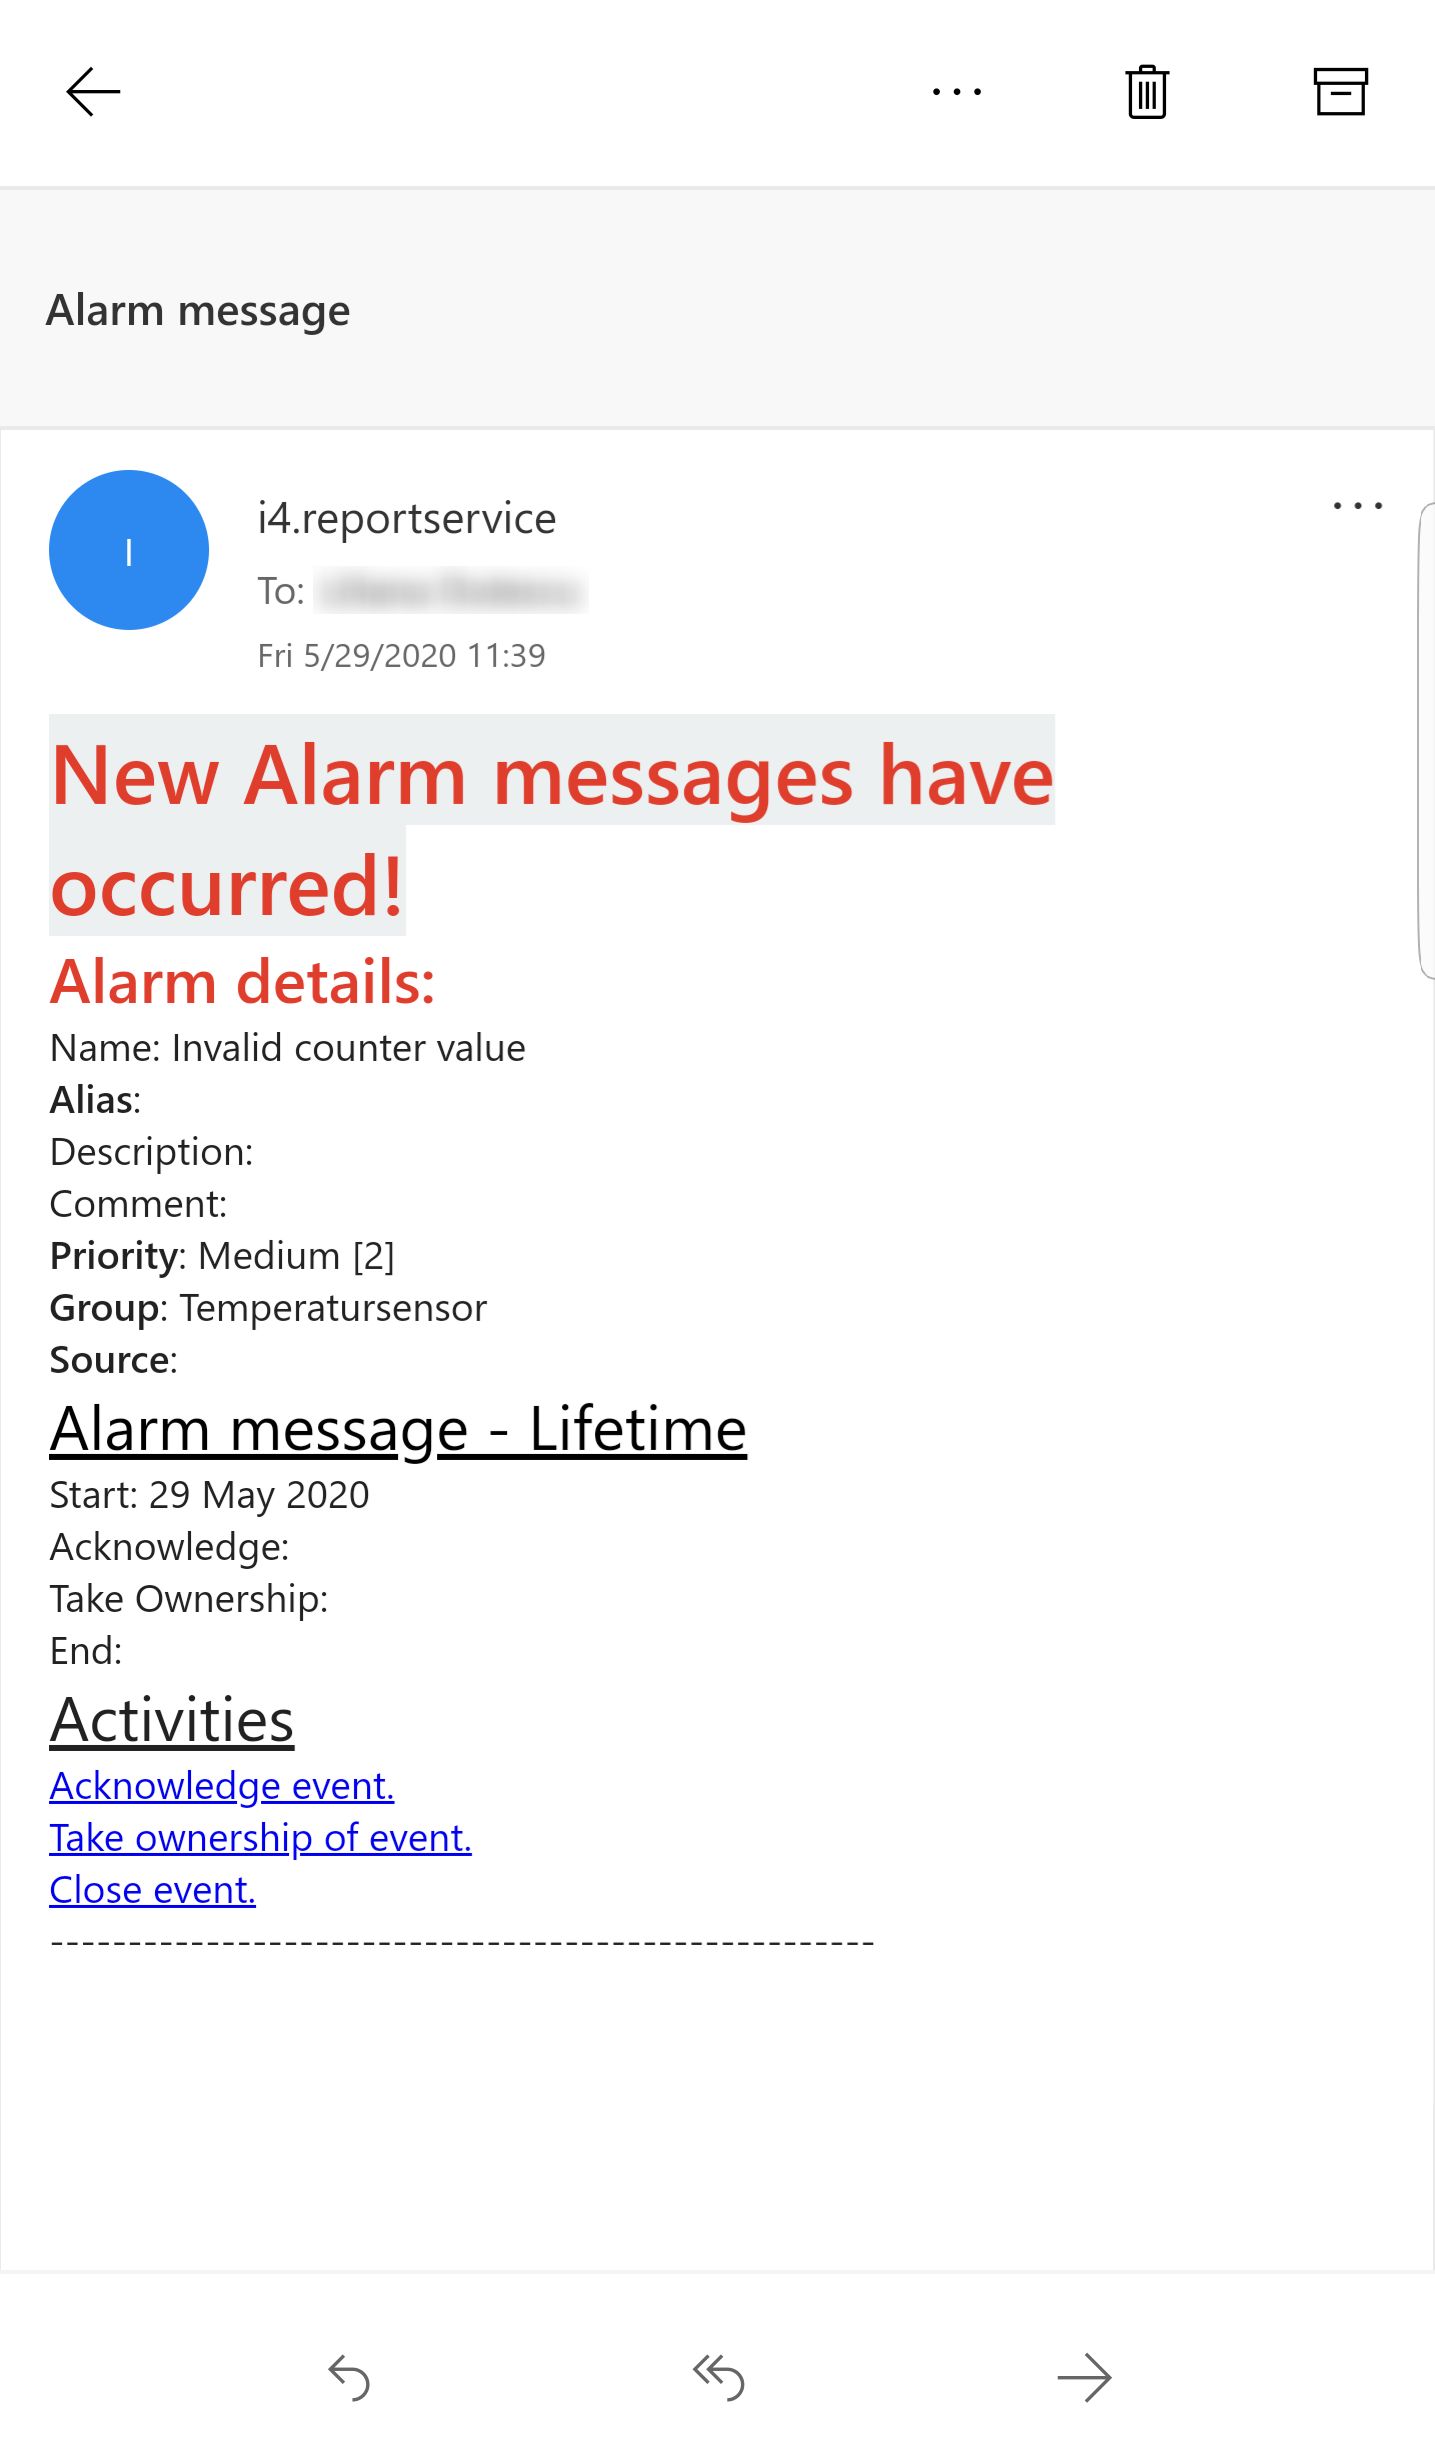
Note
The Email title and text are also configured in the context of i4connected Notification Profiles, as described in the Defining Email Notification Profiles using the Scriban syntax tutorial.
Tap on one of the URLs describing an Alarm management activity. For this example, we shall open the "Take ownership of event" option.
The i4messenger web application is opened, allowing you to either proceed with managing the Alarm (in our case "Own" Alarm) or to open the MobileApp.
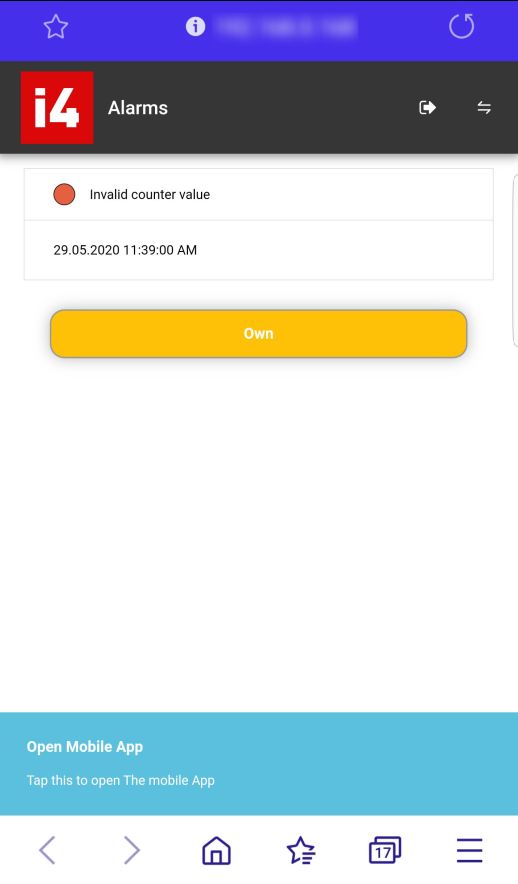
Important
When opening an Alarm from an Email notification, for the first time on your device, the Web Application might ask you to introduce the i4connected Endpoint.
It is also important to know that the i4connected environment should be publicly available over the internet or on the same network as you are. Otherwise, a firewall program should be installed on your device, in order to be able to establish the connection between your network and the i4connected environment.
Managing Alarms on a portable device
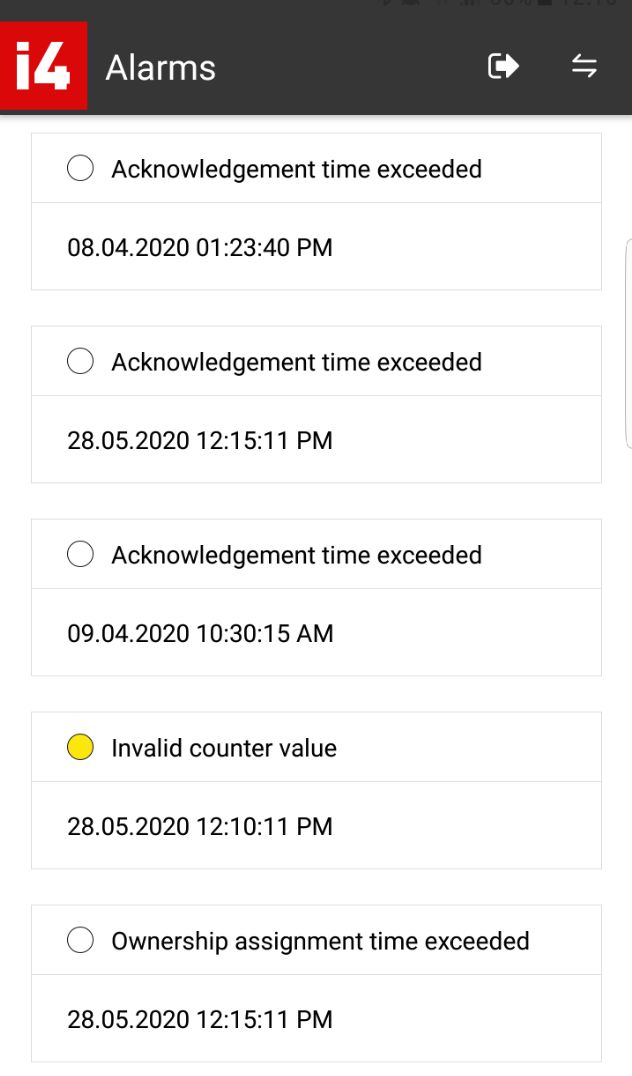
The i4messenger MobileApp lists all the Alarms available for your i4connected user, in a clean view. To manage one of the listed Alarms, please follow the steps described below:
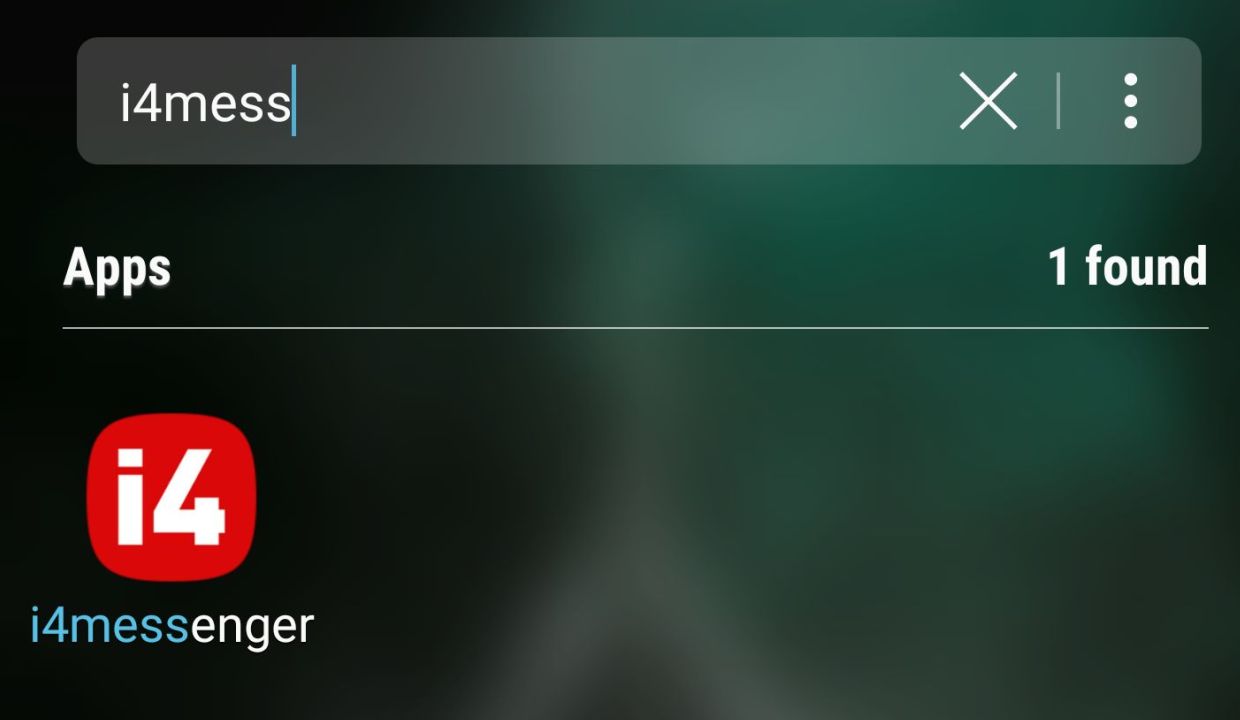
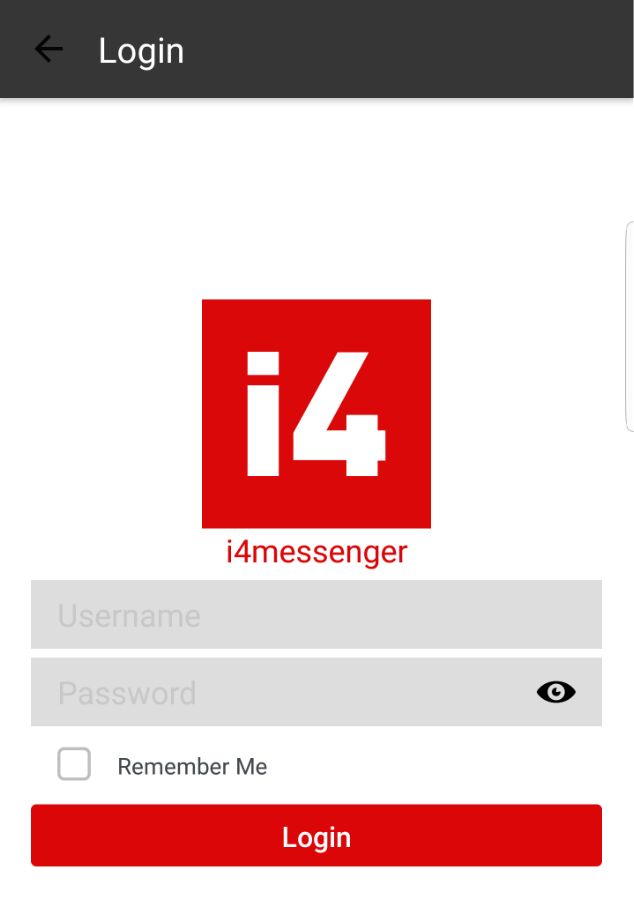
Open the i4messenger MobileApp on your device.
Fill in your credentials, in order to login, if you haven't done this step already.
Tap on the desired Alarm in the list view.
The selected Alarm is opened in detailed view mode, allowing you to either Own, Acknowledge, or Close.
Tap on one of these management actions.
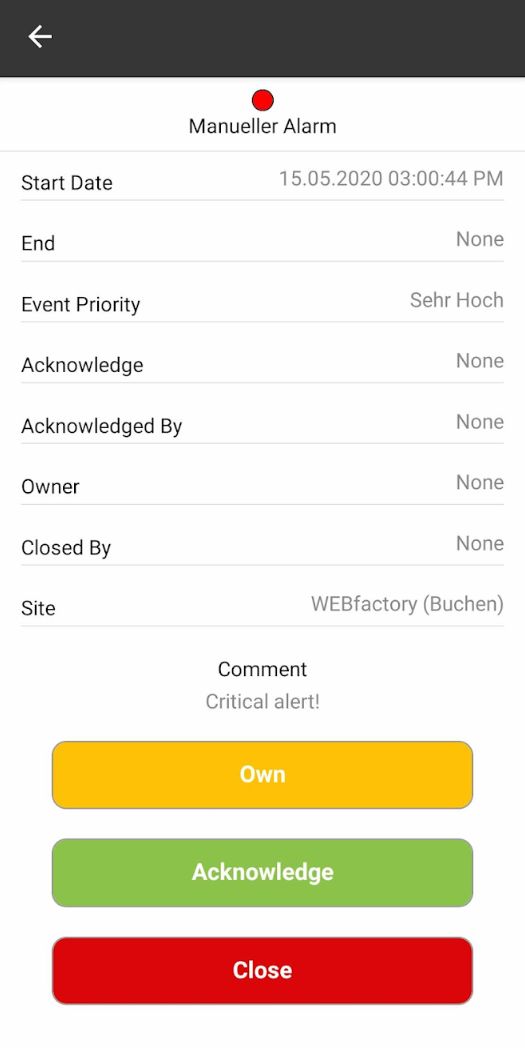
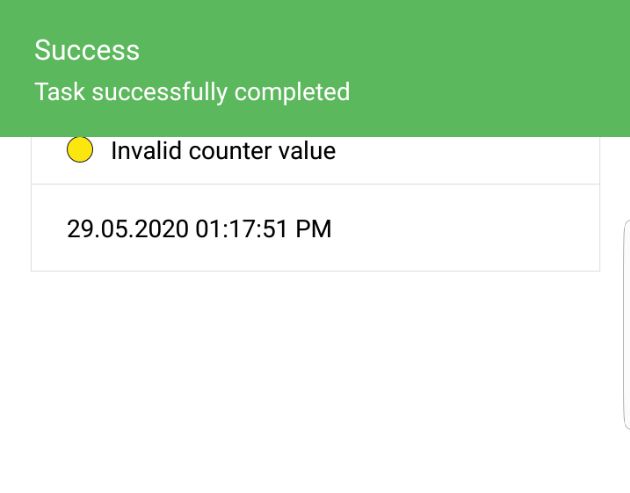
A toast message pops up at the top of your screen, confirming the successful operation.