Setting up an Ad hoc reporting for Analysis charts
Check out this tutorial and learn to configure Ad hoc reporting for Analysis charts.
Since version 5.6.19 , it is possible to schedule an Ad hoc report for the following charts:
Load Profile chart
Time Delta chart
Object Delta chart
This tutorial describes the needed steps to schedule an Ad hoc report for the Load profile chart, as follows:
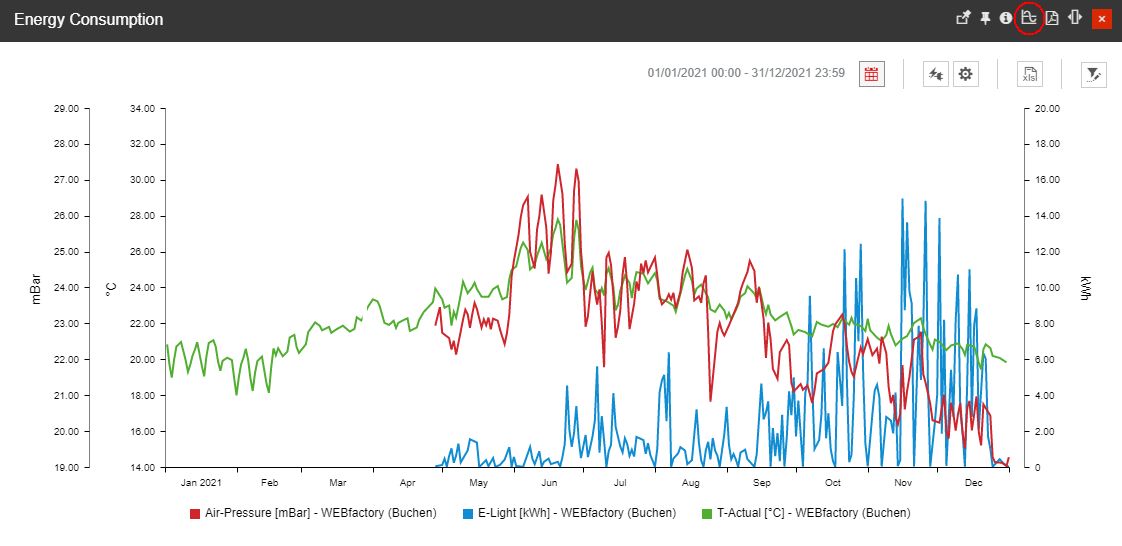
Open a Load Profile chart and click on the Ad hoc reporting button.
Tip
For more details on how to configure a Load Profile panel, please visit the dedicated article, here.
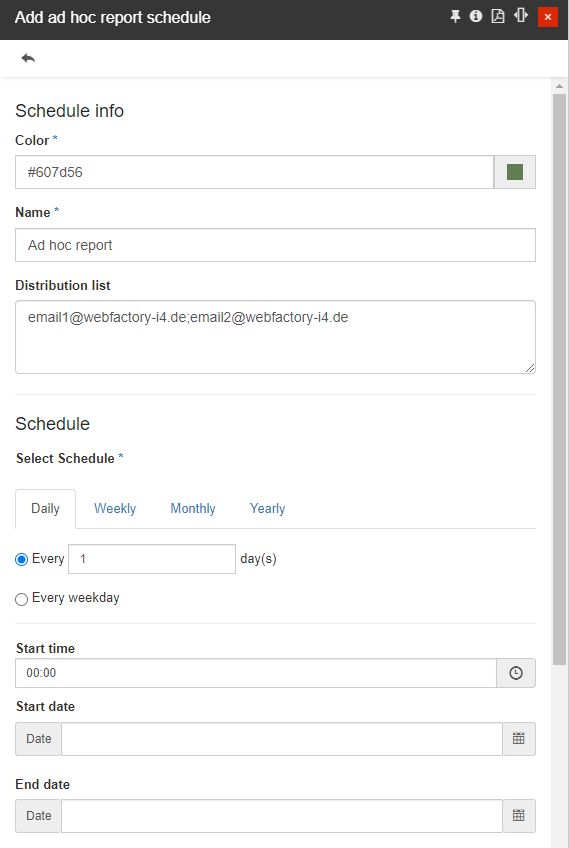
In the Add ad hoc report schedule fill in all mandatory fields such as Color, Name, and the desired Report Schedule. In the Distribution list field, you can type in one or multiple email addresses separated by semicolon.
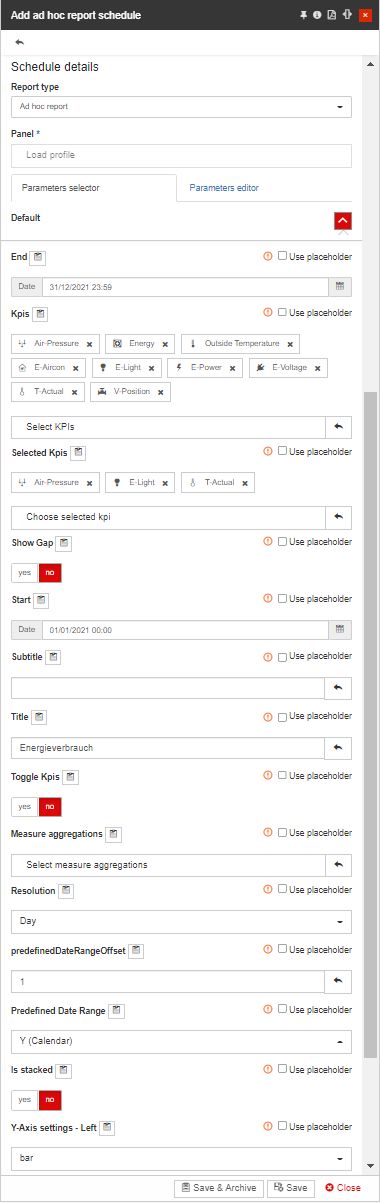
Configure the rest of the configuration parameters.
Next, click on the Save & Archive or the Save button. As soon as the report was saved, it will be displayed in the Report scheduled calendar.
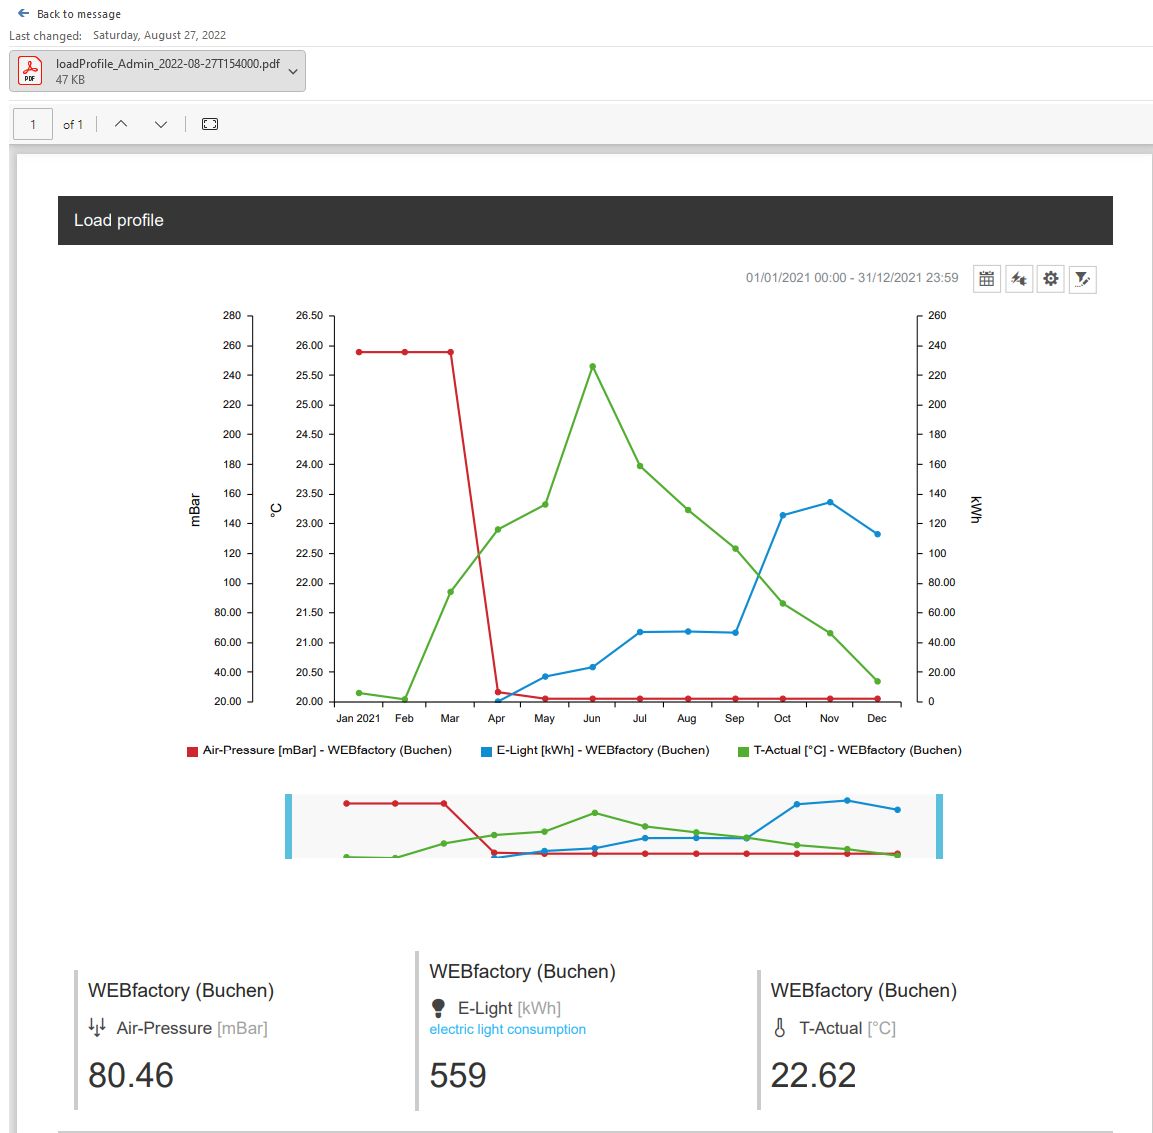
Based on your settings, the Ad hoc report will be delivered via email to all addresses inserted in the Distribution list. In our case, the "Ad hoc report" was delivered according to the schedule.
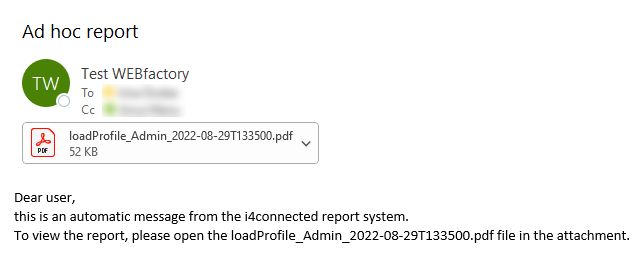
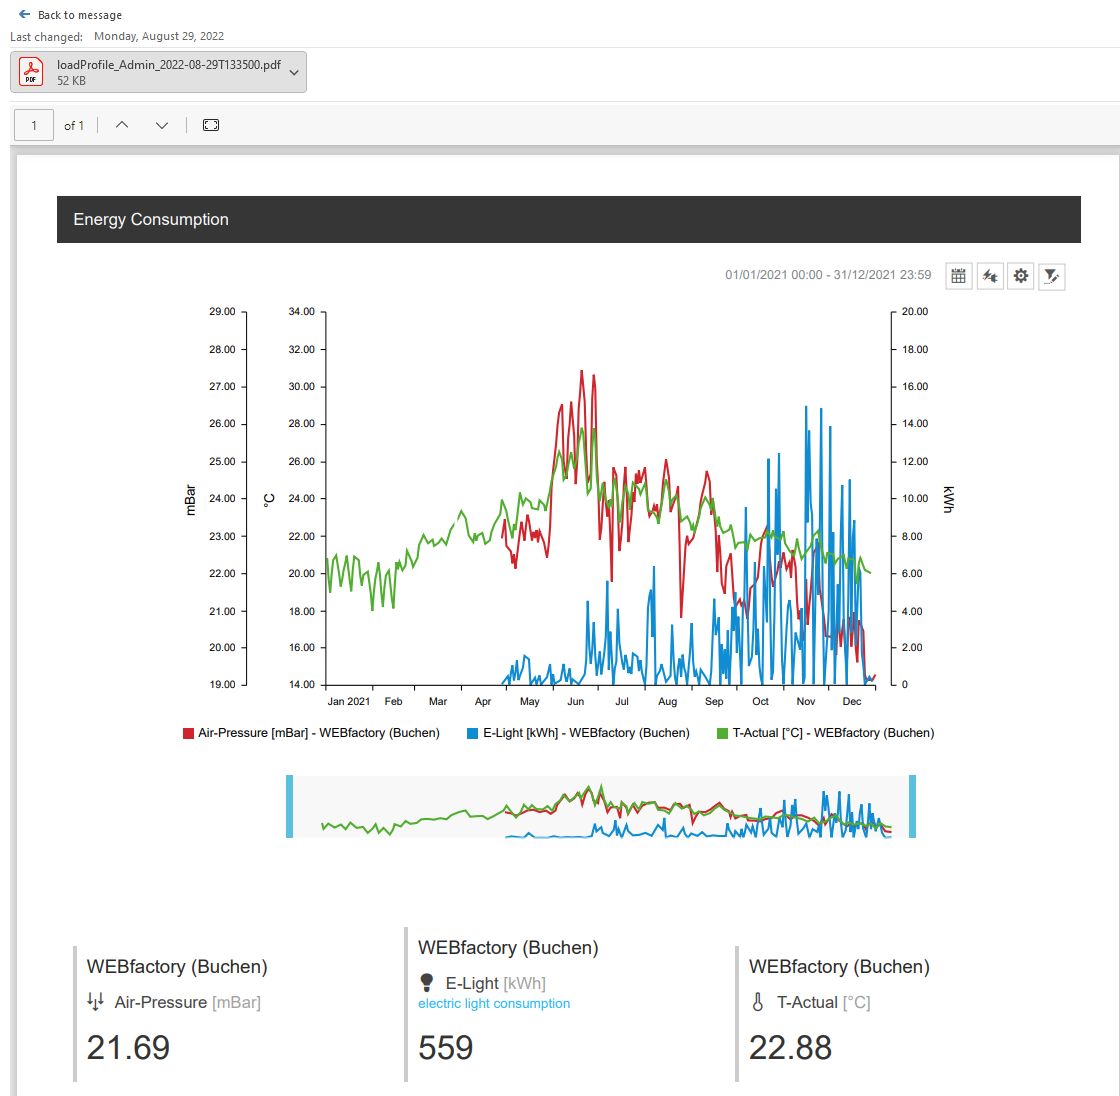
hen opening the email, the Ad hoc report rendering a Load Profile chart is opened displaying your settings.
Another option to schedule an Ad hoc report for an Analysis chart is provided by the steps below:
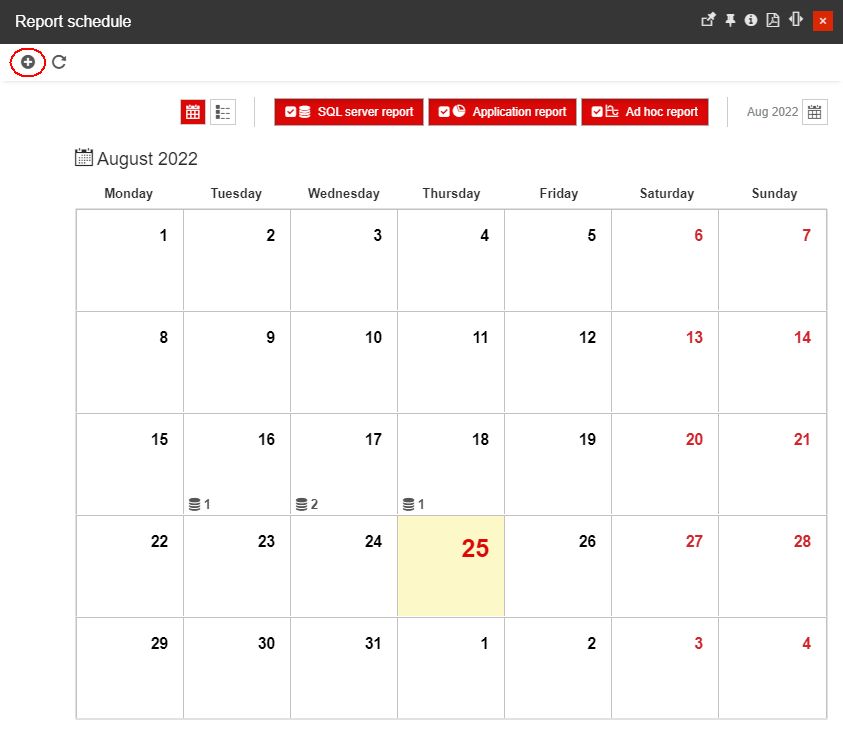
Open the Report schedule panel and click on the Add button.
In the Add report schedule panel fill in all mandatory fields such as Color, Name, and the desired Report Schedule. In the Distribution list field, you can type in one or multiple email addresses separated by semicolon.
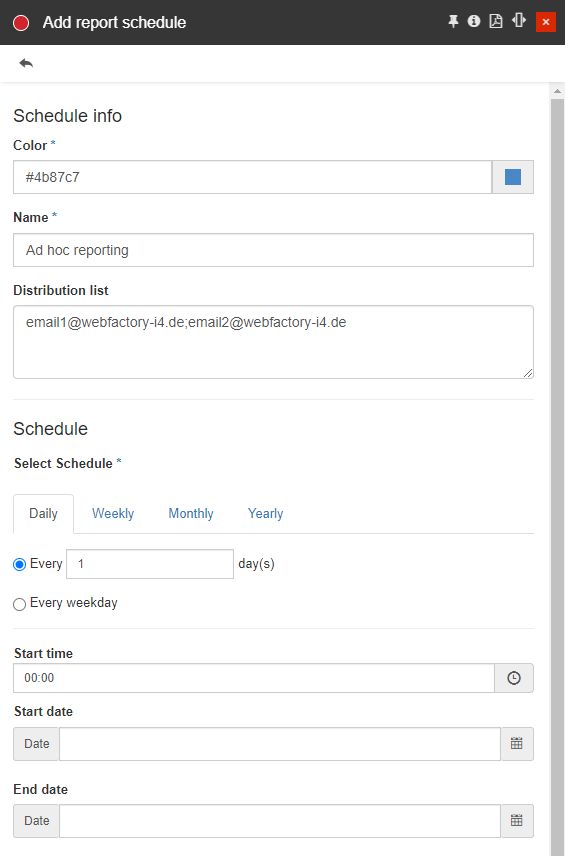
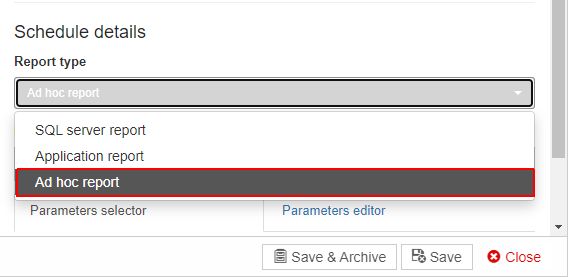
Next, go to the Schedule details and select Ad hoc report.
Tip
For more details on how to schedule reports, please check the dedicated article, here.
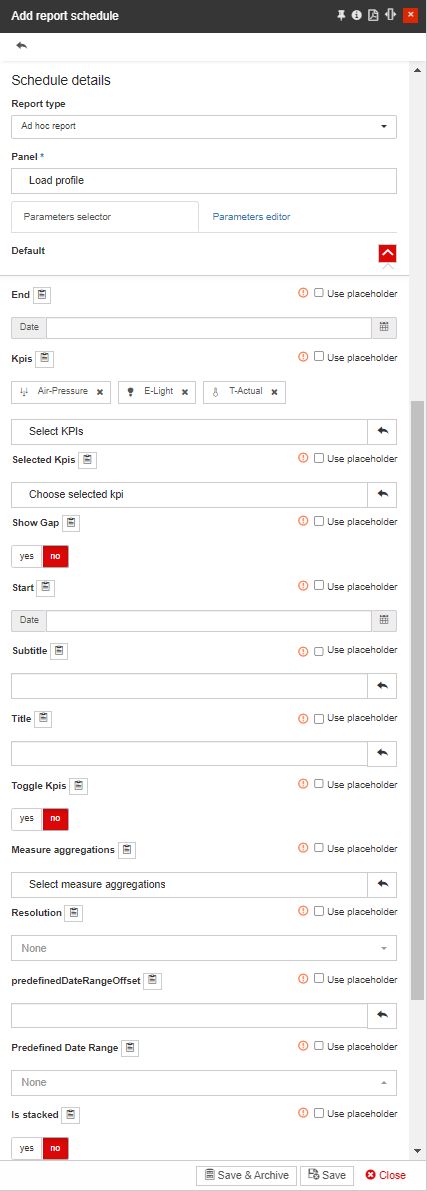
Now, select the desired Panel, for this tutorial we will choose the Load profile panel.

Configure the rest of the reporting parameters.
To proceed, click the Save & Archive or the Save button. As soon as the report was saved, it will be displayed in the Report scheduled calendar.
Based on your settings, the Ad hoc report will be delivered via email to all addresses inserted in the Distribution list. In our case, the "Ad hoc report for Load profile" was delivered according to the schedule.
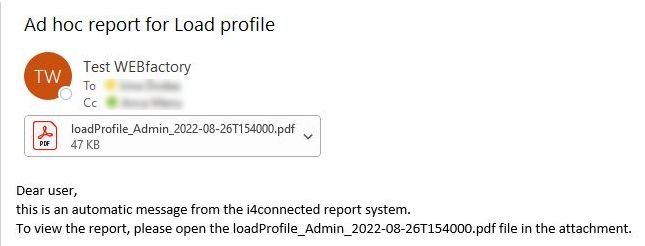
When opening the email, the Ad hoc report rendering a Load Profile chart is opened displaying your settings.